
Right, so after an ignominious start, I figured I could probably do better in future rounds. Couldn't go much worse, right? And now I'd had practice and stuff. On to glory!
Game 2 - Plunder
Tony Lee - The Herd
- Horde of Guardian Brutes with Potion of the Caterpillar
- Horde of Stampede
- Regiment of Centaur Longmanes with Brew of Strength
- Regiment of Centaur Longmanes
- Regiment of Centaur Longmanes
- Regiment of Centaur Bray-Hunters
- Regiment of Centaur Bray-Hunters
- Chimera with wings
- Centaur Chief with Blade of Slashing
- Centaur Chief
- Shaman on a mount
- Beast Pack Troop
- Beast Pack Troop

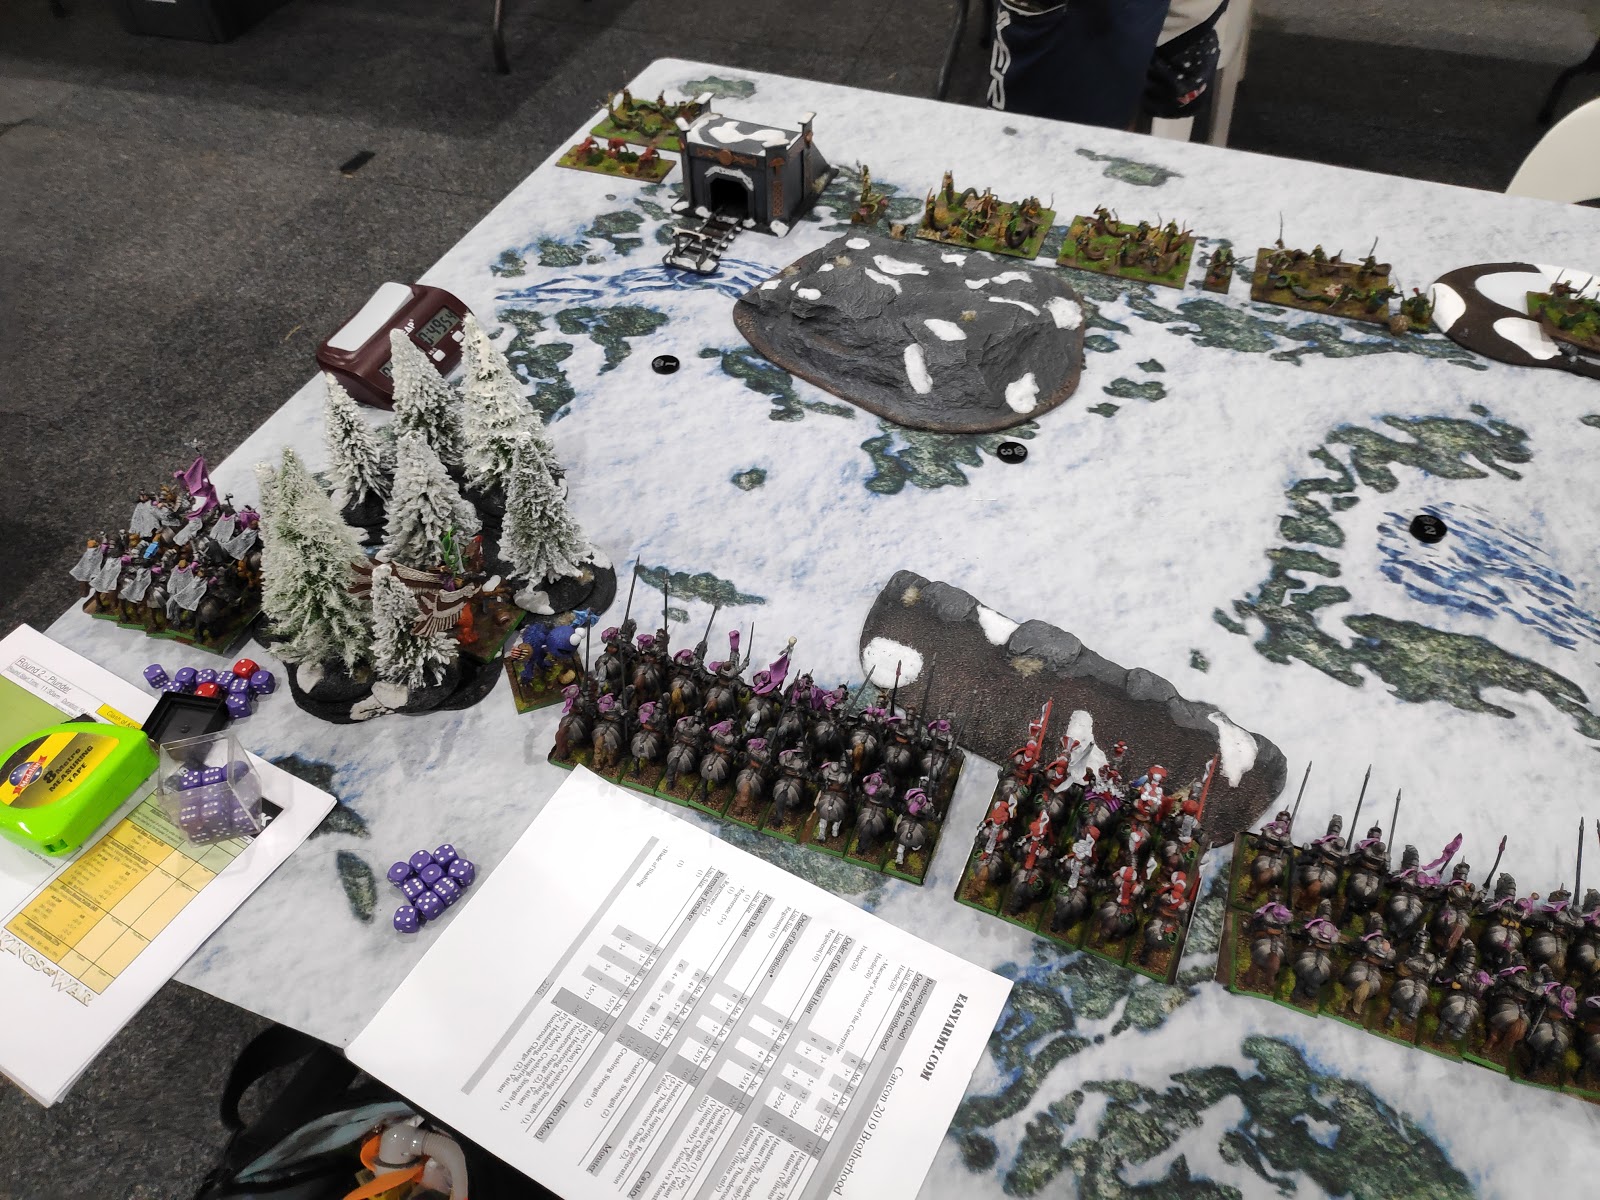
Tony's army consisted almost entirely of Naga models. It might make things a little hard to make sense of in the pics, unfortunately. Hard on the flank there is a Centaur Longmane unit. The character there is the Shaman, whilst the other units are both Bray-Hunters.

Moving along the line we have the 2 Centaur Chiefs with more Longmanes in between them (I think those ones had the Brew of Strength), then some more Longmanes showing off their mad pathfinding skills in a puddle of some sort. The Guardian Bruters are lurking behind a Beast Pack, whilst the flank is held by the Stampede and Chimera. Easy, right? It's easier in person when you can actually see the bows and other weapons...

This field was more open than the previous one, which I figured boded well for me. Of course, Tony's list was again about as quick as mine. At least it had fewer flyers. I put the horde with pathfinder in position to move through the forest, although their enthusiasm to do so might have been affected by what got deployed behind it. To keep them company I had a bit of inspiring in the Exemplar Forsaker and Elmo as a blocker .
The left flank looked less scary. Having another flyer and Cookie Monster over there would hopefully give me enough flexibility to take control.

I took the first turn and moved the knights up into the forest, being careful of enemy charge distances. Elmo took point, using the forest to block most lines of sight.

I was relatively aggressive on the left, effectively trying to bait the Beast Pack out of the way so I could worry about the Longmanes. When you've got no shooting, you're reduced to trying to tempt the screening stuff out of the way. Get it to commit so it can't cause trouble later.

On the right, the Beast Pack did indeed elect to go for the bait and charged Elmo whilst the other elements moved up.

I think the Bray-Hunters are acting as a shield for the Longmanes there in the centre. Absorbing the charge so that their friends could respond.

This was slightly unexpected. The Beast Pack went for the Order of the Abyssal Hunt, whilst the Bray-Hunters charged my Exemplar Forsaker. Given they're not proper combat troops, this seemed like a good result to me.

No, Elmo! What are you doing? Other than demonstrating how badly my lines could be stuffed up by a freak Waver roll...

My birdie took a few wounds, but was OK. My knights somehow took no wounds at all, so would have their Thunderous Charge to properly wallop the Beast Pack...

I had a number of charge options open to me, and this was what I went for. The horde went in to dispose of the Beast Pack, whilst the Order of Redemption charged the Bray-Hunters with the birdie in the flank for support.

Elmo's waver was really problematic for the other knight horde. I couldn't get past, and shuffling sideways would just have gotten them combo-charged. All things considered I eventually decided my best course of action was to back out of the forest to reduce lines of sight.

It was a big turn for charging. The Exemplar Forsaker had little choice but to counter-charge without his flying, but he did not go in alone. The Order of the Abyssal Hunt also counter-charged the Beast Pack.

Probably unsurprisingly, both the Bray-Hunters and Beast Pack collapsed under my charges. Then I had to try to work out what to do about my facings.

On the left my opponents all routed as well. I elected to roll forward with the Order of the Abyssal Hunt, and reformed out of sight of the Centaur Longmanes with the horde. I figured the flank was under control at this point.

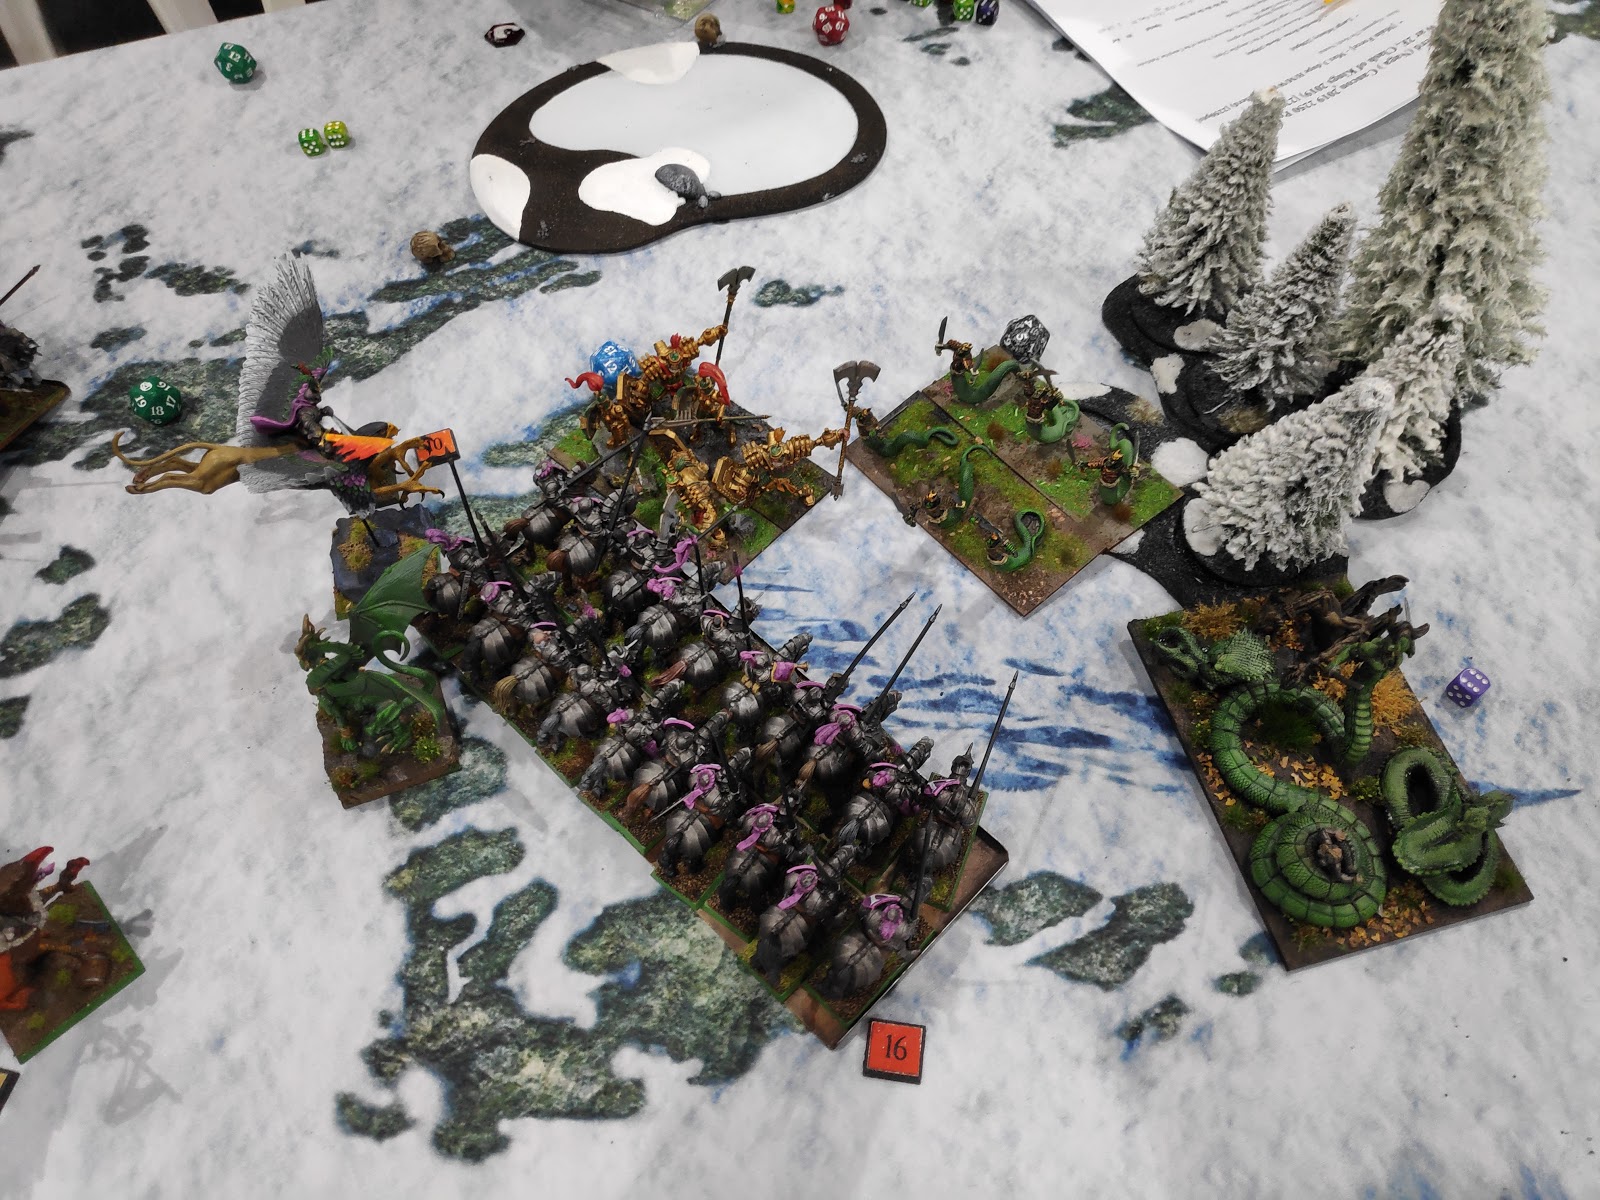
Rather unsurprisingly the Longmanes charged the Abyssal Hunt, whilst the Shaman did her best to make a nuisance of herself to block Cookie Monster.

The central Longmanes went into the Order of Redemption, both Chiefs charged my bird, and the Guardian Brutes found a path through to my Brotherhood horde. That was less than ideal, but kind of unavoidable.

Elmo copped another charge, whilst the Chimera and Stampede went for the other horde.

Well, that could have gone better. I don't like Stampedes - they are scary. Apparently my knights thought so too. 18 wounds and gone. The other horde fared better, taking 10 and holding. Elmo also survived and held is ground better than before.

My other units weathered the storm a little better, although now that I was reduced to counter-charges I wasn't going to sweep through things like I did at the start.

On the left, the Abyssal Hunt took a bit of a beating with 9 wounds, but were never really in danger thanks to Fury.

A bit of a pattern was developing over on the right. Elmo and the knights counter-charged because they had no other real options. Elmo regenerated some of the damage he had taken, which was nice.

I had lost the momentum of my central charges, but the arrival of a horde of knights in the flank is never great for any opponent. That horde was going to be key to help me roll through and regain control of the center-right.

Cookie Monster was content to have a go at the blocking Shaman, but my Exemplar Forsaker preferred to fly over and flank the Centaurs to help my knights.

Elmo did a few wounds, but his was really a holding action. Without their Thunderous Charge, the knight horde was never going to threaten the Guardian Brutes in a single charge. This was exactly the sort of time when Bane Chant might have helped.

My Exemplar Forsaker damaged the Chief he counter-charged, but didn't achieve a lot. And speaking of not achieving a lot, those Centaurs are still there. Despite the 64 attacks coming in from the flank... Yes, I rolled double 1s. Bad timing. I really needed my path cleared.

On the left, the Shaman wavered but the Longmanes routed before the combo charge. So at least stuff was freeing up over there, but it was a long way from the action.

It was sometime around when the Stampede arrived in Elmo's flank that his questionable resistance came to an end.

The Guardian Brutes continued their work on my knights - they were better suited to this to-and-fro than my unit was. Also you will note that my Order of Redemption now had a Chimera in their flank...

Actually, they had a Chimera in the flank and the cheekily not-yet-dead Centaurs in their front. That was not ideal at all.

16 wounds, but not dead yet! My horde was offering some resistance, buying me the time I needed...

Except that half of the rescue force just died because of that double 1. The Order of Redemption were gone, leaving the horde to mop up the already clinically dead Centaurs, as my reinforcements from the left flank started to arrive in the form of the second birdie.

The rest of the left flank was struggling to work out how to get back into the action. In the end Cookie Monster decided to swagger off and leave mopping up the Shaman to the Abyssal Hunt.
The Order of the Brotherhood counter-charged the Guardian Brutes for the second time, hoping that this would amount to enough damage. At the same time, the Exemplar Forsaker continued to counter-charge one of the Chiefs. I believe at this point that first Chief routed. Alas, the Guardian Brutes did not.

Well at least the left side of the field looks very solid.

I can't remember why I landed the birdie right in front of the Chimera. I think I figured I couldn't close in to help my forces and avoid this anyway, so it was better to wear the charge, hope that my nerve would hold, and line the knight horde in the background up for a flank.

And in this picture you can see... Nothing. I don't have anything in this picture. The Order of the Brotherhood had fought to the last, but the Stampede cleaned them up. The Exemplar Forsaker who had been struggling with the last Chief also disappeared. So my right had collapsed all at once.

On the bright side, the other birdie remained on his feet. He shrugged off the efforts of the Chimera and remained in moderate shape.

I was now really worried about the threat lurking unopposed over to the right. Having lost most of his options due to being disordered, the damaged birdie backed off to make room for Cookie Monster and the Order of the Brotherhood to make their presence felt. Rotating out my front lines, effectively.

Unsurprisingly, the Chimera folded. I tried to lunge Cookie Monster forward to protect my horde, but he didn't go far enough. For his troubles, he copped a Stampede to the flank (not really different from one to the front in practical terms). The Guardian Brutes went past into my horde, whilst the cheeky Chief went for my crippled Exemplar Forsaker.

Cookie Monster was roadkill to the Stampede. The horde took some damage, but was still functional apart from being disordered. The birdie wavered, but had Headstrong.

I hit back with what I could. A combo charge on the Chief, and the horde trying to finish off the Guardian Brutes (the third time they were receiving the charge from one of these hordes without their Thunderous Charge).

Third time lucky against the Guardian Brutes, and it was all a bit much for the Chief. There was not much left to face off now.

Right, at this point it was all going to come down to a couple of things. I needed the horde to survive, and I needed the game to go to Turn 7. I did not have great hopes for the Order of the Abyssal Hunt...

Aaand the game ended at the end of Turn 6. It didn't matter - my horde had folded, which meant I couldn't muster the flank or rear charge on the Centaurs that I really needed. By this point Tony's units had collected a few of the loot counters (taken from the corpses of the units I had just lost), and the field was clearly his.
Well that was savage. I honestly felt like I was winning for most of the game, but in the end Tony's surviving units on the right were most compressed together than the ones I was bringing in from the left. Basically as soon as he freed his stuff up, he was able to look for new targets whereas I had some travelling to do. Combine that with the accursed double 1s that lost me my momentum and cost me the Order of Redemption, and it just narrowly slipped away. It was a very entertaining game.
Result: 4-17 Loss
What a close game. Did Elmo cause terror because he certainly does with my kids.
ReplyDeleteNo no, Elmo was a celebrity. Everyone loved him!
DeleteProper smashy game, thanks! Stampedes are the death of me as well, can't believe some people take two of them (or three?!)
ReplyDeleteNaga army looks very sweet as well, way to really carry a counts as theme through. I wouldn't have thought to use centaur-based Herd but it totally works.