Tuesday 4 December 2012

2012 Australian Masters - Day 1

Well the weekend is over (actually, by the time I am posting this, it's already Wednesday morning) and I survived another whirlwind trip to Canberra for this year's Australian Masters event. After a weekend with plenty of gaming, karaoke and too little sleep, I'm just a bit tired. But it's time for another tournament report - this one with more pictures than ever before! I might actually be getting better at this...

For those not familiar with the Masters, it's a tournament with a unique format. Comp scores are determined by the players, with all the lists being collated and sent out prior to the event. The 3 highest and lowest scores were discarded, and the scores were then averaged out and attached to the armies, rather than the players? Why is this an important distinction? Because in rounds 3 and 4, players use the army belonging to someone else, drawn randomly out of a hat. So for those rounds you get the comp score associated with the list you draw, rather than the one you arrived with at the start of the event. These 2 rounds are referred to as the "sealed section", and are the real distinguishing feature of the event.

I've already revealed the details of my Empire list here. It received a comp score of 2.5 out of 5, so was considered about mid-range in terms of strength. Having said that, a number of people expressed their admiration for the list going into the event, and declared that it should be strong enough for me to do well. If people were to be believed, the list had the goods. In that case the only remaining question marks were around the player...
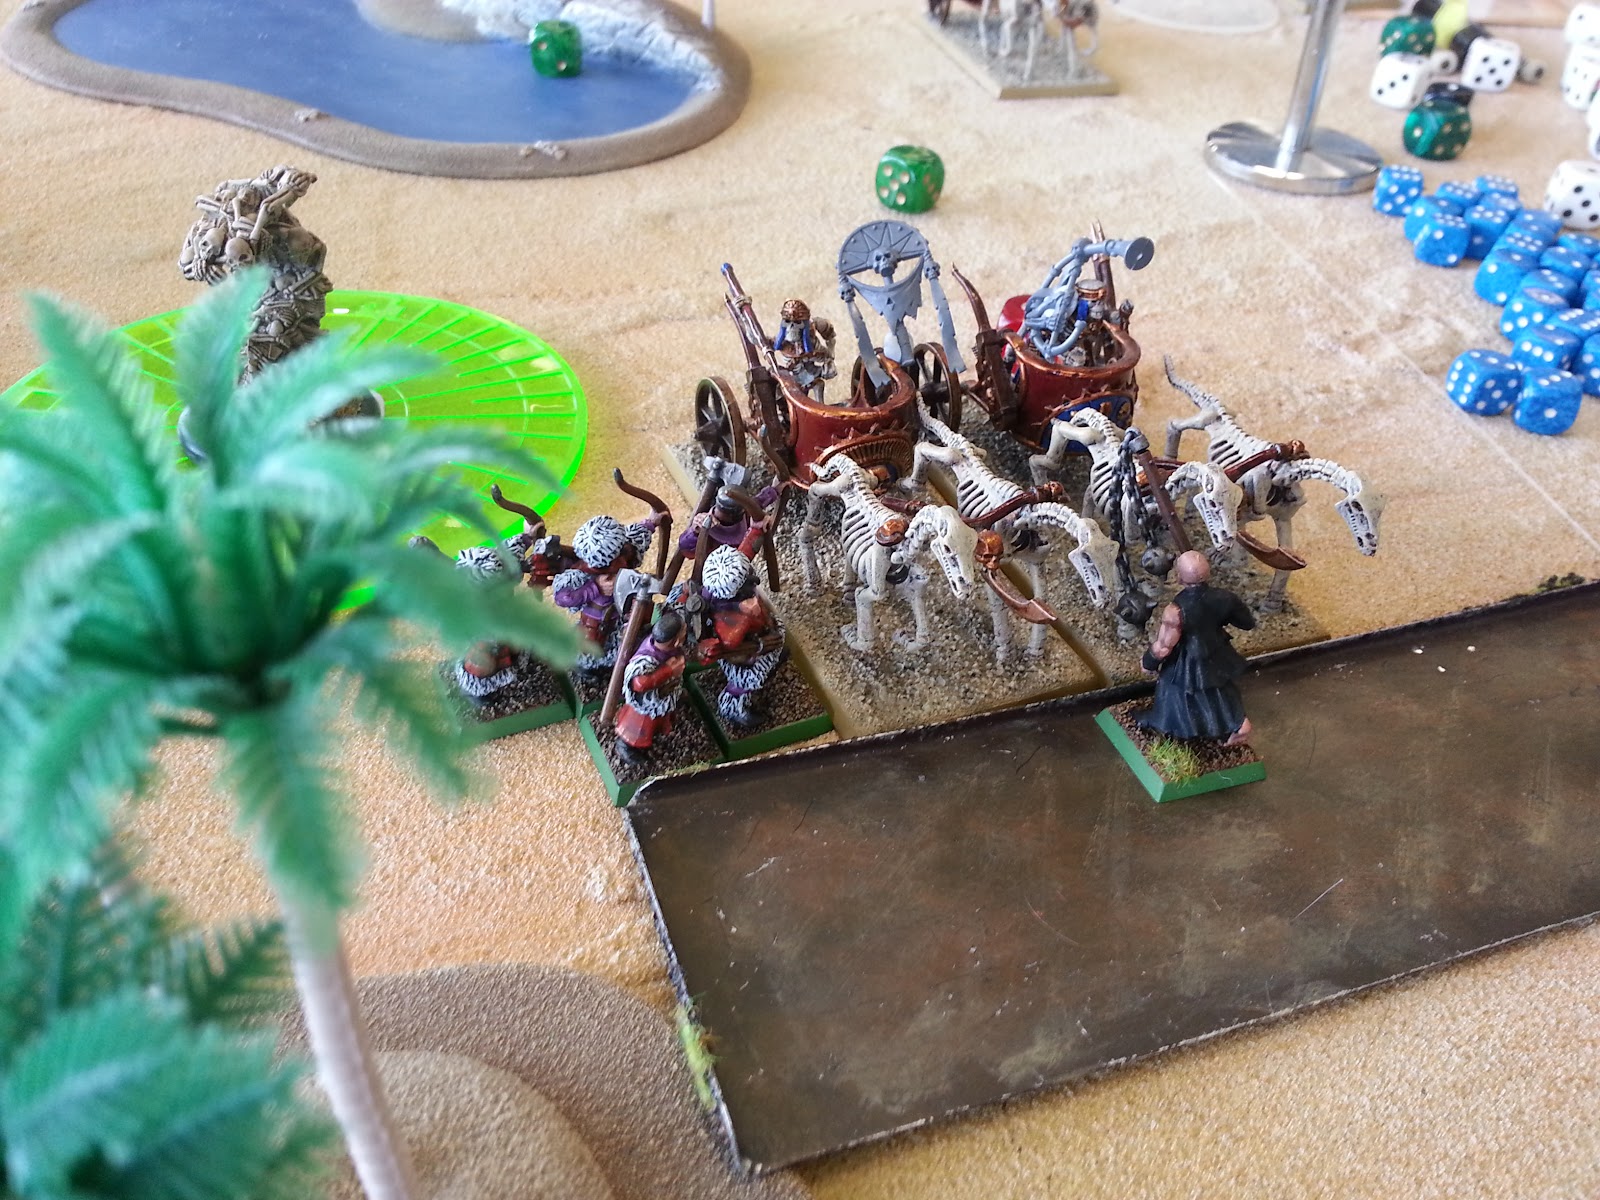

Round 1: Waypoint
Nick Hoen, Tomb Kings
Nick strikes a confident pose before the game
Liche High Priest (Level 4, The Lore of Nehekhara) with Dispel Scroll, Talisman of Preservation
20 Skeleton Archers with Full Command
10 Skeleton Archers with Musician
4 Skeleton Chariots with Standard, Musician, Banner of Eternal Flame
3 Skeleton Chariots with Standard, Musician
3 Necropolis Knights with Standard, Musician, Entombed Beneath the Sands
3 Sepulchral Stalkers
6 Carrion
Tomb Scorpion
Khemrian Warsphinx  with Fiery Roar
Casket of Souls
Hierotitan

Comp score: 3.5/5

The Waypoint scenario is a simple variant of your typical Battleline, with 3 objective markers spread near the centre line, each of them worth 200 VPs at the end of the game. 
Nick's Skullstorm marker, which Brad (our host at Good Games Canberra) painted up in a matter of minutes before the game. Nick has developed an unhealthy obsession with this spell, ever since it did good things in one game...
Being members of the same club, Nick and I play each other semi-regularly. In fact, one of my two practice games for the Masters had been against Nick's list. The game had gone massively in my favour, and although I didn't expect things to go quite so well this time around, it was still nice to know that it was a decent match-up for my army.
Game 1 deployment
Where the flavour is: The combination of the Casket of Souls, Hierotitan and High Liche gives the army a potent magic phase.
Nick deployed the bulk of his forces to my right, centred around the hill on his table edge. A couple of small Skeleton Archer units were the only things on the left half of the table. Of course, with about 700 points of his army waiting underground, he was never going to need the whole table to deploy. My deployment was more central, as you can see above. I put the fast, resilient stuff on the left, intending to sweep through the Archers whilst shrugging off their shots.
Nick's forces using Entombed Beneath the Sands. 700 points underground - no wonder things looked a bit thin in the deployment zone
I got the first turn and advanced. The Demigryphs and Knights both got into positions to charge the next turn, which would give Nick no time to react with his tunnelling units. The Steam Tank lined up the Casket of Souls and fired its cannon at it, however I failed to wound it. My Great Cannon also shot at it, with the same result. 
A wall of steel advances on the beleaguered left flank of the Tomb Kings.
My magic was ineffective, and it was then Nick's turn. He shuffled about a bit, leaving his Chariots on my right to deal with the Flagellants, with shooting assistance from the main unit of Skeleton Archers. Between them they knocked 5 models off the unit. The Archers on the left found themselves with a wall of 1+ armour save targets, and had no luck there. The Carrion backed off behind the main line of Archers, and the Warsphinx shifted to look at the approaching threat from my cavalry. Nick's magic phase was similar to mine - unexciting.
Turn 1
In my second turn the Demigryphs wheeled slightly and hit the more central unit of Skeleton Archers, whilst the Knights went straight on into the other unit. Both units crushed their opposition and reformed toward the enemy lines. My Halberdiers continued to advance, however the Flagellants backed off a bit to try to get out of range of the main Skeleton Archer unit. The Steam Tank kept rumbling toward the Casket and fired again, however it misfired and took a couple of wounds. The Great Cannon had more luck, killing the Casket outright. More impressively, the Hierotitan found itself on the receiving end of a boosted Shem's Burning Gaze, which managed to kill it outright. The spell was cast with irresistible force, however the resulting miscast merely wounded my Wizard Lord and killed a few Halberdiers. All in all, it was a great turn for me. Nick's magical potency was largely gone.
Where did everybody go? The Casket and Hierotitan vanish abruptly
The small units of Skeleton Archers put up about as much resistance as you would expect.
In Nick's turn all of his underground units arrived, or at least they all tried to. The Scorpion appeared in front of the Demigryphs, blocking their advance. The Sepulchral Stalkers emerged in front of the Great Cannon and eyed it with sinister intent. The Necropolis Knights were less successful. One unit failed to roll a 3+, whilst the other unit misfired and stayed underground for another turn as well. Very helpful. The Warsphinx declared a charge on my Halberdiers, intending to try to deal with my Wizard Lord, but fell well short of the long charge.
The Sacrificial Scorpion emerges to blunt my charge
Snake surprise!
The shooting phase saw the Stalkers comfortably remove my Cannon, whilst the Flagellants were reduced to 13 models. In terms of magic, Nick decided the time was right for a boosted Skullstorm (I think at the moment he is slightly obsessed and thinks it's always a good time for a Skullstorm, but he really needed something now). He cast the spell with irresistible force and lost 3 magic levels (and the spell) as a result, but at least he got it off. Practically hopping up and down with anticipation, he placed the massive template in front of his Liche, heading right for my main regiment of Halberdiers...
Boosted Skullstorm!
And watched it trickle along a miserable 8 inches - only about halfway to my unit. My Halberdiers breathed a sigh of relief, and Nick began to succumb to despair.
LAME boosted Skullstorm
Turn 2
In my third turn the Demigryphs charged the Scorpion right in front of them. The Steam Tank pulled a hard U-turn and crashed into the back of the Stalkers behind my lines. The Flagellants and Halberdiers both stepped back a bit, trying to make the charges harder for the Chariots and Warsphinx respectively. Banishment took off a couple of Chariots over near the Demigryphs, who made short work of the Scorpion and overran toward the main enemy lines, putting the now-depleted Chariots in their flank. The Steam Tank bulldozed through the Stalkers, but was now well behind my main advance.
The Scorpion does its job, preventing the Demigryphs from hitting anything else that turn
Tanked: Whatever happened to those Stalkers? And what is that goo getting caught in my wheels?
In his turn, Nick managed to charge both the Flagellants and the Halberdiers, despite their efforts to put distance between them and the enemy. The Chariots in the centre engaged the flank of the Demigryphs, looking to hold them up as much as anything. One of the Necropolis Knight units again failed to arrive, whilst the other unit misfired and ended up arriving on my board edge. Nick considered getting them involved in the main fights, but thought better of it and came on over to the left, heading instead for a couple of the objective markers, which I had swept past and left behind. 
The chariots have a crack at the Demigryphs
The other Chariots decide it's time to deal with the Flagellants
The Warsphinx makes its charge on the second attempt
The Necropolis Knights get lost and wind up on the other side of the table, away from all the nasty Empire men
Turn 3 - the lines engage
The combat between the Flagellants and Chariots was savage, and saw all but one of the Flagellants die, knocking 5 wounds off the Chariots as they went. The other Chariots bounced pretty harmlessly off the Demigryphs, but managed not to lose any of their own number. The main combat was between the Halberdiers and the Warsphinx, however. The Warsphinx itself managed to land a blow on the Wizard Lord, however 2 wounds from the Tomb Guard on top (both of them killing blows) were shrugged off by the 5+ ward save. For their part, the Halberdiers took 3 wounds off the beast. It won combat thanks to its breath weapon and Thunderstomp, however Steadfast saw the unit hold its ground.
Last man standing: the Chariot charge takes its toll on the Flagellants, but can't quite wipe them out
The Warsphinx does its best to maul the unit and kill the Wizard Lord, but ultimately its charge is absorbed
Turn 4 was the Turn of Rescues for the Empire. The Knights charged the flank of the Chariots fighting the Demigryphs, looking to kill them off and overrun. The War Altar and Hurricanum both crashed into the side of the Warsphinx in an attempt to cut it down before it could make any more attacks on the Wizard Lord (who was on 1 wound). The Archer detachment charged the flank of the Chariots over on the right, not so much to rescue the sole remaining Flagellant (who looked inclined to set himself on fire and flay himself to death in a fit of apocalyptic doom anyway) as to hold the Chariots out of the main combats. The Steam Tank drove toward the newly arrived Necropolis Knights, without any real chance of catching up to them.
The Knights counter-charge the Chariots
Reinforcements arrive to rescue the Halberdiers and Wizard Lord
To the rescue! The brave Archer detachment makes a gallant charge against the flank of the Chariots
Chasing tail: the Steam Tank begins a futile effort to chase down the newly arrived snakes
With my Wizard in combat, magic was focused around augment spells. I cast Birona's Timewarp, to give the Halberdiers a chance to take down the Warsphinx should the chariot hits fail me. They did not, however. Between them the Hurricanum and War Altar did 2 wounds from impact hits, which was enough to finish the Warsphinx before it could attack. They then overran across in front of the Halberdiers, heading for the Chariots in combat with my Archers. The remaining Flagellant did indeed wipe himself out before combat, but the Archers and Chariots managed to inflict no damage on each other, which saw one of the Chariots crumble from combat bonuses. The lone remaining Chariot then turned to face the heroic (stupid?) Archers. The Knights made short work of the other Chariot unit, and overran once the Demigryphs had reformed out of the way (we couldn't see anything stating I couldn't perform these actions in that order).
They're getting closer...
The Warsphinx falls and the War Altar and Hurricanum overrun
Things were looking decidedly grim for Nick in his fourth turn. The Carrion tried for a big charge on the flank of the Hurricanum, but didn't even get close. They were now right in front of the incoming Knights - between them and the Skeleton Archers the Knights were really after. The High Liche decided to abandon his Skeletons and stepped behind the lines. He threw an irrisistible boosted Righteous Smiting (suffering no real ill-effects), which saw the Chariot fighting the Archers suddenly rejoined by its 2 lost comrades, and the group of them sprouting an additional 12 attacks. Poor Archers. They fought bravely, but were wiped out. The Skeleton Archers managed to shoot one of the Demigryphs, who was already wounded. They passed their panic test, however.

The defining moment of the turn had come in the magic phase when the Skullstorm, which had been roaming the field and had ended up right next to the end of my Halberdiers, came to move. The arrow pointed straight up my line - it would hit everything in the unit. Unfortunately, the other dice showed a misfire, which meant the spell had ended. Of all the things that went wrong for Nick in the game, this was the one that broke him. His howl of rage and despair was terrible to behold. No figuring some people...

In my fifth turn the Demigryphs crashed into the Skeletons whilst the Knights hit the Carrion right in front of them. The Chariots on my right were charged by both the War Altar and Hurricanum. In all 3 combats, I wiped out the opposition due to combat resolution, and could not overrun. The Halberdiers advanced toward the High Liche and the Wizard Lord tried to take him off with a magic missile, to no avail. On the bright side, I did manage to cast both Speed of Light and Birona's Timewarp on the Demigryphs. They were inviiiincible! Not that it's very hard to feel invincible when you're fighting Skeleton Archers, but hey. 
It's all bad (if you're a Tomb King, anyway)
You call those little bony things Chariots?
All alone: no overruns for me thanks to the last FAQ, but there's nowhere to run...
In Nick's turn the remaining Necropolis Knights finally arrived, and decided to join their comrades in skulking behind my lines near the objectives. The High Liche could not escape the charge of the Demigryphs, so his fate was sealed. 

In my final turn the High Liche met his fate, whilst the rest of my forces turned and tried to wipe out the more central Necropolis Knights with a combined barrage of magic and shooting. I left them on a single wound, so they were still able to take an objective, as was the other unit further to the left. The Tomb Kings had 400 points of objectives, but had lost everything except their late-arriving Necropolis Knights (who in hindsight should have taken 2 crumble tests, but in the end that didn't matter). I had lost the Flagellants, Great Cannon and Archer detachment. The relatively harsh scoring scale of the tournament ensured that the result was a maximum win for me.
The finale
Result: 20-0 win 

This game couldn't have gone a lot better for me, really. I didn't really make many mistakes, although my dithering with the Flagellants could have gone better. Given that they ended up wearing the charge from the Chariots anyway, I should have forced the matter and made it happen sooner - before I lost more models to shooting. I was fortunate not to lose my Wizard Lord, although the Warsphinx was fairly lucky to make me take 3 ward saves when I was -1 to hit. Nick had some pretty bad luck - the erratic arrival of his underground units ensured he couldn't adequately respond to my advance, and the summary removal of the Hierotitan with a single spell was a real blow (even if it was not that unlikely). All of his magical support vanishing (followed shortly thereafter by 3 of his 4 magic levels) ensured the game was pretty much over as an even contest at that point. All in all, a strong start for my army.

Round 2: Dawn Attack
James Brett, Orcs and Goblins
James the Blurry. Actually, he doesn't look that blurry in real life. Could be my fault.
Savage Orc Warboss with Shield, Basha's Axe of Stunty Smashin', Trickster's Helm
Savage Orc Great Shaman (Level 4) with Fencer's Blades, Lucky Shrunken Head
Black Orc Big Boss (BSB) with Heavy Armour, Shield, Dragonhelm, Obsidian Amulet
Night Goblin Shaman (Level 2) with Dispel Scroll
Goblin Big Boss on Giant Wolf with Light Armour, Enchanted Shield, Warrior Bane
Goblin Big Boss on Giant Wolf with Spear, Light Armour, Shield, Dragonbane Gem
Goblin Big Boss on Giant Wolf with Spear, Light Armour, Shield
24 Savage Orc Big'Uns with Full Command, 2 Choppas
40 Night Goblins with Standard, Musician, Shields, Nets, 1 Fanatic
5 Forest Goblin Spider Riders with Musician
Goblin Wolf Chariot
Goblin Wolf Chariot
8 Trolls
Arachnarok Spider
Goblin Doom Diver Catapult
Mangler Squig

Comp score: 3/5

James and I have played a couple of times before, most recently at Book of Grudges where he ended my run at the title, thanks partly to my foolish attempt to break him in Blood and Glory when I should have given up on the scenario and faced him on better terms. Dawn Attack was a far better scenario for me to meet him in, as Orcs and Goblins are one of the armies most susceptible to the slightly random deployment at the start. At least, that was the theory.

This game did not go well. The first problem was James winning the roll-off to deploy first, as it gave him a 5/6 chance of getting the first turn. I needed more time to address his army, in particular the Goblin Big Bosses, who gave me real grief the previous time we played. He then proceeded to roll pretty well for his deployment, with almost everything ending up in a pretty solid position - he had a very strong force on my left, with just a Wolf Rider Big Boss and a Chariot being forced out on the right.
Game 2 deployment
My deployment forced the Flagellants and Demigryphs down on the left (right in front of his main forces, whilst everything else landed in the middle, except my Great Cannon. The only thing I got to choose was the Hurricanum, which I also put over on the right in the hope of offering some resistance to the Wolf Riders. Before the roll for first turn the Big Bosses and Spider Riders all used Vanguard to close the gap on my forces, after which James got the first turn as expected. 

The Big Bosses started the game by moving into positions I could really not respond to. The one on the left swung right around into the blind spot of the Flagellants, near the table edge. The one on the far right advanced to about 7" from the Cannon - outside short range for grapeshot, and under 10" so a normal shot could go straight over his head. The more central one shot forward and faced toward the Cannon as well, although the side of the Hurricanum was in the way. The Spider Riders moved up to block the Demigryphs on the left, whilst the rest of his forces advanced cautiously. Magic didn't do much, but the Doom Diver killed one of the Demigryphs.
Stupid Big Bosses: The Wolf Riding heroes cause me significant issues on my right flank. Sadly that Demigryph is dead. He could have shown them...
In my turn I did what I could to try to prevent the Big Bosses from ruining my day. The Hurricanum remained where it was, blocking the path of one to the Cannon, whilst facing the other one in case it got a chance to try its bound spell (you can see I was desperate). The War Altar also faced this direction, intending to try its luck with Banishment. The Demigryphs and Flagellants both backed up, hesitant to engage the extremely solid units heading toward them. The Knights moved forward to the right of the central impassable terrain, looking to tempt the Wolf Chariots into charging. The Steam Tank advanced fairly slowly, straight toward the Doom Diver, which it wounded once with its cannon. The Great Cannon fired grapeshot at the approaching Big Boss, but managed a pitiful 2 shots, which resulted in a single wound. I couldn't force any magic through on the Big Bosses, but did manage to take off the Manger Squig with Shem's Burning Gaze. So that was something.
Knight bait: charge me, guys! It'll be fiiine...
The Empire forces edge backwards
The forces approaching my left flank
The next turn went badly. The Big Boss on the far right charged and killed the Great Cannon. The one nearer the middle decided to try its luck in the flank of the Hurricanum, which was apparently an excellent plan, as it broke and got run down. The Big Boss on the far right squeezed around behind the Flagellants, looking at their rear. The thing that really went right for me was the Spider Riders, who got overly enthusiastic with their animosity roll and charged the Halberdiers. Turns out that was a mistake on their part, and they all died. I reformed into a 5-wide column, facing the approaching Night Goblins. The Chariot right in front of my Knights decided it would rather charge past them and into the Steam Tank, but rolled terribly and went nowhere. Gork very nearly stomped on the Demigryphs in the magic phase, but thankfully he missed.
Curb your enthusiasm: the Spider Riders get overly excited and charge a horde of Halberdiers. Not James' idea, to be fair
Damn Big Bosses: into the flank we go
Bloody Big Bosses: and around the flank we go
After failing to protect itself with grapeshot, the Cannon is doooomed :(
What right flank?
In my turn the Halberdiers managed to charge the Night Goblins, passing through a Fanatic and losing 5 models or so on the way in. The Knights charged the Chariot which turned and fled, but not very far. I could have reformed when I caught it, to swing around the impassable terrain, however I failed the test with the BSB's reroll. Way to go, guys. The Steam Tank and War Altar both moved around behind the Halberdier column, ready to head past or support it. 
The reformed Halberdiers charge the waiting Night Goblins
In my magic phase I cast Speed of Light on the Halberdiers, which helped compensate for their being netted by the Goblins. I think I also had rerolls to wound from the Arch Lector. Regardless, I cut down a reasonable number of Night Goblins, but failed to kill the Shaman from the front rank. The Goblins turned and fled with maybe an 8, but I pursued a miserable 2 inches. This meant my flank was exposed to the Savage Orc bus of doooom, when a 4 would have gotten me out of line of sight. Awesome.
The ones that got away: A feeble pursuit roll sees the Night Goblins escape, and the Halberdier invite pain on themselves
The game is poised, with the Orcs about to charge, but numerous counters in place
In his third turn, James charged the Halberdiers in the flank with the Savage Orcs. He also charged the Flagellants in the rear with the Big Boss lurking behind them, hoping to pin them in place. The other units moved up, assuming the Flagellants would be occupied.  The Wolf Rider Big Bosses and Chariot moved over from the right, up behind my line which was now firmly bent around to face the left. The Night Goblins rallied, and turned back to face the Halberdiers. In the magic phase I managed to prevent Ere We Go! to try to minimise the damage the Savage Orcs would do, and the Night Goblin choked on a mushroom and failed to cast another spell (but didn't die). 
Oof!
Accursed Big Bosses
With the pivotal combat about to occur, the remaining forces face off
The Doom Diver killed 3 of my Knights, who thankfully did not panic. In combat, the Flagellants really should have butchered the Goblin Big Boss, but they managed to choose then of all times to sacrifice none of their number, giving them no rerolls. I think missed with 5 of my 6 attacks, and only did a wound. I lost combat, was held in place, and lost my Frenzy. I then also failed to reform to face the little horror.

It was all going to come down to the combat between the Halberdiers and the Savage Orcs. The Orcs laid into me and killed a solid number of troops, but not enough to knock off Steadfast. I have a Leadership 9 test to hold them in place for a countercharge from a combination of the Steam Tank, War Altar and Demigryphs. I failed, but I had the BSB reroll. I failed that too. Then I fled a pitiful distance and got run down. Without that big unit and the Wizard Lord, my game was doomed.
No more Halberdiers. They're gone, along with my chances
In my turn 3 the Demigryphs charged the Savage Orcs in the flank, whilst the Steam Tank drove toward the Trolls. Its cannon wounded the Arachnarok, but only took off 3 wounds. My Knights moved toward the flank of the Night Goblins and the Doom Diver behind them, keeping their options open. My magic was largely unsuccessful, with only the Arch Lector on his War Altar left. 
My Knights head around through the backfield
Things were falling apart, so I am going to speed them up.

The Flagellants did manage to kill the Big Boss, but the damage was done. They received the charge from the Arachnarok in the front, and lost in a war of attrition. 

The Demigryphs managed to do 2 wounds to the Savage Orc Warboss as he stepped across to receive their charge, but despite only losing one of their number and holding for the first round, they couldn't finish him off and died. The Orcs eventually managed to get through to my deployment zone, guaranteeing James a goodly number of bonus VPs under the modified conditions of the scenario.
The failed counter-charge

The Trolls managed to kill the Steam Tank, largely thanks to their first turn of vomits doing 5 wounds from 6 attacks. Not bad at all.

The Arch Lector withstood a charge in the side from the Wolf Chariot, and killed it over a couple of turns.
The faltering Empire line
The Doom Diver shot again at the Knights, misfired, but rolled a result that meant it still hit me. Great. It then did 6 hits and 6 wounds, wiping out everyone but the BSB. He then got angry and charged the Doom Diver, before turning and charging the rear of the Night Goblins whilst the Arch Lector went into the front. I managed to break and catch that unit and their Shaman, but it was the sum total of my achievements for the game, really. 
What Knights? Oh well, I didn't need them anyway
With so much stuff dead (I think only the Arch Lector and BSB survived), and having killed very little (the Night Goblins, Shaman, Chariots, Doom Diver, Mangler and a Big Boss), I had been soundly thrashed.

Result: 0-20 loss

I don't really know what I could have done differently in this game. James pointed out that the spell on the Hurricanum is so poor that its facing didn't matter, so I might as well not have given the Big Boss my flank (I could have blocked him with my front). Still, if he had still charged, he would still have broken me with the way things went, so that didn't really matter. I might have been better served leaving the Cannon to die, as the deployment had screwed it. Things like Doom Divers and Mangler Squigs worry me, however - I wanted that Cannon. Oh well. Really I was well in the game until that failed break test with the Halberdiers. Not much I could have done about that. Oh well.

Round 3: Sealed Section
Chris Cousens, Skaven
I forgot to take a photo of Chris. Here he is in a different game, looking far more concerned than he ever did against me...
Warlord with Heavy Armour, Blade of Corruption, Enchanted Shield, Foul Pendant, Potion of Strength
Grey Seer with Dispel Scroll
Chieftain (BSB) with Heavy Armour, Shield, Dragonhelm
Chieftain with Halberd, Heavy Armour
Warlock Engineer with Doomrocket
Warlock Engineer (Level 1) with Warp-Energy Condenser
20 Skavenslaves
20 Skavenslaves
40 Skavenslaves
30 Clanrats with Full Command, Light Armour, Shield
30 Clanrats with Standard, Musician, Light Armour, Shield
5 Gutter Runners with Slings, Poisoned Attacks
6 Rat Ogres with 3 Packmasters
Warp Lightning Cannon
Hell Pit Abomination

Comp score: 2/5

Being the sealed section, this was not actually Chris' list. He had brought Wood Elves to the event, but somebody else was using those this round. The Skaven belonged to Casey Tabner. For my part, I no longer had my Empire, and would instead be using the Orcs and Goblins of Haig Mclisky:

Black Orc Warboss with Basha's Axe of Stunty Smashin', Enchanted Shield, Talisman of Endurance, The Other Trickster's Shard
Savage Orc Great Shaman (Level 4) with Fencer's Blades, Lucky Shrunken Head, Dragonbane Gem
Savage Orc Big Boss (BSB) with Great Weapon, Glittering Scales
Night Goblin Shaman (Level 2) with Dispel Scroll, Ironcurse Icon
Goblin Big Boss on Giant Wolf with Short Bow, Light Armour, Shield, Warrior Bane
24 Savage Orc Big'Uns with Full Command, 2 Choppas
22 Night Goblins with Standard, Musician, Shields, 2 Fanatics
5 Goblin Wolf Riders with Standard, Musician, Short Bows, Spears, Light Armour, Shields
10 Orc Arrer Boyz with Standard
19 Black Orcs with Full Command, Shields, Standard of Discipline
Spear Chukka
Goblin Wolf Chariot
Goblin Wolf Chariot
Mangler Squig
Mangler Squig
Snotling Pump Wagon
Orc Boar Chariot
Orc Boar Chariot
Doom Diver
Rock Lobber

Comp score: 3/5

Similar to what had happened to me the previous year at the Masters, I had inherited an Orc and Goblin army that was not at all built the way I would have gone about it. It had a whole raft of small chaff-type units, without any really large, solid blocks. The Savage Orcs are a very dangerous unit, but they lack sheer numbers and the Black Orcs are small enough that they will struggle to retain their damage potential against a decent enemy with higher Initiative. It means the list is really not straightforward to use. I also didn't have a print-out of the list at my disposal, which proved a bit of a distraction as I was trying to look the thing up on iPads and phones. I had the gist of it, but a couple of small things missed my attention.
Game 3 deployment
I'm not going to lie to you here - I deployed badly. I tried to place chaff whilst waiting for Chris to commit, but would have been far better making a plan of my own and focusing on that. I spread stuff too far from the general and BSB's influence, I put my Night Goblin Shaman in a unit that couldn't really look after it (the Orcs with Bows), and in general I couldn't really decide what I was doing. I knew there were Gutter Runners waiting to deploy and it messed with me a bit too as I tried to work out what to do with the war machines.
My left flank, after Vanguard
My right flank, jumbled mess that it was
Chris deployed heavily on the right, with only the Abomination (only!), a unit of rat Ogres and the Gutter Runners to the left. I Vanguarded with the Wolf Riders on the far left (including the Big Boss), but I failed to get the first turn.
The teeming hordes on the other side
Chris advanced relatively cautiously in the face of so many chariots, especially on the right. The Abomination shambled forward at a moderate pace. The Rat Ogres kept pace, with the Gutter Runners in between them. One unit shot at the Mangler Squig on my left, and rolled a pile of poisonous 6s. We were taking the thing off (and panicking the Night Goblins) when we remembered it was -1 to hit it (so chris needed 7+), and it promptly arrived back on the table without being harmed. Magic was focused on trying to kill the other Mangler, but I managed to keep him intact. Scorch killed a few Savage Orcs, however. The Doom Rocket lined up the Black Orcs and then Chris rolled 5 1s on 8 dice, resulting in a misfire that shot it off his table edge instead. The Warp Lightning Cannon scorched right through my Mangler Squig on the left at Strength 10, but failed to wound. Thank goodness. The Gutter Runners on the far left shot at the Wolf Riders, but despite Chris rolling really well, I retaliated by rolling even better for saves, and only one died.
The Abomination and friends advance
The advance on the right is more cautious, what with 150,000 chariots waiting to charge anything that comes too close
In my first turn the Night Goblins rolled a 1 and a 1 for animosity, which tied up them and the Arrer Boyz and Shaman next to them for the turn. Great. The Wolf Riders declared a charge on the Gutter Runners toward the centre, as they had a flank on them. Chris cursed his failure to avoid this as he had intended, and fled through the Abomination. I redirected onto the closer Gutter Runners, and in a display of good fortune, actually managed to get there and win the combat (I think we each killed 2). Unfortunately they got away.
The glorious charge of the Wolf Riders
I stuffed up my movement on the right by forgetting that a Pump Wagon and a Mangler Squig are not the same thing (hard to believe, eh?). The Pump Wagon went out ahead of the Savage Orcs, whilst the thing that was actually a Mangler went a glorious 5 inches. The chariots on the right shuffled forward, trying to strike the right balance between charge range for me, and not for a gamble from the Slaves. On the left the Black Orcs were careful about the Rat Ogres and Abomination and unwilling to advance, whilst the Mangler showed no such concern and headed for the Abomination. I didn't manage to get any magic off, the Rock Lobber misfired and missed its shot, but the Doom Diver at least missed the Abomination, but managed to hit the fleeing Gutter Runners instead. I dropped all but one, so he was unlikely to rally (and didn't despite fleeing through the heart of the Skaven army and past the BSB).
Don't you open that trapdoor! My Mangler Squig strolls slowly toward the Abomination
The Pump Wagon (that was never a Mangler Squig) moves out in front of my messed up lines, whilst the actual Mangler Squig takes a nap
In his turn Chris charged the Pump Wagon with the Rat Ogres on the right, killed it easily and overran into the Savage Orcs. The Abomination headed in towards the centre a bit, ignoring the Mangler and any threat from Fanatics or the Black Orcs. The fleeing Gutter Runners on the far left rallied to face the Wolf Riders, who were some distance behind them. In the magic phase I was again focused on not losing stuff, and Skitterleap got through. It saw a Chieftain flung across the table and deposited right in front of the Black Orcs, triggering the Fanatics. One went at him but fell pitifully short, leaving the other to find another target. It headed for the Abomination, but didn't make it either. No wonder the Abomination was showing that flank such disrespect.
The Rat Ogres pile into the Savage Orcs, not even noticing that there had been a Pump Wagon in the way
The Chieftain Skitterleaps in front of my Black Orcs, and the Fanatic fails to deal with him
And the other Fanatic does no better
In my turn I tried to charge the Warp Lightning Cannon with the Wolf Riders, but failed to make the distance (I think). The Boar Chariot near the Savage Orcs went into the flank of the overrunning Rat Ogres. The Arrer Boyz and their Goblin Shaman failed animosity and charged straight into the front of the Abomination. Well done, guys. I decided to try to help them by sending the Mangler through the back of the Abomination. Unfortunately it only managed 4 wounds, and Chris rudely passed all 4 Regeneration rolls. The Abom really did have good reason to show disdain toward my army. My Black Orcs charged the annoying Chieftain right in front of them and made short work of him. They then faced the still-distant Rat Ogres.
The Black Orcs reform to face the Rat Ogres
My magic didn't work as intended, and my artillery was struggling to find a decent target, as the best ones were ineligible (the Abomination in combat, and the Warp Lightning Cannon completely obscured by the rock forest thing nearby). In combat the Rat Ogres tried to maul my Great Shaman and BSB, however the BSB emerged unscathed and the Shaman retained a single wound. In return the Rat Ogres were butchered - only a couple of Packmasters lived to flee, and they eventually headed off the table. I think my pursuit roll was something pathetic, because I didn't seem to gain much ground. The Chariot went further, and got bogged fighting a small unit of Slaves.
Failed animosity: Don't tell me they're going to make it. Noooo!
The last charge of the Shaman and his mates
The Arrer Boyz fed themselves admirably to the Abomination, with the only survivor being the Night Goblin Shaman. He fled and was run down, and the Abomination went far enough to hit the flank of the Savage Orcs (where my crippled Great Shaman was waiting on the corner). It was going really well.
Abominable pursuit: The Hellpit goes straight through the Arrer Boyz and into the flank of my main unit.

In Chris' turn, the Rat Ogres on the left failed their Frenzy test, but failed to make the distance to the Black Orcs, who had reformed wide to try to get slightly further away. I think the rallied Gutter Runners moved to block the Wolf Riders and shot at them, but they once again passed a lot of armour saves. A unit of Slaves moved up and sat on the Mangler that had failed to hurt the Abomination, casually absorbing the damage. Chris' right flank continued to hedge around the Chariots, moving back as I moved forward. 

Magic was uneventful, but we had combat as well. The Abomination found itself fighting 3 characters, as the BSB and Warboss both made way. The horrid beast made all 3 of them take Initiative tests or suffer hits and wounds, as well as mauling the unit. All 3 failed, however only the Great Shaman keeled over. A lot of Savage Orcs fell as well, as the Warboss and BSB hacked back and left the Abomination on a single wound. I lost the combat and my Frenzy, but the unit held. The Boar Chariot killed several Slaves and won its combat, but they held due to the general being nearby.
The Savage Orcs get pounded by the Abomination
In my turn the Wolf Rider Big Boss charged out of his unit into the Warp Lightning Cannon, but was cut down by the crew for only 2 wounds in return. He had failed in his mission. A Wolf Chariot went in to support the Boar Chariot against the Slaves, and try to punch through to the enemy characters. Unfortunately it did basically no damage and I was held up again.

The Mangler Squig near the Abomination lined up a rescue mission for my unit, but needing about 10 inches, it travelled 4. Wow, so quick. So much for that plan. The Abomination continued to maul my unit, but was cut down. Would it get back up?
It's dead! Will it stay dead?
Thankfully the Abomination didn't rise once more, although it did turn into a Rat Swarm, which scurried across and sat on the stupid Mangler Squig. The Savage Orcs breathed a collective sigh of relief, turned back to face the oncoming Skaven army, and were promptly swallowed whole by Curse of the Horned Rat.
What army? What happened to the Savage Orcs?
The Black Orcs reformed deeper and received the charge from the Rat Ogres, and unexpectedly they won combat (Chris rolled poorly with the Ogres). They broke them, ran them down, then turned to face the Skaven army, and were also removed by the Curse of the Horned Rat.
The Black Orcs in their brief moment of triumph, before they all get turned into rats.
At this point I had had enough. We called it, as he was going to be just far enough ahead to take the full points.

Result: 0-20 loss

Well that game could have gone better. I spent it looking at all my various small, impact units and all the Steadfast, Ld 10 Skaven, and wondering how I was going to get through. My deployment didn't help me, but the antics of the Abomination and subsequent unopposed rampage by the Grey Seer with the 13th spell were out of control, and there was nothing I could do. A very frustrating game.

So at the end of day 1, I had only a single win, and had been involved in 3 white-wash games. Perhaps day 2 would be less extreme.

The atmosphere at the event was excellent, and people were doing their best to keep the rest of the community updated via Facebook and WargamerAU. Jabe from The Dwellers Below was also roaming around with a recording device, getting a summary from the players after every game. Expect to see a Masters podcast soon.
Jabe gets the run-down from Rowan and Staks after their game. Note the terrible Movember moustache. Here's hoping that's gone by now...

No comments:

Post a Comment