This is the continuation of my report of a recent 6th edition Warhammer Fantasy tournament. You can find the previous part here, or go back to the start here.
After 3 wins, I was getting perilously close to the top of the tables. By this point however, I had realised that there was only one Daemonic Legion list in the entire tournament, and I was not going to have to play it (which was nice, because they were basically kryptonite to a forest spirit army). I don't know where all the daemons had gone, but maybe we could win this thing!
Game 4 - Steal Their Supplies
Kieran Pink - Bretonnians
- Bretonnian Lord on Warhorse with Gauntlet of the Duel, Gromril Great Helm, The Heartwood Lance, Virtue of the Joust, Shield, Grail Vow
- Damsel of the Lady (Level 1, Lore of Life) on Warhorse with Dispel Scroll
- Paladin Battle Standard Bearer on Warhorse with Banner of the Lady, Questing Vow
- 6 Knights Errant with Musician
- 6 Knights Errant with Musician
- 6 Knights of the Realm with Standard Bearer
- 5 Mounted Yeoman with Shields
- 5 Mounted Yeoman with Shields
- 3 Pegasus Knights with Musician
- 8 Questing Knights with Standard Bearer, Banner of Chalons
- 8 Grail Knights with Musician, Standard Bearer, War Banner
- Field Trebuchet
This scenario involved 2 objectives. One didn't move and needed to be controlled at the end of the game. The other was a little cart that could drive around each turn and could be captured and carried with you. Control of those objectives at the end of the game dictated the bonus points.
Bretonnians had the potential to be a problem for my army. My armour penetration was only so-so, Bretonnians can easily add a rank or two to my none, and they would generally out-charge me. The Grail Knights in particular could probably kill anything in my army, especially on the charge. On the bright side, a single Damsel with one dispel scroll is not a lot of anti-magic... This game was also notable for being the only time all tournament that one of my spellcasters rolled The Call of the Hunt (a movement spell).
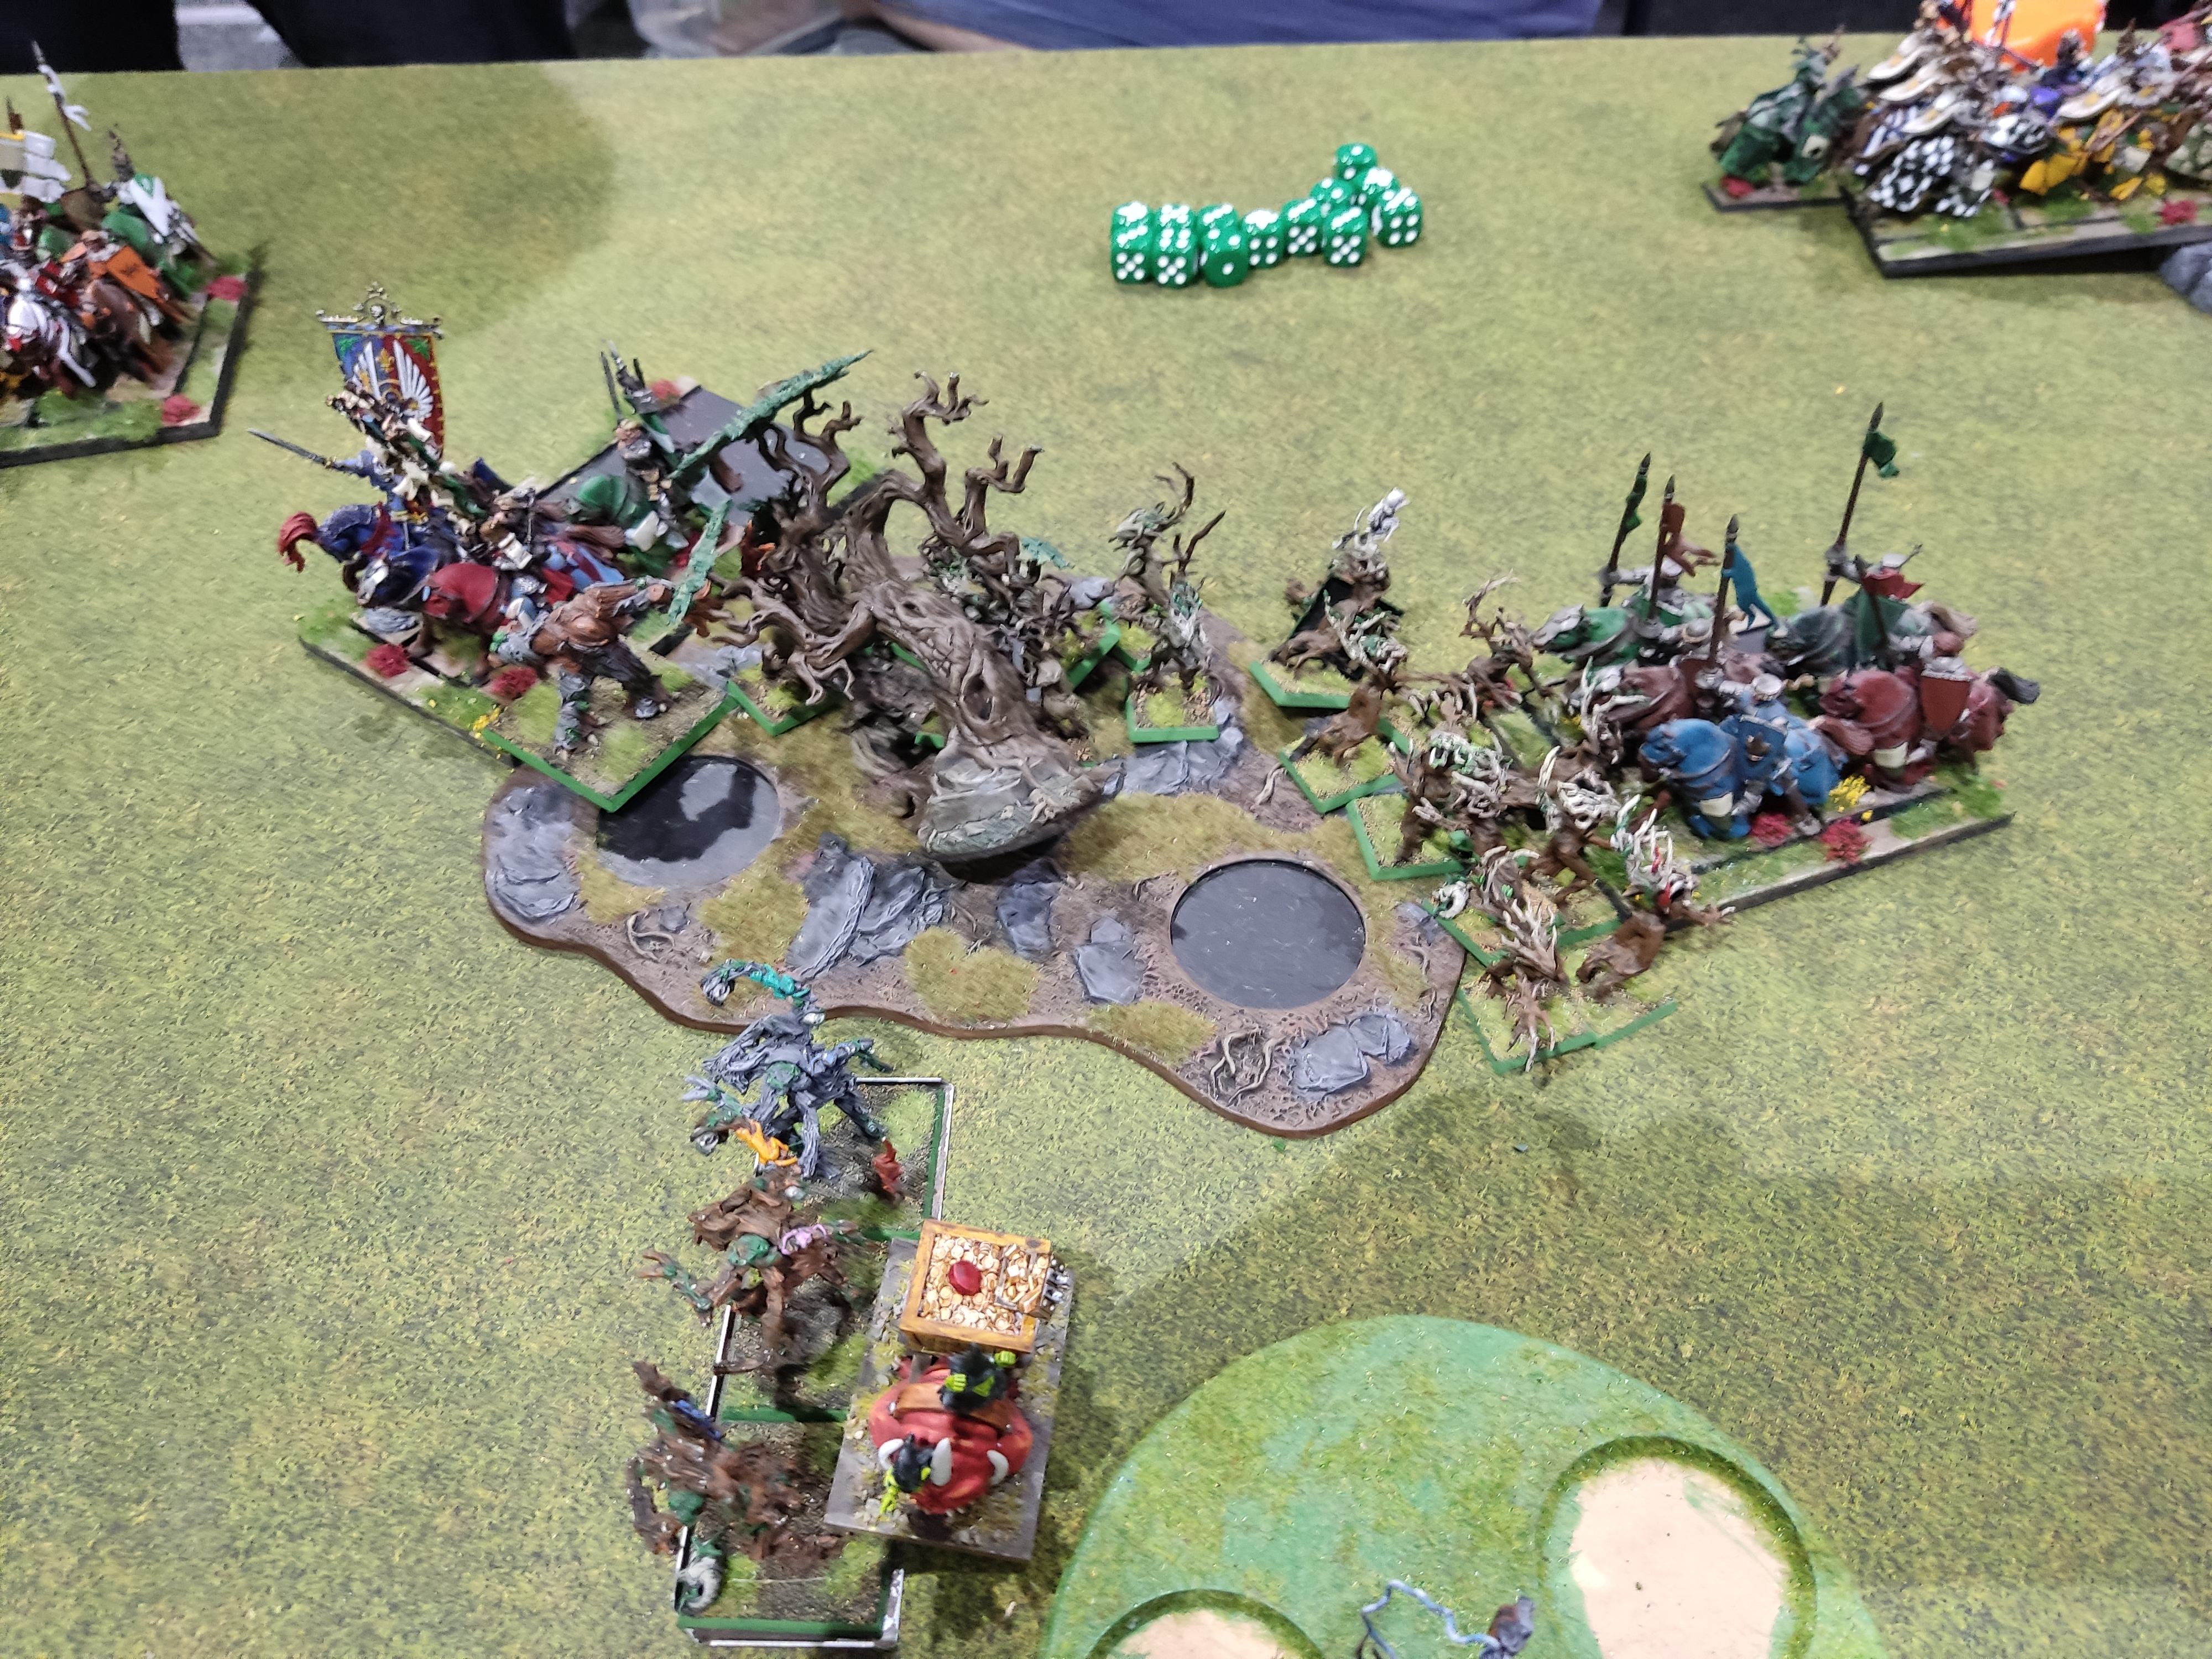
How we setup. I decided to keep a small unit of Dryads in reserve, given there was a forest right in the middle of the Bretonnian deployment zone. If nothing else, I thought it might mess with my opponent. Wild Riders on the flank, hoping to make it to the Trebuchet. That's the mobile objective on the middle line there. Every table had a lovely little painted objective, and there were different flavours. Ours was pulled by a fat Squig and driven by Snotlings, I think. It was an impressive amount of effort for a tournament with something like 57 players.
The Pegasus knights went right behind the forest, and the Grail Knights led by the Lord were behind them. The BSB was in the Questing Knights, over to the left of the forest.
They do make for a rather lovely looking army. Of course, in the Old World they're going back to triangles, which is a headache.
Mounted Yeomen and Knights Errant hard on the flank. The unit on the other side of the building was the Knights of the Realm.
I automatically got the first turn, given the Bretonnians were busy praying. The Wild Riders enacted Operation Get to the Trebuchet immediately, though the Mounted Yeomen would surely do something about it.
The Treekin and Treeman jumped into my little forest to go for a drive, pulling out ahead of my lines and getting very close to the objective. That thing had to be charged to be picked up, and I realised in my next turn, Kieran would likely use it to block my advance. Oh well. (We both forgot to move it in Turn 1)
My advance on the left was more hesitant. I wasn't sure what to do about the small lances of Knights likely being enough to go straight through either the Dryads or Wild Riders.
The Yeomen did indeed move up to block the Wild Riders, then rather surprisingly shot 2 of them off with their bows. That was a good return. They did almost enough damage to let us past.
The lances set about moving to get around the forest. It was already starting to cause him a bit of a headache, given the units are a bit unwieldy and he couldn't afford to enter the trees. The Pegasus Knights shifted across, looking for targets.
We were both a bit cagey over on the flank, but the Pegasus Knights would mean he simply had too much muscle over there.
It's a bit of a puzzle, this game. Normally my plan was to mostly rush toward the enemy and make them decide how to respond. But here I couldn't come within 16" of things.
The Mounted Yeomen clearly wanted the Wild Riders to charge them, so they obliged.
My movement in the centre was a bit of a mess. The Treekin wanted to advance hard into the trees, but Kieran blocked them with the moving objective, so they were pretty much obliged to charge and claim it instead. The Dryads were being careful to stay out of the arc of the Knights Errant lurking behind the forest. The Treeman stepped out bravely in front of the best units in the enemy army, but we had a plan.
I wasn't sure what to do about the left. I tried to set things up so they'd get a chance to retaliate against what charges the Bretonnians could find. The Treekin actually backed up. It was cagey.
The Wild Riders broke the Yeomen, and then tried to restrain pursuit. They failed, then they pursued 18" with a massive triple-6 roll. Kieran was less than impressed. He'd set up the Errants to clean up my unit, regardless of whether I held my ground or pursued. Instead I rolled so high that they were now out of sight, and had a clear path to the flanks of his main units. That wouldn't have mattered so much if they were about to charge away, but...
...Someone had parked a bloody great forest in their way. I think this was maybe 3 copies of Treesinging forcing their way past the enemy defences, to work the forest around through the gaps and into the path of the Grail and Questing Knights. Not only were the Treekin safe, neither unit could even see the Treeman anymore. It actually felt a bit mean, but the best unit really shouldn't have deployed behind a forest...

The messing around on the left flank was done - it was time for action. The Pegasus Knights charged into the Dryads, careful to wheel in a way that a pursuit move would take them past the Treekin and hopefully into the Spellsinger who was lurking in the trees behind them. It was not the worst plan, but Kieran had failed to anticipate that his troops were going to fight like potatoes. They might have killed a single Dryad on the charge. They took a wound in return, they were outnumbered, I caused Fear... They didn't even escape the pursue roll when I chased them. It was not a great performance.
The Dryads' pursuit roll took them into the flank of the Yeomen, who had moved up to block and bait the Wild Riders.
Evasive action was taking place behind the forest as the Bretonnians tried to ensure at least one of their main units would escape and see combat.
So I mean... They certainly did see combat. Just not really on their own terms. The Treeman moved up in my turn, staying out of the arc of the Knights and getting ready to use Strangleroot. That was not required, though. I cast The Call of the Hunt on him with a decent roll, and to my surprise, Kieran tried to dispel it with 3 dice. He failed, and then immediately remembered that he still had his dispel scroll. To his credit, he did not start banging his head on the edge of the table... But the Treeman did start banging on the flank of hit Questing Knights.
The combat between the Dryads and the Yeomen was predictably one-sided. I think the Dryads killed all but one of them, which meant he would be unable to rally. I had tried to leave the Wild Riders far enough back that it would be hard for the Errants to break through and pursue into them.
My reserve unit of Dryads had appeared in the forest along with the other brown unit of Drayds and the Treeman. The Wild Riders decided to resume Plan A and headed for the Trebuchet, but the Grail Knights were still looking right at them.
This was one of those predictable situations that I could perhaps have avoided, but it sort of played into both of our hands. At this point Kieran was resigned to the game slipping away and wanted his most valuable unit out of danger, away from my army. I knew I couldn't likely engage that unit anyway, so I was just as happy to see them go. The Wild Riders were not consulted about how they felt about this plan, but I'm sure they were on board (as they died horribly).
Apparently the Errants didn't get the memo about points conservation (it's possible they failed their impetuous test), and charged into the Dryads on the nearest edge of the forest.
This one was far more predictable.
But had I left enough of a gap to keep the Wild Riders out of it?
The Treeman was slowly working his way through the Questing Knights. The Errants made no real headway against the Dryads, losing one of their number and failing to break through.
The Errants on my left flank had better luck against their smaller unit of Dryads, breaking and running them down. They didn't make it to the Wild Riders, however. They needed to roll at least average for that, and didn't come close.
The reserve Dryads found an opportunity to pitch in and help against the Questing Knights.
Without the advantage of the charge, the Errants lost the second round of combat and fled, but escaped my pursuit.
We seem to be missing a shot. The Wild Riders crashed right through the Errants, ending up right in front of the Knights of the Realm (who has basically not moved this whole time).
With the help of the Dryads, the Treeman finally broke the Questing Knights. They got away, but they were below 25% strength, so would not be able to rally anyway.
The Knights of the Realm tried to avenge the Errants, but did relatively light damage to the Wild Riders and failed to catch them when they fled. They also failed to go fast enough to get out of line of sight of the Treekin...
On the right, the Errants rallied. I considered going after them with the Dryads, but I would almost certainly have lost the unit, and that wasn't really worth it. We backed off and let them keep that corner of the field.
The Knights of the Realm heroically fled from the charge of the Treekin, heading for the table edge with the Treeman hot on their heels. They would have been in for a world of hurt had they rallied, but then in a weird spike of rolling, the Treeman wiped them out with Strangleroot! Well, I guess that's one way to deal with things...
This then was how things finished. I had backed off, leaving the Bretonnians with their Lord and Damsel, the Grail Knights, the Trebuchet and the battered Knights Errant. For my part, I had lost a unit each of Wild Riders and Dryads, but was otherwise intact - and I had both of the objectives.
That had been a weird game. I spent half the time worried about the threat of the lance formation charges, but then managed to shut down the better ones just by shuffling some trees around in their way. I basically didn't even move Drycha all game. She sat back and directed affairs from a distance.
Result: 22-3 Win (17-3 before bonuses)
You can find the final part of my report here.


No comments:
Post a Comment