This is the final part of my Convic report. You can find the previous part here.
Day 1 had gone pretty well for me, but now we were heading into Day 2. Now we were using our full-sized 2000 point lists. I'll put all 3 of the remaining games in this one post. Hopefully the number of pictures won't break your browser. :P
Game 5
2000 points, Loot!
Ben Rantall, Ogres with Goblin allies
- Siegebreaker horde with Brew of Haste
- Boomer horde with Blessing of the Gods
- Boomer horde with Chant of Hate
- Berserker Brave regiment
- Giant
- Giant
- Red Goblin Blaster
- Red Goblin Blaster
- Grokagamok
- Army Standard Bearer
- Spitter regiment (Goblin allies)
- Mawbeast regiment (Goblin allies)
- Mawbeast regiment (Goblin allies)
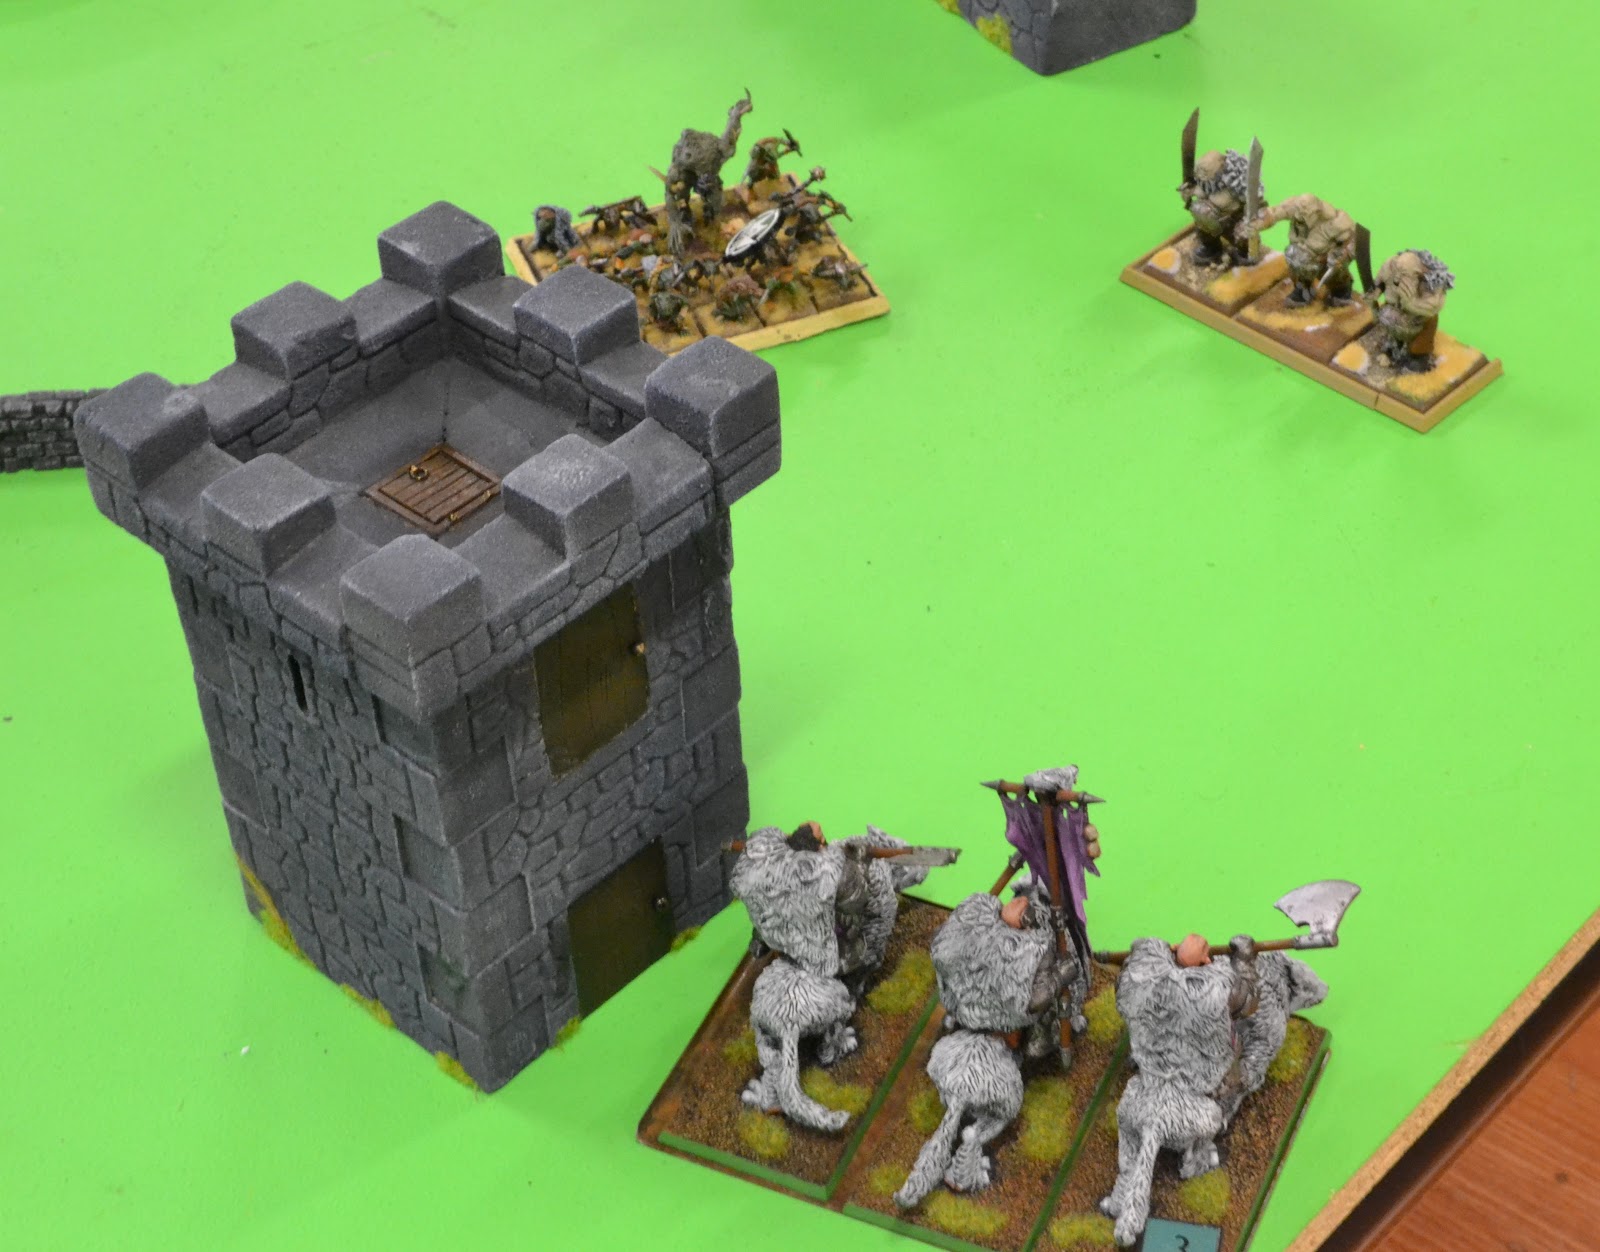
Oh look, another Grokagamok! Perhaps we could have an epic Grokagamok showdown. Deploying against Ben's army immediately showed one of the weaknesses of my own list - I really only hard large horde (and even legion) sized units. It meant I didn't have a lot of smaller stuff with which to control deployment, objectives, or the game in general. Oh well, maybe I wouldn't need them.
 |
2 Giants, eh? That could pose a problem. And that's Grokagamok standing next to them. So much hurtiness. The horde in front of him is the Siegebreakers.
|
 |
| The loot counters and my lack of deployments resulted in some indecision from me. I ended up putting very little on the right flank to deal with all this stuff. |
 |
| In fact, the only thing that was really on the right flank was my Chariot regiment. By the time Ben was done placing stuff after I had finished, the chances of this unit doing much were looking pretty slim. My main concern was the Blaster. I had basically decided that bar something unexpected happening, the right-most loot counter was out of my control. I was better off concentrating on the other two. |
 |
| This is me concentrating on the remaining 2 counters in the middle there. It is as close to "overwhelming force" as I could muster. |
 |
| I did not get the first turn. Consequently I had to sit and watch as some cheeky Mawbeasts scampered forward and grabbed the loot counter in the centre. |
 |
| Ben had sufficient stuff on the flank to go and get the loot counter whilst also blocking the advance of my Chariots with the threat of the Blaster. With no way to shoot it over there, that thing was always going to be a headache. |
 |
| The stuff on my left was not quite so gung-ho in moving toward the objective. The Giants actually stayed behind the forest to hide, so would not be able to charge the next turn if I advanced. |
 |
| In my turn I advanced on the central loot counter whilst shooting the Mawbeasts to death. I had to choose between them and the Blaster. So the Blaster would be free to hurt me in exchange. That was probably the hardest decision I had to make during the game - try to chase down mission-critical Mawbeasts, or face the wrath of the Blaster. |
 |
| I moved up fairly aggressively on the left, |
 |
| Yeah, this flank is looking pretty grim. |
 |
| My Grokagamok shows little respect for the approaching enemy. Hiding is for sissies! |
 |
| My Siegebreakers pay the price for my decision to shoot the Mawbeasts instead of the Blaster. They took 7 damage from the blast, combined with the Boomers on the hill. |
 |
| The other Blaster also moved into position. It didn't detonate until I charged it in my turn, which meant I would not be able to hit anything else that turn. |
 |
| The Giants move up a bit as the general shuffling advance continues. Unfortunately the Boomers up the back there shot at my Boomers, somehow did 10 damage, and routed them on the spot. It was just a touch rude. I never got to fire with my unit. |
 |
| The remaining Mawbeasts made a nuisance of themselves, forcing me to charge them with excessive force. |
 |
| Grokagamok went into the Siegebreakers. He failed to waver them, unfortunately. My Shooters did manage to waver the Boomers on the hill, as my own Siegebreakers moved into position. |
 |
| My Chariots got off lightly from the Blaster - it only did 3 damage. This was great, but I was still going to have to wear a charge from the Berserkers before I could do anything in return. |
 |
| So I killed the Mawbeasts and decided to use the D6 overrun move to try to steal ground and push Ben away from the loot counters. This was fine in theory, until the legion went the fill 6". This turned out to be just enough to show their flank to one of the Giants. The Captain then refused to follow suit and roll a 6 as well (this would have solved the problem). He rolled a 2 or something. This next turn was going to hurt... |
 |
| Oh, the humanity. Giant in the flank, Giant in the front, Grokagamok in the front... |
 |
| So much suffering. Actually, this was not as bad as it might have been. Grokagamok had charged from the forest, so was Hindered. And the Giants only hit on 4+ anyway. A legion of Warriors also has a pretty solid nerve value, and they had Inspiring. |
 |
| Never mind all that, my stuff died anyway. Oh, and my own Grokagamok wavered when the Siegebreakers counter-charged him. And the Boomers did a fair whack of damage to my Siegebreakers over on the flank, too. Not going well. |
 |
| The Berserkers charged my Chariots as expected. They didn't roll especially well. Then they rolled enough to waver me anyway... |
 |
| ...Then we remembered they were Brutal, so I was actually routed. Only later did I remember that I had the Brew of Courage. That might have been useful. Sigh. |
 |
| So what do you do when it's all falling apart? Charge with everything! Well, everything except Grokagamok, who was being a sook. My Siegebreakers killed Ben's, which was something. Unfortunately my other Siegebreakers failed to get rid of (or even waver) the Boomers on the left, which meant I copped a counter-charge from them and a Giant in the flank. Very bad. Game over for them. My Shooters did some damage to Ben's Grokagamok whilst my Captain went in to the flank of the other Giant, but made little headway. |
 |
| Grokagamok spent the next turn moving and scowling at the Shooters, so they shot him again and made him dead. |
 |
| My Captain was being all heroic and eyeing of the rear of the Giant who was retreating with a loot counter. Ben decided to shoot me with Boomers instead of charging me properly. Unfortunately this worked for him and my Captain toppled over. |
 |
| The closing stages saw my Shooters standing alone, desperately trying to gun down the Giant as he ran into the trees. I just couldn't roll well enough and he finally made it out the other side to safety. |
 |
| Eventually bad things happened to the Shooters too. I was wiped out. |
Well that had been a bit disheartening. A number of things had gone wrong by 1 - multiple failures to waver Ben's stuff, that legion going just far enough to get itself killed... It was a case of many things being close, but it all adding up to a game that wound up not really being close at all. I got spanked.
Result: 5-15
Game 6
2000 points, Kill and Pillage!
Andrew Goodman, Abyssal Dwarves
- Abyssal Grotesque horde
- Abyssal Grotesque horde
- Abyssal Halfbreed horde
- Slave Orc horde
- Greater Obsidian Golem
- Greater Obsidian Golem
- Iron-caster with Surge and Inspiring Talisman
- Abyssal Halfbreed Champion
- Gargoyle troop
- Gargoyle troop
- Heavy Mortar
- Heavy Mortar
- Mortar
No doubt there were a couple more items in the list, but I don't recall the specifics. The Halfbreeds were moving through a forest, so probably had Pathfinder. Abyssal Dwarves are another army I had never played before, so this promised to be another learning experience.
 |
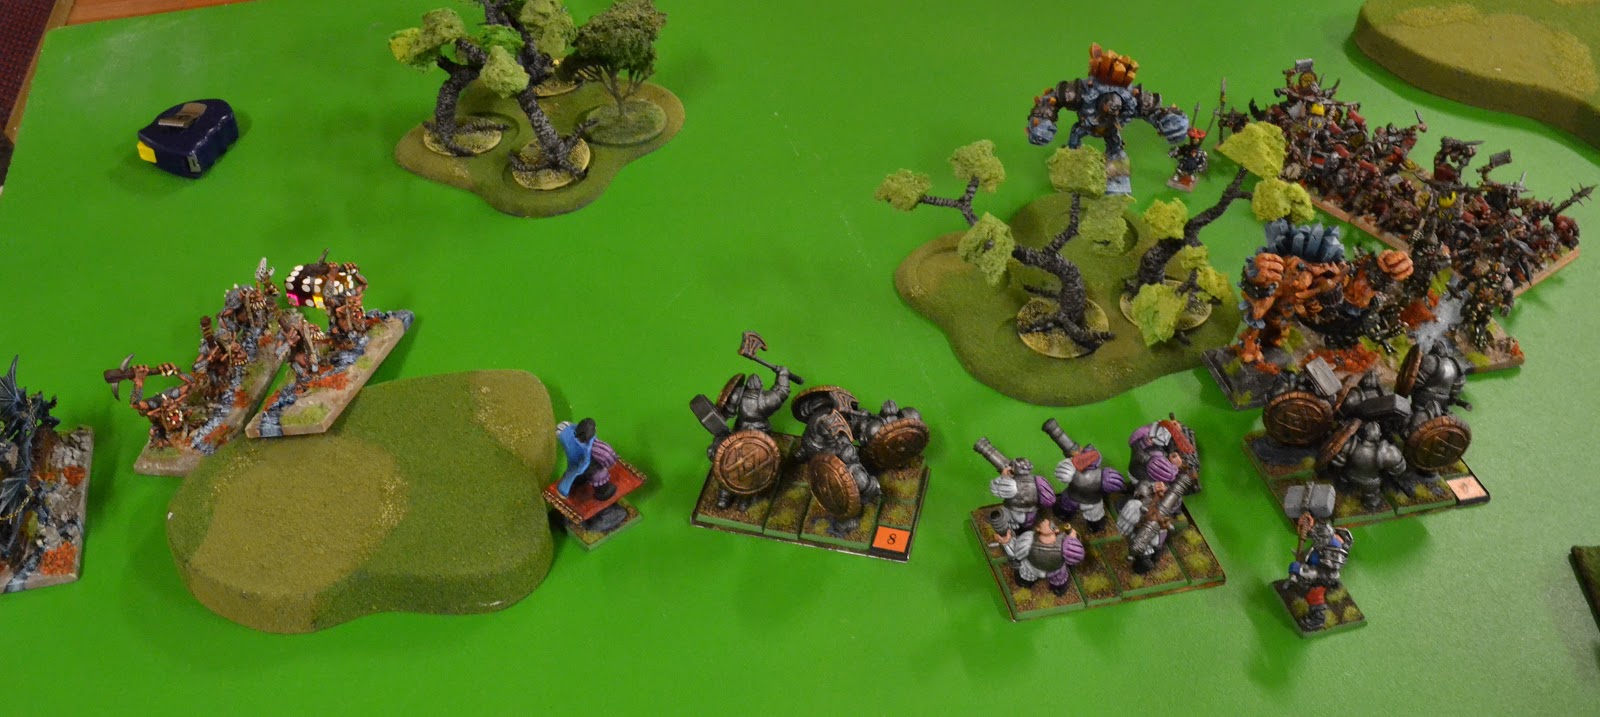
| Some of these unit seem pretty mean on paper, and people were telling me Abyssal Dwarves were tough. Oh well, maybe it would be OK anyway... |
 |
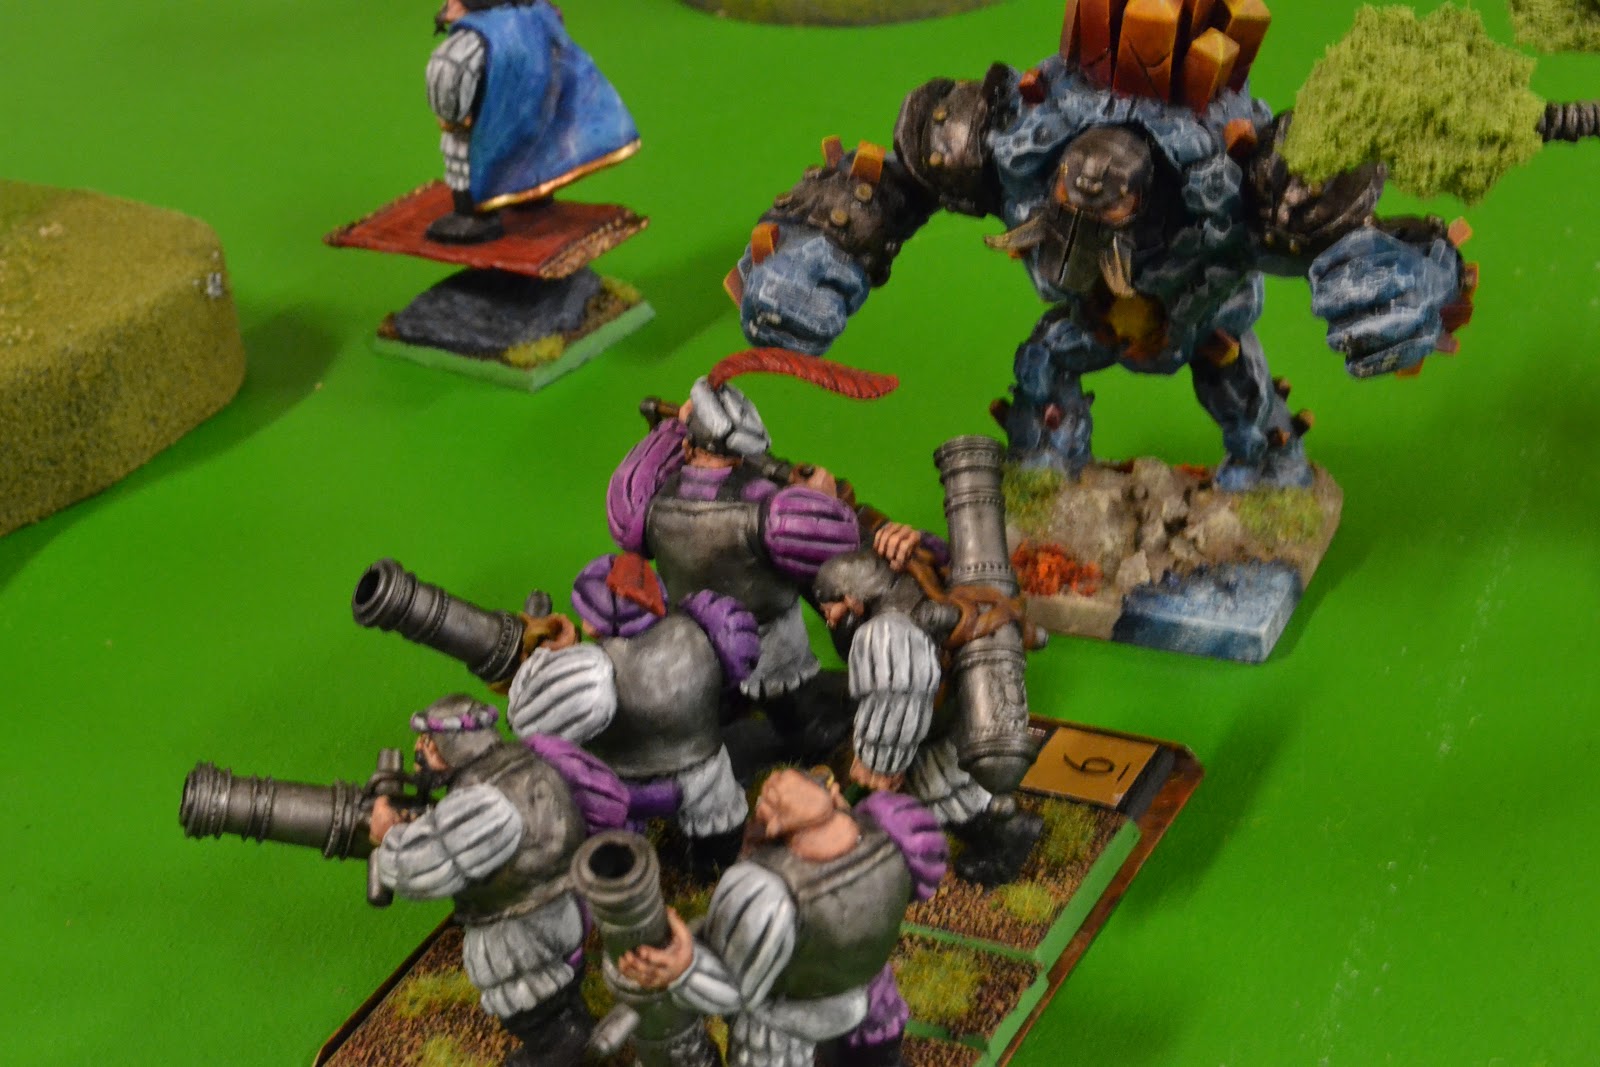
| A couple of big rock monsters with their little wizard keeping them company and offering magical encouragement. |
 |
| There is an objective marker in the rocky ground on the right. The general plan was to walk up there with the Shooters, claim the marker and shoot the artillery hiding behind the hill. I maintain it was a good plan. |
 |
| My flank was anchored by the Warrior legion. It is a big anchor. |
 |
| Andrew got the first turn. Pesky Gargoyles advanced, shielding the Halfbreed Champion. |
 |
| The other Halfbreeds hurry through the trees. Andrew's artillery in the first round or 2 was useless - couldn't hit a thing. That was helpful. |
 |
| Things for my legion to worry about. The Trolls are the Grotesques, which seemed to be the main threat in the enemy list. |
 |
| My Chariots and Shooters both charged and routed he Gargoyles. Why not? It gave my Shooters a free reform at the end of the combat and got them where they needed to go. |
 |
| The Boomers opened up on the Halfbreeds, doing some significant damage there. The Siegebreakers moved up in support. |
 |
| Seeing little else for it, the legion had advanced quickly and got itself charged by both the Gargoyles and the Grotesques. The Gargoyles rolled like fiends, but the Grotesques were more controlled in their efforts. I took some damage, but repelled them as expected. |
 |
| Now it was my turn. How would you like 36 attacks to the face, Grotesques? 12 damage plus Brutal and I was looking pretty good. He didn't even have Inspiring. And then I rolled double 1s. Oh no... |
 |
| So that Halfbreed Champion? Turns out those guys are the business. He mashed my Chariots straight up on the charge. 6 damage and they routed immediately. Then they turned their attention to the Shooters, who had just shot off one of the enemy Heavy Mortars. He did a little damage and managed to waver me on the charge. It was some good rolling and meant I couldn't respond. Curses. |
 |
| My Siegebreakers had moved up to force at least some of the enemy chargers to pass through the forest, and then braced for the charge. They did their job, taking the charge and pushing the enemy back. This freed me up to counter-charge with the Siegebreakers and with Grokagamok, both into the Grotesques. |
 |
| My legion paid for that double 1 roll with their lives, and now there were Grotesques regenerating the damage I had done and working their way around my flank. Not cool. Time to respond, then... |
 |
| Turns out Siegebreakers and Grokagamok together are good for about 20 damage on a Grotesque horde. Not bad at all. You know what is really bad though? Rolling double 1s. Again. Come on, dice... |
 |
| Andrew enjoyed getting to roll 20 regeneration dice the next turn. Meanwhile I was moving stuff elsewhere. The other Siegebreakers had fallen victim to one of the Mortars finally landing a hit, so they were no longer as fresh as they had been. My Boomers had finished off the Halbfreeds and now found an important mission for themselves, swinging around to the flank to take aim at those pesky Grotesques. |
 |
| Grotesque problem resolved. At this point the Gargoyles got a little nervous and pulled back. |
 |
| I think it took the Halfbreed Champion 3 goes to get rid of my Shooters. Each time I wavered and backed up toward the difficult terrain. By the time I got there though, the work was finished and only a couple of wounds were needed to send them packing. |
 |
| As due punishment for my nerve rolling, Grokagamok got flanked by the Golem and the Siegebreakers copped a counter-charge from the Grotesques. I lost both units, and control of the centre of the field. |
 |
| Using the power of Surge, the other Golem ran past the front of my other Siegebreakers and into their flank. They died. |
 |
| Wait, did you hear something coming? |
 |
| My Boomers stand alone. They give the nearest a good blast, doing quite a few wounds, but I needed a big roll to rout it and didn't manage it. That was the final contribution for my Boomers. They had done well. |
 |
| My final effort was the Captain running off on a mission of his own. He ran into the trees, within minimum range of the Mortar. The Gargoyles jumped in the way and he swatted them. The he carried on to the Mortar... |
 |
| Aww yeah, one dead Mortar and one objective claimed. That effort is worth 1 whole battle point, baby! |
Well, what can I say? I was looking pretty good in that game up until a couple of rolls destroyed me. What is it with those Grotesques? Why are they not scared of my Ogres? Such disrespect. Oh well, one more game to go...
Result: 1-19
Game 7
2000 points, Invade (variant)
Staks, Dwarves
- Ironclad horde with Throwing Mastiffs
- Ironclad regiment with Throwing Mastiffs
- Ironclad regiment with Throwing Mastiffs
- Shieldbreaker horde with Throwing Mastiffs
- Shieldbreaker regiment with Throwing Mastiffs
- Shieldbreaker regiment with Throwing Mastiffs
- Ironguard regiment with Throwing Mastiffs
- Ironguard troop with Throwing Mastiffs
- Ironguard troop with Throwing Mastiffs
- Jarrun Bombard
- Jarrun Bombard
- Cannon
- Flame Belcher
- Flame Belcher
- Army Standard Bearer
- Army Standard Bearer
That's the list as best I can determine. All you really need to know is that every battle doggy ever trained by the Dwarf people was included in this list. Sooo many Throwing Mastiffs...
The scenario for this game followed the rules for Invade! However, there was an addition in that each player nominated a single enemy unit that they wanted dead. If they killed it, they got the points for it and added that to whatever they had managed to rush into the enemy’s half of the field. So each player would be trying to kill the nominated unit in the enemy army, whilst wanting to protect the one their opponent had chosen. I chose Staks' Shieldbreaker horde, as it was a significant unit without a massive defence value. He chose my Boomer horde.
 |
| This is my Boomer horde, deploying behind a hill and hiding like a pack of big girly Ogres. No point making it easy for Staks to artillery them to death. I would worry about getting across the table later. |
 |
| The right flank, where I put most of my stuff and Staks put practically nothing. Except Throwing Mastiffs. Those were everywhere. We were fighting on a carpet of them. |
 |
| Woo, first turn. Go go go! |
 |
| The bum's rush. |
 |
| My Shooters stay cool and sit back, shooting as per their job description. No point getting excited and running across the field. Not yet. |
 |
| Staks reacts to my heroic hill hiding. |
 |
| The Dwarf troop units vanish in the face of overwhelming force. |
 |
| Not bad. 2 turns and my legion was in his deployment zone. So speedy. |
 |
| The main combat muscle of the Dwarf army was struggling to get over a fence. |
 |
| The Chariots flank the Ironclad regiment and rout them straight up. This leaves the rest of my stuff free to advance along the line. |
 |
| My legion copped a whole lot of damage from Throwing Mastiffs and the Flame Belcher, but it didn't stop them from charging and smashing up the Ironclad horde. Things were looking pretty good. |
 |
| The Dwarves were getting close enough now. I couldn't hide forever. So my units finally stepped up onto the hill to face the advancing enemy. |
 |
| The legion smashes through the Ironclad horde, but is face to face with the Flame Belcher. |
 |
| The only thing between us and the Cannon is an Army Standard Bearer, intent on making a nuisance of himself. |
 |
| The real reason my units stepped up onto the hill was because the lead Dwarf elements were coming within Boomer range. The first volley removed the leading regiment of Shieldbreakers. |
 |
| Aaand then the Dwarves got a turn. In a never-ending series of hits and wounds, 2 Throwing Mastiffs did something like 11 damage to the Boomers. Then one of the Bombards hit them, and they were gone. Just like that. And with them, the bonus points I was trying to protect. It was all rather rude, really. |
 |
| Meanwhile the battery the legion was taking was taking its toll, and this time they wavered in the face of the enemy firepower. |
 |
| Grokagamok decided to take matters into his own hands and charged the remaining regiment on that side of the field, a slightly damaged group of Ironclads. He mashed them good. |
 |
| Upset at the poor treatment of the nearby Boomers, the Siegebreakers charged the Shieldbreakers. Shields and sieges were broken with gay abandon, but in the end it was a bit much punishment for the Dwarf regiment and they routed. My path to the bonus unit was clear! Pity they would get to charge first... |
 |
| In order to make sure it was only the horde of Shieldbreakers that would be charging my Siegebreakers, the Captain skipped up and charged the Ironguard. He was not expected to do much damage - just hold them up. |
 |
| The following turn looked rather predictable. Importantly though, neither of my units wavered or routed. |
 |
| My wavering Warrior legion had done their best to reform out of sight of the Bombards, but it was not enough. They perished in the following Dwarf shooting phase. |
 |
| The Siegebreakers and Shieldbreakers trading charges. |
 |
| The Army Standard Bearer followed through on his threats to be a nuisance by blocking the charge of the Chariots, and then not having the decency to rout when I hit him. What a waste of a turn. Pesky Dwarf. |
 |
| By this point the Shooters had run out of targets and moved toward the enemy half of the field. |
 |
| The Flame Belcher scorched Grokagamok rather more than was reasonable and he wavered, so was forced to run for cover behind the building. Meanwhile my Siegebreakers were failing in their duel with the Shieldbreakers, wavering before they could land a second charge. That basically spelled doom for them, so I sent the other Siegebreakers into the forest to try to get to the combat (or to the Shieldbreakers once the combat was over). |
 |
| My Captain had a turn where he failed utterly to hurt the Ironguard, at which point it became apparent that he was going to lose that duel. I wanted to keep my Inspiring alive, so fled back over the hill to escape a charge. The Ironguard had to waste a turn climbing the hill to see him. |
It was shortly after this that Staks and I came to the realisation that a unit had to be entirely in the enemy's half of the field to get the points. I had assumed the Ironguard were already in a scoring position, so backing off with the Captain was irrelevant. But when they were locked in their struggle near the centre, I don't think his unit was properly over the line, so was not scoring. So running to save the Captain's life was the wrong call. I should have held position and hoped I could keep them back from my table half. Oh well.
 |
| Blurry blurry. These are the closing moments of my Siegebreakers' resistance. They routed on the next hit. The Shieldbreakers overran, but only went a couple of inches. |
 |
| Another strategic choice. My Siegebreakers had to charge out of Staks' half of the field in order to hit the flank of the Shieldbreakers. But the Shieldbreakers were worth a similar amount and were scoring if they survived. And they were the bonus unit. So them still standing made them effectively worth double. Some very simple math showed it was worth hitting them in the flank and hoping that would be enough to compensate for being Hindered. It was. |
 |
| Staks' final act was one of insolence. My Shooters had run all the way across the field. This was how far they got - out of sight of the Bombards. But the Flame Belcher was still alive, and could see them. In another outrageous display of 4s and 4s, he did 8 wounds and then rolled the 9 he needed to rout my completely fresh horde unit. I was left watching my bonus points going up in flames. Now the only thing I had left scoring was the Chariots (and maybe the Captain - I don't recall). |
So after spending all game looking like I was going to win, we ended up only 10 victory points apart. It was a draw. The Flame Belcher was probably man of the match, although the Throwing Mastiffs had done some ludicrous damage too. Staks' shooting was what had brought him back into the game, but it had nothing to do with the long-range artillery. It was only within 12" that his army really showed its teeth.
Result: 10-10
So in the final wrap-up, I had won 2 games, drawn 2 and lost 3. It was not a terribly impressive performance after a promising start. It left me in 8th out of 14 players, although one had to pull out halfway due to illness (and I only just caught him despite playing 3 more games). My army lists were probably nor perfect, but they generally pushed my opponents and all of the games were good fun. Thanks to all of my opponents, and to AG for making the event happen and keeping it all running smoothly on the day.
Thanks for reading. :)


Really enjoyed out Game. It shall forever be known as "The Grokagam-off"!
ReplyDelete-Ben