
Hello again! It's been a while. I'm afraid that a month of travel has seen me neglect my blogging responsibilities, but as I write this I am on the plane back home, so hopefully I will do better in the immediate future.
Despite my being far from home, my gaming has not been completely on hold. The main reason (excuse?) for this holiday was to go to Poland in order to represent Australia at the European Team Championships (ETC). My carry-on luggage is almost entirely devoted to carting a 2400pt Empire army across the world, and my other bag includes a number of souvenirs from the event such as customised dice from various countries and the odd shirt.
As I write up a report of all my tournaments for the blog, obviously I will be offering one of my experiences of the ETC as well. After all, with 34 teams each consisting of 8 players (and often a non-playing coach as well), the event involved close to 300 people. This makes it far and away the largest tournament I have attended, and probably the biggest I have ever heard of. It would seem a pity not to give something so huge the attention it deserves...
Despite my being far from home, my gaming has not been completely on hold. The main reason (excuse?) for this holiday was to go to Poland in order to represent Australia at the European Team Championships (ETC). My carry-on luggage is almost entirely devoted to carting a 2400pt Empire army across the world, and my other bag includes a number of souvenirs from the event such as customised dice from various countries and the odd shirt.
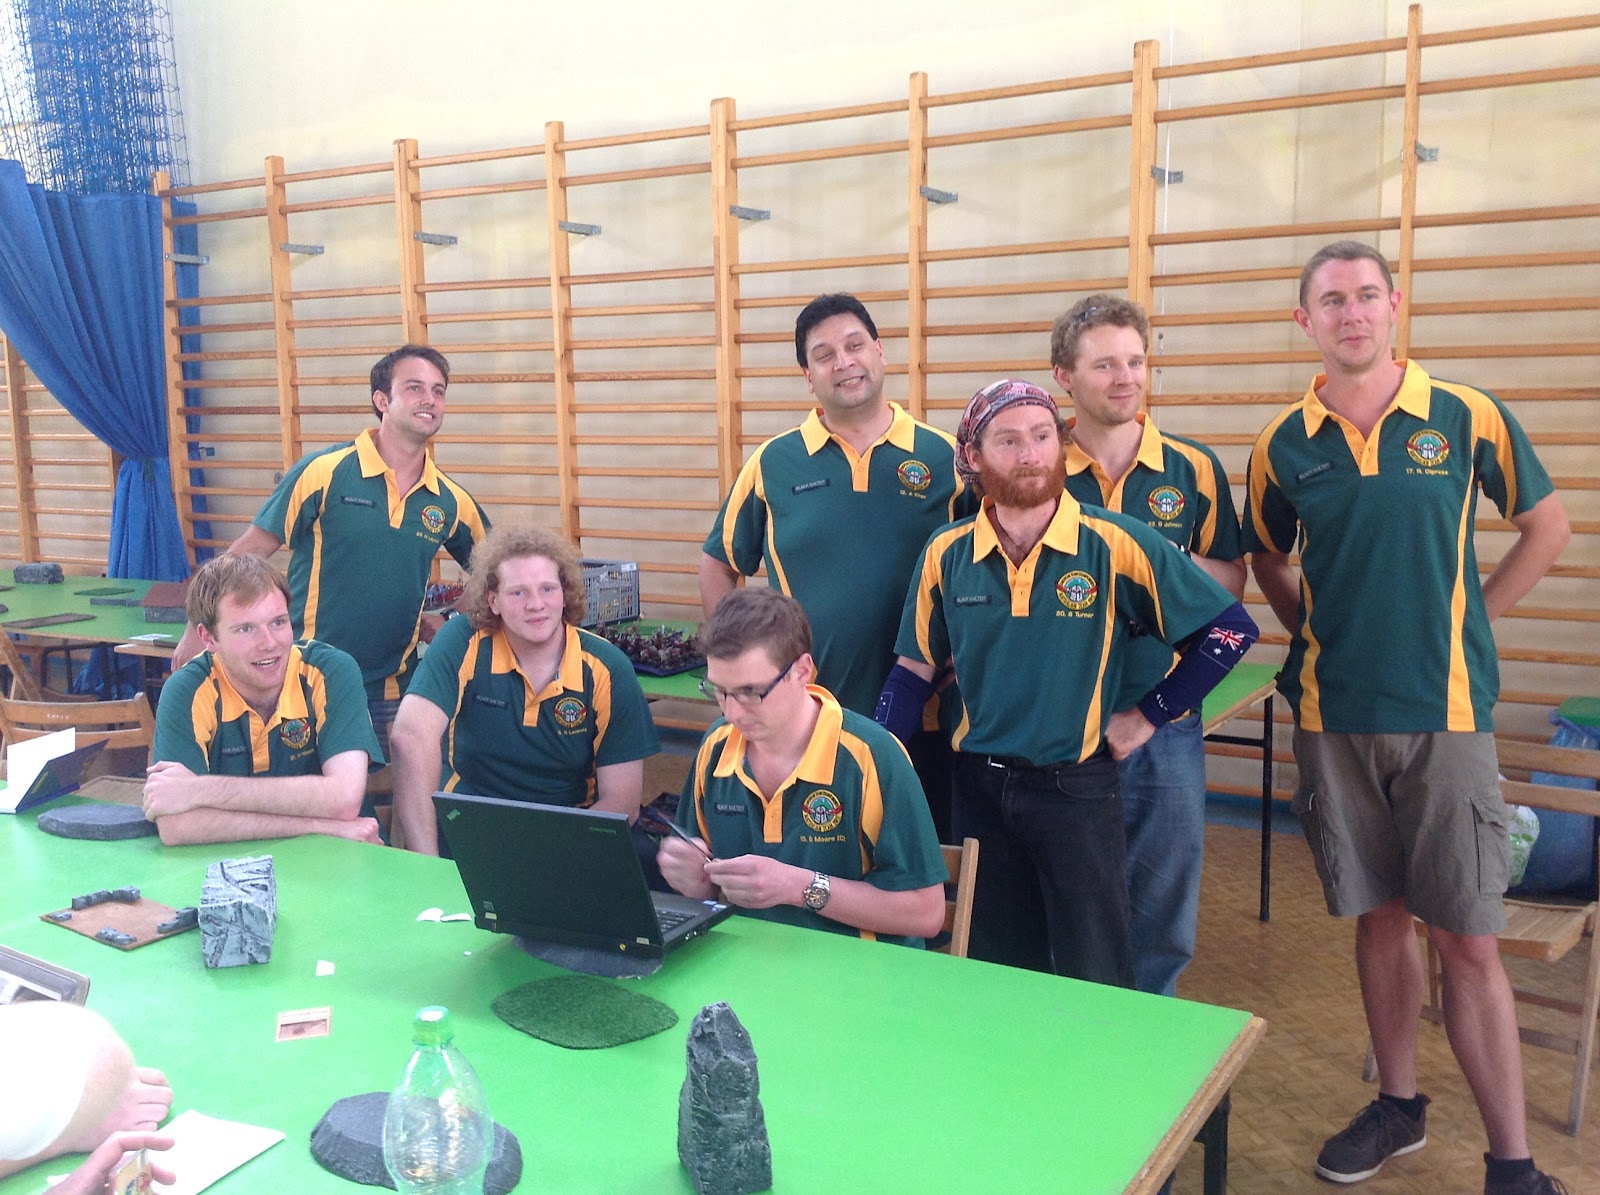 |
| Team Australia. That's me trying to hide behind Simon. Maybe Akhter would have made a better screen... |
The location
I had never been to Poland before and the language remains a complete mystery to me. Gorzów Wielkopolski is not really a tourist hotspot (the town seemed somewhat befuddled by the sudden influx of foreigners), but it's a nice enough place and was close enough to the border that the quickest way to get there was a flight into Berlin and driving across from there.
The tournament venue was in a local school, with the Warhammer Fantasy taking over the gym and having plenty of room. The 40K players were arguably less fortunate, and were hosted in a very large tent outside. Both locations got hot during the day, but it's the price you pay when attending a large tournament in summer.
 |
| The ETC venue for Warhammer Fantasy |
Our accommodation was in a holiday house outside (well outside, as it turned out) of town, a short walk out of a cute little town in the middle of a forest. The house was large, there was an enormous fire pit out the back for people to congregate around, and there was copious firewood. All in all, a pretty good place to hang out.
 |
| Our accommodation. Just below the picture was a large fire pit surrounded by some big bits of wood for seats. |
The rules
For anyone who doesn't know, the ETC is not your average tournament. It is a strange mix of tampered rules, specific restrictions, and impressive organisation. I make no secret of the fact that I dislike it when an event alters the rules, whatever the reasons behind it. In the case of this tournament, units were generally capped at 40 models and 450 points, bonus power and dispel dice were restricted, you couldn't use more than 5 dice to cast a spell (4 for the Lores of Shadow and Death), units conceded half points if they were below 25% strength or fleeing at the end of the game, and the line of sight rules were completely altered (partly to accommodate the "no-frills" terrain and partly to avoid disputes). All games were using the Battleline scenario. "Super spells" like the Dwellers Below granted characters Look Out Sir. No doubt there were other changes, but I don't recall them all. I understand where many of these things come from, but it's not what I want from a tournament and in my opinion it's not really Warhammer 8th edition.
On the other hand, the ETC had an extensive FAQ sheet to supplement those offered by GW, obviously with the intent of intercepting most rules disputes before they began. There was also the "Worst Play" document, which specifically explained a number of shifty ploys used by players and making them illegal for the ETC. I found this impressive, and I know most of us learnt something from reading through these guidelines (even if I have no intention of ever being "that guy" and using such bogus tactics).
When all is said and done, the ETC is trying to provide a relatively predictable, level playing field for everyone who turns up. The end result is not to everyone's tastes, but the intention is there and everyone is playing under the same set of rules.
The pairings
Each country enters a team of 8 players, each of whom must use a different race. At the start of each round, the countries are paired off and then the players within those teams are matched up using an interesting system which is as follows:
1. Both teams select a leading army in secret. Once both are selected, they are revealed.
2. Each team looks at the army led by their opponents, then selects 2 (of their remaining 7) to be matched against that enemy army. So both teams have named 3 armies by this point - the one they led with, and the 2 to match against the opposition lead.
3. The teams then look at the 2 armies that the opposition has offered up against their lead, and choose which one to fight. The rejected army then goes back into the pool. Once this has been done, 2 matches are locked in - each team's lead and their chosen opponents.
4. The process then repeats a couple of times, resulting in 6 matches. At that point you have 2 armies left from each side - one that was rejected from the third round of matchings, and one that wasn't included in that third round. The rejected lists are paired off with the ones that were not offered up to make up the final 2 pairings.
Hopefully that makes sense. If not, you can always have a look at the official player pack here.
The pairing process is a critical element of the ETC, and getting the match-ups badly wrong will pretty much doom a team to failure. Lack of preparation or incorrectly evaluating potential matches can lead to some very unfavourable pairings and leave the players with a mountain to climb if they want to perform well. The exact army composition of every player is made public before the event, allowing teams to try to plan their potential matches in advance. In the lead-up to this year's event, all of the Australian players went through every list and gave them a score, based on how favourable we felt the match-up would be against our army. The scale was effectively as follows:
For anyone who doesn't know, the ETC is not your average tournament. It is a strange mix of tampered rules, specific restrictions, and impressive organisation. I make no secret of the fact that I dislike it when an event alters the rules, whatever the reasons behind it. In the case of this tournament, units were generally capped at 40 models and 450 points, bonus power and dispel dice were restricted, you couldn't use more than 5 dice to cast a spell (4 for the Lores of Shadow and Death), units conceded half points if they were below 25% strength or fleeing at the end of the game, and the line of sight rules were completely altered (partly to accommodate the "no-frills" terrain and partly to avoid disputes). All games were using the Battleline scenario. "Super spells" like the Dwellers Below granted characters Look Out Sir. No doubt there were other changes, but I don't recall them all. I understand where many of these things come from, but it's not what I want from a tournament and in my opinion it's not really Warhammer 8th edition.
On the other hand, the ETC had an extensive FAQ sheet to supplement those offered by GW, obviously with the intent of intercepting most rules disputes before they began. There was also the "Worst Play" document, which specifically explained a number of shifty ploys used by players and making them illegal for the ETC. I found this impressive, and I know most of us learnt something from reading through these guidelines (even if I have no intention of ever being "that guy" and using such bogus tactics).
When all is said and done, the ETC is trying to provide a relatively predictable, level playing field for everyone who turns up. The end result is not to everyone's tastes, but the intention is there and everyone is playing under the same set of rules.
The pairings
Each country enters a team of 8 players, each of whom must use a different race. At the start of each round, the countries are paired off and then the players within those teams are matched up using an interesting system which is as follows:
1. Both teams select a leading army in secret. Once both are selected, they are revealed.
2. Each team looks at the army led by their opponents, then selects 2 (of their remaining 7) to be matched against that enemy army. So both teams have named 3 armies by this point - the one they led with, and the 2 to match against the opposition lead.
3. The teams then look at the 2 armies that the opposition has offered up against their lead, and choose which one to fight. The rejected army then goes back into the pool. Once this has been done, 2 matches are locked in - each team's lead and their chosen opponents.
4. The process then repeats a couple of times, resulting in 6 matches. At that point you have 2 armies left from each side - one that was rejected from the third round of matchings, and one that wasn't included in that third round. The rejected lists are paired off with the ones that were not offered up to make up the final 2 pairings.
Hopefully that makes sense. If not, you can always have a look at the official player pack here.
 |
| Our captain Sam at the keyboard of the Computer of Fate during the pairing process. We used a model from each army to represent us, with those yet to be nominated hiding behind the screen. |
Disastrous - avoid at all costs.
Unfavourable - could be worse, but not good.
Average - could go either way.
Favourable - I have the advantage.
Gimme gimme! - Easy points.
Our team captain, Sam, had brought along a super fancy spreadsheet that looked at all of our assessments and suggested which armies to lead and respond with during the pairing process. This all felt very organised on the day, and it was slightly funny to watch other teams scrambling about with our lists and debating what to offer up whilst we all just sat back and let the computer consign us all to our fates. Little Britain quotes of "computer says 'no'" abounded.
In case you're interested, here is how I scored the 264 armies from the other countries against my own (I don't have the scores I allocated to Team UN on hand, as I marked those later)...
Disastrous = 16
Unfavourable = 64
Average = 152
Favourable = 24
Gimme gimme! = 0
Looking at that, one of 2 things is apparent. Either I was pretty pessimistic about my army's chances, or my list was not ideal for the field. Out of interest, the "disastrous" match-ups correlate closely with the number of Orc and Goblin lists in the tournament, all of which contained 2 Doom Divers, 2 Rock Lobbers and a wall of stuff that carves through armour. Such lists are fully capable of removing my main knight unit and all of my characters in a single volley, so obviously they were to be avoided. For each game, I will include the score I gave the potential match-up, and discuss whether I was right.
For reference, my list was as follows:
Arch Lector on Barded Steed: General, Heavy Armour, Shield,Dragonhelm, Dawn Stone, Sword of Antiheroes, Ironcurse Icon
Wizard Lord on Warhorse: Lvl 4, Heavens, Talisman of Preservation, Dispel Scroll
Captain of the Empire on Barded Steed: BSB, Full Plate Armour, Shield,
Talisman of Endurance, Biting Blade
Master Engineer
13 Knights of the Inner Circle: Standard, Musician, Lance, Shield,
Standard of Discipline
5 Knightly Orders: Musician, Lance, Shield
5 Knightly Orders: Musician, Lance, Shield
4 Demigryph Knights: Musician, Lance, Shield
4 Demigryph Knights: Musician, Lance, Shield
Great Cannon
Helblaster Volley Gun
Helblaster Volley Gun
Steam Tank
The army lists have been pretty much just copied from the master version distributed before the event, so there might be the odd strange abbreviation or translational quirk, but the lists themselves are accurate.
Round 0 (The Ashes): Team England
Jack Armstrong, Lizardmen
Slann: General, BSB, Light, Focus of Mystery, Earthing Rod
Slann: Light, Focused Rumination
Scar Vet: Cold One, Light Armour, Halberd, Luckstone, Dragonhelm
Scar Vet: Cold One, Light Armour, Biting Blade, Dawnstone, Charmed Shield
Skink Priest: Lvl 1, Heavens, Cube of Darkness
21 Skink Cohort: Musician
24 Skinks / 3 Kroxigor: Musician
24 Skinks / 3 Kroxigor: Musician
10 Skink Skirmishers
10 Skink Skirmishers
10 Skink Skirmishers
5 Chameleons
5 Chameleons
5 Chameleons
3 Terradons
3 Terradons
2 Salamanders: 6 Handlers
My score for this army: Average
Tradition dictates that on the day before the ETC proper commences, Australia and England play a single round of matches against each other in "The Ashes" (a reference to the century-old cricketing rivalry between the two countries - no gaming material was burned in the naming of the ETC rivalry). The pairings are done properly, and once the scores of all 8 games are tallied up, the winner takes home bragging rights and little else. I don't believe Australia has ever won The Ashes before, and last year we were destroyed 7-0 (with one draw) in a very one-sided affair. Hopefully we could put in a better showing this year.
 |
| The pairings under way as The Ashes kick off |
 |
| The table layout for my game against Jack in The Ashes. I deployed on the bottom edge. |
I got the first turn and obliged Jack by charging the Demigryphs on my left into a Chameleon unit, which held and died. I chickened out on the overrun into a Kroxigor block because the other unit would have flanked me, and I didn't think my Demigryphs could take the punishment. I moved up to support with my main unit to the right and the small Knight unit to the left. Jack then declared a charge on the Demigryphs with both Kroxigor units, but only one made it. The other stopped with its flank facing my main unit, but some Skinks moved up to sacrifice themselves and prevent that being an issue. Those small units deployed to my right (Terradons, more Skinks) started shifting to the other side of the table as I swept toward them and fired ineffectually at the Terradons with the Steam Tank and Cannon (they were utterly useless all game - simply couldn't make the distance with the shot and bounce). My Volley Guns had started walking slowly toward the centre in the hope of extending their influence and actually getting a shot at something.
 |
| My Demigryphs engage as Daemons and Vampire Counts face off next door |
The Knights who had intended to support the Demigryphs (only to see them smacked about by the Kroxigor) managed to make a long charge into the flank of a Skink unit containing the Shaman, right in front of the Slanns' bunker behind the hill. This could have been decisive, however with only 3 Knights able to reach and me unable to roll dice, I barely won combat and he was never going to break right in front of the general and BSB. I then found myself rear-charged by one of the Scar Veterans (who decided he had to salvage a bad situation). I fought for a couple of rounds before breaking, and managed to scarper through the Skink lines into a gap in Jack's backfield. Unfortunately the Scar Veteran eventually caught up with me and finished the job.
The other Scar Veteran survived a couple of nervous moments as both Cannons aimed at him, before joining the Kroxigor unit in a charge on my remaining Demigryph unit, which had moved into the centre. Augment and hex spells flew all over the place, however my Wizard got overzealous and vanished in a mushroom cloud (along with several of my Knights) during one attempt. The Demigryphs ended up losing the combat and breaking on marginal leadership, and with a massive pursuit roll it saw the Scar Veteran and Kroxigor unit head into my advancing Volley Guns, as well as the Steam Tank and Cannon. I think the Steam Tank survived and killed most of the Skinks, but that was meaningless - I wasn't doing any damage (or at least, not enough to get any points).
My main Knight unit (depleted as it now was thanks to the dearly departed Wizard Lord) had been poised menacingly when the Demigryphs were still around, however their departure saw the unit in a hopeless situation. Jack had 4 or 5 units around me - more than enough to declare 2 flee reactions in response to a redirected charge, and still keep me away from the Slann. At the end, in desperation after wearing a whole lot of magic and shooting, my BSB, Arch Lector and one remaining Knight charged into an obvious trap of a unit of Terradons with Kroxigor waiting on one flank and a Scar Veteran on the other. I was able to wear the counter-charge without losing the vital wounds and preserved some points, but the game was lost.
Result: 1-19
This was a pretty bad start to the event, really. A couple of things had gone slightly wrong and I'd gone belly-up and conceded an almost whitewash result. I was torn as to how much I had gotten wrong. Looking at Jack's list, I figured I had several units he simply couldn't take in combat. I hadn't fully considered the Kroxigor units' immunity to Stomp, nor the impact of Speed of Light on how the combats would go. Even then, I figured if I could get the main unit into the fray, I could punch through and threaten the Slann, which would have changed things massively. In the end though, it was a couple of marginal combats and the loss of the Wizard that really saw my game collapse. Jack did play the game better than me, out-deployed me, and then probably had the luck I didn't (but to no great extent). I still don't think he would have felt comfortable throughout the game, even if the final score suggests otherwise.
What I did definitely do wrong was expose myself to the possibility of a major defeat. I had decided to push for a win against an army where I thought I could weather the damage it put out, and it meant that when things went pear-shaped, I was exposed and lost badly. This is really a no-no in the ETC, even if it's generally in my nature as a player.
The full extent of my folly was made clear when the final results of The Ashes were revealed. I think we had lost by 13 points overall, as several of the guys had exceeded expectations and pulled out good wins. Unfortunately I was one of three 19-1 losses that offset their heroics, and we went down overall. If I had played ultra-conservatively, I think we might have been looking at a 10-10 draw - and an 18 point swing that would have seen us win the match.
Round 1: Team England
Jack Armstrong, Lizardmen. Again.
Day 1, round 1, and we find ourselves matched up against... Team England. As it turns out, this was not entirely chance. Due to some miscommunication, both our teams turned up late, so ended up being shuffled up against each other to allow the other teams to prepare properly. Fair enough, but slightly funny. We were late because we were busy eating cupcakes, baked by Gareth from the Bad Dice podcast who had decided to sleep on the floor of our accommodation. Bad Dice, good cupcakes...
 |
| Check it out - these cupcakes will magically make you late. |
 |
| The pairing process begins once more |
 |
| The table for Round 1, with me at the bottom |
Unnerved by the impressive speed of my Steam Tank, Jack moved up a sacrificial unit of Skinks to buy time whilst his Kroxigor unit moved to receive the oncoming cavalry. A large amount of his chaff swept around my left of the house, which at the time didn't overly concern me, probably because I am stupid (or forgot the rules about the Terradons being able to fly straight over the heads of their friends and into forests without penalty - half of which are basic rules in the game of Warhammer). I then wasted my Dispel Scroll protecting the Engineer from Banishment because the house (and therefore the Slann) was just within 24". Not good. The Salamanders and Skinks scurried out from behind the big rock and around behind my advancing line of cavalry - I had basically decided to ignore them in the interest of getting to the army proper - there was only a Cannon back behind me there anyway.
 |
| My forces move in |
In Jack's turn, the Terradons charged the nearest Volley Gun, which was only 17" away (but I had been too blind to notice). The Skinks behind my line sauntered up and did at least 4 wounds to the Cannon with a toxic volley. I lost the second Volley Gun and the Engineer to magic, and the Kroxigor led by one of the Scar Veterans charged the Steam Tank to pin it in place in case the Engineer ever worked out how to operate it again (at least, I think that's how the engagement in the centre began).
In my turn I charged around the Steam Tank and into the Kroxigor with the main unit, but I think I killed 3 more Knights my riding into potholes hidden by the field they were fighting in. The Demigryphs charged the flank of the unit as well, and I proceeded to win the combat handsomely for a couple of rounds until Jack failed the Steadfast test due to the Slann being unwilling to advance from the house to improve his chances.
 |
| The central area where the key fights were played out |
The end game saw the shattered remains of my main unit receive the charge from the Kroxigor, hold and then watch the now-crippled Steam Tank plough into the side of the enemy only to be denied the victory by Steadfast. The Wizard Lord cast Harmonic Convergence irresistibly again and killed the Arch Lector and the remaining Knights, whilst the Kroxigor came dangerously close to losing Steadfast without it actually happening - so they held until the end. I had lost my general, my main unit, all the artillery and perhaps the odd other thing, and the damage I had inflicted in return was not enough. I had lost again.
Result: 4-16
This game was frustrating. My indecision between attacking and defending made a mess of my game, and in the end I played pretty poorly at times. I had done considerably more damage than in the previous game, but the loss of full points for the general and my main unit was nasty, and the artillery added up. In hindsight, I made a couple of bad mistakes - the deployment of the Volley Guns in my attempt to bring them into the game, and the decision to really attack at all. In the previous game I had a chance to get to the Slann if things went well. However, the presence of the building in this game really made that impossible and I should have realised this and played for the draw.
In the end the team went down marginally worse than the prescribed limit of a 60-100 loss (it's capped to prevent blow-outs from ruining the competition, I think), which means that was the result that went into the books.
Round 2: Team Serbia
Darko Stojanovic, Dwarf
Dwarf Lord on Shieldbearers: general, GW, Runic Talisman: MRo Spite, Runic Armor: MRo Steel + Ro Stone + Ro Resistance
Thane: BSB, GW, Crossbow, Runic Talisman: Ro Furnace, Runic Armor: MRo Gromril + Ro Resistance + Ro Preservation
Runesmith: Shield, Runic Talisman: Spelleater rune + MRo Challenge
Runesmith: Shield, Runic Talisman: Spelleater rune
Master Engineer: GW, Pistol, Runic Armor: Ro Stone
20 Quarreler Rangers: Standard, Musician
24 Logbeards: FCG, GW, Runic Banner: Ro Courage
24 Hammerers: FCG, Runic Banner: MRo Grungni
Canon: Ro Forging + Ro Burning
Grudge Thrower: Ro Accuracy + 2x Ro Penetrating
Grudge Thrower: Ro Accuracy + Ro Penetrating + Ro Reloading
Organ Gun
My score for this army: Average
So we hadn't started the tournament the way we would have liked, but there were still 5 more rounds to go. Plenty of time to redeem ourselves. Our next opponents were Team Serbia, who had come fresh from a similar drubbing at the hands of Team New Zealand.
 |
| Team Serbia during the pairing process. |
I was drawn against Darko, the Serbian Dwarf player (closest to the camera in the shot above). As with all the Dwarf lists at the event, this was basically a gun line (though capped from being too over the top by the artillery restrictions on army selection). This one was actually unusual, in that it didn't include an Anvil of Doom.
Darko deployed as tightly into the table corner on my left as physically possible, giving him one of the smallest deployment footprints I have ever seen. The Hammerers were in the centre of the triangle, offering 5+ ward saves against shooting for everything within 6" of their banner (ie, every Dwarf and war machine in the army). The Longbeards were to my right of the Hammerers, whilst the Rangers placed themselves immediately in front of the Organ Gun on my left table edge when the time came.
For my part, I had basically written the Volley Guns off as useless for the game. They went behind the hill, shielding them from dropping cheap points to the Dwarf artillery. The Cannon went over on my left, taking its chances with the Dwarf guns in order to try to contribute with the help of the Engineer. I put Knights and Demigryphs on my left table edge, with the main Knight unit going to the right of the forest and the other Knights and Demigryphs going wide right, behind the hill in case the Rangers thought they were going to be funny (which they obviously didn't - Dwarfs lack a sense of humour). The Steam Tank also started behind the hill to save it from a turn of enemy shooting.
 |
| The table for Round 2. As always I deployed down the bottom. I had to turn it upside-down to achieve this, but you get the idea. |
For my part, I had basically written the Volley Guns off as useless for the game. They went behind the hill, shielding them from dropping cheap points to the Dwarf artillery. The Cannon went over on my left, taking its chances with the Dwarf guns in order to try to contribute with the help of the Engineer. I put Knights and Demigryphs on my left table edge, with the main Knight unit going to the right of the forest and the other Knights and Demigryphs going wide right, behind the hill in case the Rangers thought they were going to be funny (which they obviously didn't - Dwarfs lack a sense of humour). The Steam Tank also started behind the hill to save it from a turn of enemy shooting.
 |
| Round 2 deployment. The Dwarfs are those tiny specks in the distance, over in the corner of the table... |
My plan for the game was pretty simple - I didn't think I could out-shoot the Dwarfs, so I would need to engage and try to make up points in combat. Darko got the first turn and didn't really move, other than edging the Hammerers forward slightly into the forest. He fired the Cannon and both Grudge Throwers at my Cannon, but despite wounding it twice, managed to roll a 1 both times for the number of wounds inflicted - I survived! In fact, he did the same thing the following turn when he shot my Steam Tank with the Cannon - just 1 wound came off it. I admit, I was impressed. In return, my Steam Tank and Cannon managed to comprehensively out-shoot the Dwarf artillery over the next couple of turns, removing both Grudge Throwers and the Cannon. Darko stubbornly refused to pass any 5+ ward saves for his Master Rune of Grungni, and suddenly I found myself with the advantage in firepower. However, by this point I had advanced most of the way across the table, and the plan of engagement still seemed worthwhile, so I pressed on.
I lost the Demigryphs on the left flank to the Master Rune of Challenge - 2 had been shot, a third died by riding into a tree whilst charging, and the last one was turned into an icky paste by the Hammerers once he arrived. After the first round of shooting, the Quarreler Rangers reformed deep as my forces approached, and in the third turn I charged them with my main unit. I moved the small Knights on the left over into the forest to block the counter-charge from the Hammerers, or at least I believed I had. The rest of my forces were yet to make contact, but the Longbeards near the centre ended up charging the Steam Tank which had nearly made it to them the previous turn.
My Inner Circle Knights outfought the Rangers comprehensively in combat (who were hexed by Iceshard Blizzard, just to be sure things went my way), but they were Steadfast and right next to the general and BSB, so they couldn't possibly break. Could they? Well, apparently they could, thanks to the -1 Ld from the spell. They turned and ran, and the Knights ran them down and carried on into the Organ Gun immediately behind. Things were going unbelievably well.
At this point I failed to stick to my guns and let Darko do something that (as it turns out) I should not have. He believed that his Hammerers could contact the corner of my main unit despite the Knights in between (which was true). However, I had believed that being in combat, he couldn't force me to align to him and the charge would fail. After a discussion (and knowing that this was the notorious "finagling" part of the rules), I decided to let him charge and engage both the Inner Circle Knights in the flank, and the small Knight unit in the front. I found out later that the ETC had made a specific ruling on this in the FAQs, stating that you couldn't force an engaged unit to align to you. But that was my fault for not looking it up. I also felt the unit could probably withstand the Dwarfs for long enough for help to arrive (the Arch Lector was on the side, blocking most of the Hammerers and the Lord from reaching the rest of the unit), so it didn't seem like that big a deal.
In addition to all that, the Master Engineer was busily taking all sorts of Slayer oaths on account of the abysmal performance of his artillery, and charged into the front of my unit alongside the Organ Gun. His presence turned out to be important, actually. I killed the Organ Gun, and over a couple of rounds I also managed to kick the Runesmith in the Hammerers to death with the horses of the regular Knights (more good rolling on Darko's part; 3+ with a parry? Why would you want to pass that?). My Arch Lector was scything through the Hammerers reasonably well thanks to his Sword of Antiheroes and the presence of several characters, and I didn't lose combat by much at all. My BSB accepted the challenge of the Dwarf Lord, as he was basically unkillable and it would have been a waste of my Arch Lector's sudden capacity for doing damage.
The presence of the Master Engineer in my front prevented me from reforming to face the Hammerers, which was unfortunate. Worse though, I had forgotten that he was a character. So my Arch Lector should have been putting out a whopping 6 Strength 8 attacks! That would have easily been enough to cut down the Dwarf BSB, but I realised this too late and missed my chance. After narrowly losing on or two rounds of combat, my BSB died to the Dwarf Lord, losing me my Hold the Line! 3D6 break tests. My Arch Lector fluffed in the same round, the remaining regular Knights all died, and I lost combat badly. My unit broke and fled, just as help was about to arrive in the rear of the Hammerers. With them, my unit took all of the advantage I had gained thus far in the game. A few silly mistakes, eh?
The Longbeards had done some damage to the Steam Tank over a few rounds, however they quickly found themselves flanked by the Demigryphs that were sweeping around from my right, and were beaten down to the point where they lost Steadfast, broke and were ridden down. This had put the Steam Tank and Demigryphs within reach of the Hammerers, before they broke and chased my big unit. As it was, the Steam Tank still managed to plough into the back of them, however it lost 3 wounds by charging through the forest, leaving it with only 2 when it arrived in combat. It killed 10 Hammerers on the charge, leaving only about half a dozen to accompany the Lord and BSB. I was close to cutting the Stubborn from the unit. My final actions were to charge the remaining small Knight unit into the front of the Hammerers as they turned to face the Steam Tank, and my Demigryphs into the flank. If they could do just a few more wounds, I could wipe the stunties out...
In an heroic display the Steam Tank generated 3 steam points despite being on 1 wound, and I was rewarded with it only losing the ability to use its steam turret that turn. I ran over a few Dwarfs and the Knights killed another, but in the end there were 2 Hammerers left and the Lord finished off the Steam Tank. I had won combat, but they were never going to break and the game was over.
 |
| The Empire advances |
My Inner Circle Knights outfought the Rangers comprehensively in combat (who were hexed by Iceshard Blizzard, just to be sure things went my way), but they were Steadfast and right next to the general and BSB, so they couldn't possibly break. Could they? Well, apparently they could, thanks to the -1 Ld from the spell. They turned and ran, and the Knights ran them down and carried on into the Organ Gun immediately behind. Things were going unbelievably well.
At this point I failed to stick to my guns and let Darko do something that (as it turns out) I should not have. He believed that his Hammerers could contact the corner of my main unit despite the Knights in between (which was true). However, I had believed that being in combat, he couldn't force me to align to him and the charge would fail. After a discussion (and knowing that this was the notorious "finagling" part of the rules), I decided to let him charge and engage both the Inner Circle Knights in the flank, and the small Knight unit in the front. I found out later that the ETC had made a specific ruling on this in the FAQs, stating that you couldn't force an engaged unit to align to you. But that was my fault for not looking it up. I also felt the unit could probably withstand the Dwarfs for long enough for help to arrive (the Arch Lector was on the side, blocking most of the Hammerers and the Lord from reaching the rest of the unit), so it didn't seem like that big a deal.
 |
| The pivotal combats |
The presence of the Master Engineer in my front prevented me from reforming to face the Hammerers, which was unfortunate. Worse though, I had forgotten that he was a character. So my Arch Lector should have been putting out a whopping 6 Strength 8 attacks! That would have easily been enough to cut down the Dwarf BSB, but I realised this too late and missed my chance. After narrowly losing on or two rounds of combat, my BSB died to the Dwarf Lord, losing me my Hold the Line! 3D6 break tests. My Arch Lector fluffed in the same round, the remaining regular Knights all died, and I lost combat badly. My unit broke and fled, just as help was about to arrive in the rear of the Hammerers. With them, my unit took all of the advantage I had gained thus far in the game. A few silly mistakes, eh?
 |
| The Demigryphs rescue the Steam Tank, whilst the Volley Guns continue their fruitless trudge across the field, looking for a target. |
In an heroic display the Steam Tank generated 3 steam points despite being on 1 wound, and I was rewarded with it only losing the ability to use its steam turret that turn. I ran over a few Dwarfs and the Knights killed another, but in the end there were 2 Hammerers left and the Lord finished off the Steam Tank. I had won combat, but they were never going to break and the game was over.
 |
| The closing moves of Round 2. Last stand of the Hammerers. |
In the end the game was a draw - a hideously bloody draw. The Dwarfs still had their Lord (who was wounded), BSB, Master Engineer and 2 Hammerers. I had a unit of Demigryphs, a couple of Knights, and my war machines and Engineer. There were few survivors, but the toll had been roughly equal. As it turned out, the gamble with charging the Steam Tank into the Hammerers had not worked out - I had gained half points for the unit, but surrendered full points for the Tank, which was worth more. Of course, my Engineer did have specific instructions to drive around the big tree rather than through it (mostly killing his Steam Tank in the process), so I guess I can blame him. Maybe. Nah, it was my fault. I had that game where I should have won it, and I blew it.
Result: 10-10
Overall the Australians won the match against the Serbians, 92-68. I guess you could conclude that I had lost us 8 battle points for the round (at which point we would have hit the 100 point cap) by not following through and consolidating after my strong start.
So at the end of day 1, Team Australia was sitting pretty close to the middle of the field after a bad loss and a decent win, and this was despite my modest contribution of 14 of a possible 40 battle points thus far. Hopefully I could do better on day 2...
No comments:
Post a Comment