Cancon is over for another year, and I have survived my first foray back into the depths of 6th edition Warhammer Fantasy. As usual, I distracted myself by taking photos during all of my games, so here we are with another series of battle reports.
Prior to the tournament, I played a total of 4 games of 6th edition to test out a few potential armies, and to get some handle on the rules again. One of those games was with Dwarfs, so I was confident of my complete mastery of the army when I decided to take it to the tournament.
Initially I had dismissed Dwarfs as an option, figuring that they would be a pretty static, depressing army to play. There's a reason why most Dwarf armies you see end up in a castle formation with plenty of ranged firepower - they don't have a lot of choice. But then I realised the Anvil of Doom was a viable option to help the Dwarfs pull off some charges of their own, and decided it was a good opportunity to use the one I painted in the Slow Grow last year. In the end, this was my list:
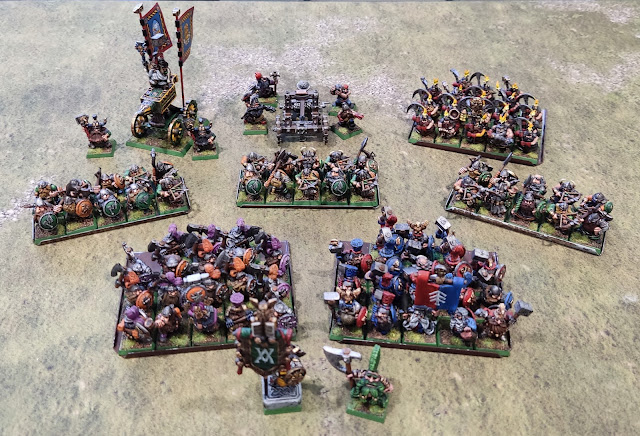
- Runelord on Anvil of Doom with Master Rune of Balance, Rune of Stone, Shield, Great Weapon
- Thane with Battle Standard, Master Rune of Gromril, Rune of Resistance, Rune of Cleaving
- Dragon Slayer with axes, wearing pants (so more than some Slayers)
- 10 Quarrellers with Great Weapons
- 10 Quarrellers with Great Weapons
- 10 Quarrellers with Great Weapons
- 18 Hammerers with Shields, Full Command, Rune of Courage
- 18 Ironbreakers with Full Command, Rune of Courage, Ancestor Rune
- 18 Miners with Full Command, Steam Drill
- Stone Thrower with Engineer, Rune of Accuracy, Rune of Penetrating
The list was based around the principle of a couple of "anvil" units capable of receiving a charge, and the Quarrellers with great weapons being ready to flank or counter-charge once things got close, probably with the assistance of the Anvil of Doom. The Miners were obviously also hoping for some help charging as soon as they appeared behind the enemy. So the Anvil had some work ahead of it, provided it didn't mess up its 2+ rolls.
I felt the amount of shooting was relatively modest for a Dwarf army - one piece of upgraded artillery, and 30 crossbows. The Anvil could lend a hand too, hitting and slowing a unit each turn until the charging became relevant. As it turned out, the TOs considered asking me to change the list due to the amount of shooting. They mainly thought it was a lot of crossbows, and to be fair, the entirety of my Core had been spent on them. I did try playing around with variations on the list, but they all felt like they made the army less functional, and honestly I didn't really expect 30 crossbows to do much damage against most opponents - I hoped it might be enough to deal with some light distractions, and mainly be enough of a threat to make people move forward and engage me. In the end they had given me the green light to stick with things as they were, so in the absence of anything I would be as happy with, I just went with it. I didn't expect the army to do especially well as it was, and didn't think my shooting would be enough to make anyone really miserable.
The tournament somehow managed to attract 50 players, which is an awful lot for a game that has been dead for 16 years. Every army except Chaos Dwarfs made an appearance, along with a number of variant Storm of Chaos and "back of the book" lists like Sylvanians, Errantry War and Blood Dragons. There were 5 Dwarf armies, which was the most with the exception of Vampire Counts (if you counted the variant lists). It was a pretty good mix, although it offended my hipster sensibilities to be using one of the most popular armies. Oh well.
The event was a very gentle 4 games spread over 2 days - a far cry from the old hectic Cancon marathon of 8 games over 3 days. It lent things a more relaxed vibe, although in all honesty I could have handled another game given it was all I had signed up to do when we were up in Canberra. But more games squeezed in probably would have made things feel more like serious business, and I don't think that was the goal. Nor am I convinced I really wanted that either.
Game 1 - Outflank
Angus Mackie - Dogs of War
- Mercenary General with Sword of Might, Heavy Armour, Enchanted Shield
- Paymaster on Barded Steed with Heavy Armour, Shield, Lance
- Hireling Wizard (Level 2, Lore of Heavens) with 2 Dispel Scrolls
- Mercenary Captain on Pegasus with Heavy Armour, Shield, Lance
- 23 Pikemen with Heavy Armour, Full Command
- 9 Voland's Venators
- 11 Crossbowmen
- 5 Light Cavalry with Spears
- 5 Light Cavalry with Spears
- 8 Duellists
- 13 Long Drong's Slayer Pirates
- 3 Ogre Leadbelchers
- 2 Ogre Maneaters with Great Weapons
- Cannon
- Halfling Hot Pot
Angus' whole army was painted in fancy non-metal style. It was very nice.
First up I would be fighting a Dogs of War army that seemed to mainly consist of lots of small units. The table was littered with impassable rock pillars. I won the roll-off to select sides, and figured the side with the trees would probably be marginally better, but couldn't be bothered moving. I then set about deploying all my units 5 wide, including my Quarrellers. I had pretty much finished deploying when I suddenly remembered half of them would be unable to fire. I had stuffed up. Oh well, there was always going to be some rustiness.
The scenario was "Outflank". Deployment zones were 14" deep instead of 12", and at the end of the game the player with more units with Unit Strength 5 that were entirely in the enemy's deployment zone got a bonus 450 victory points.
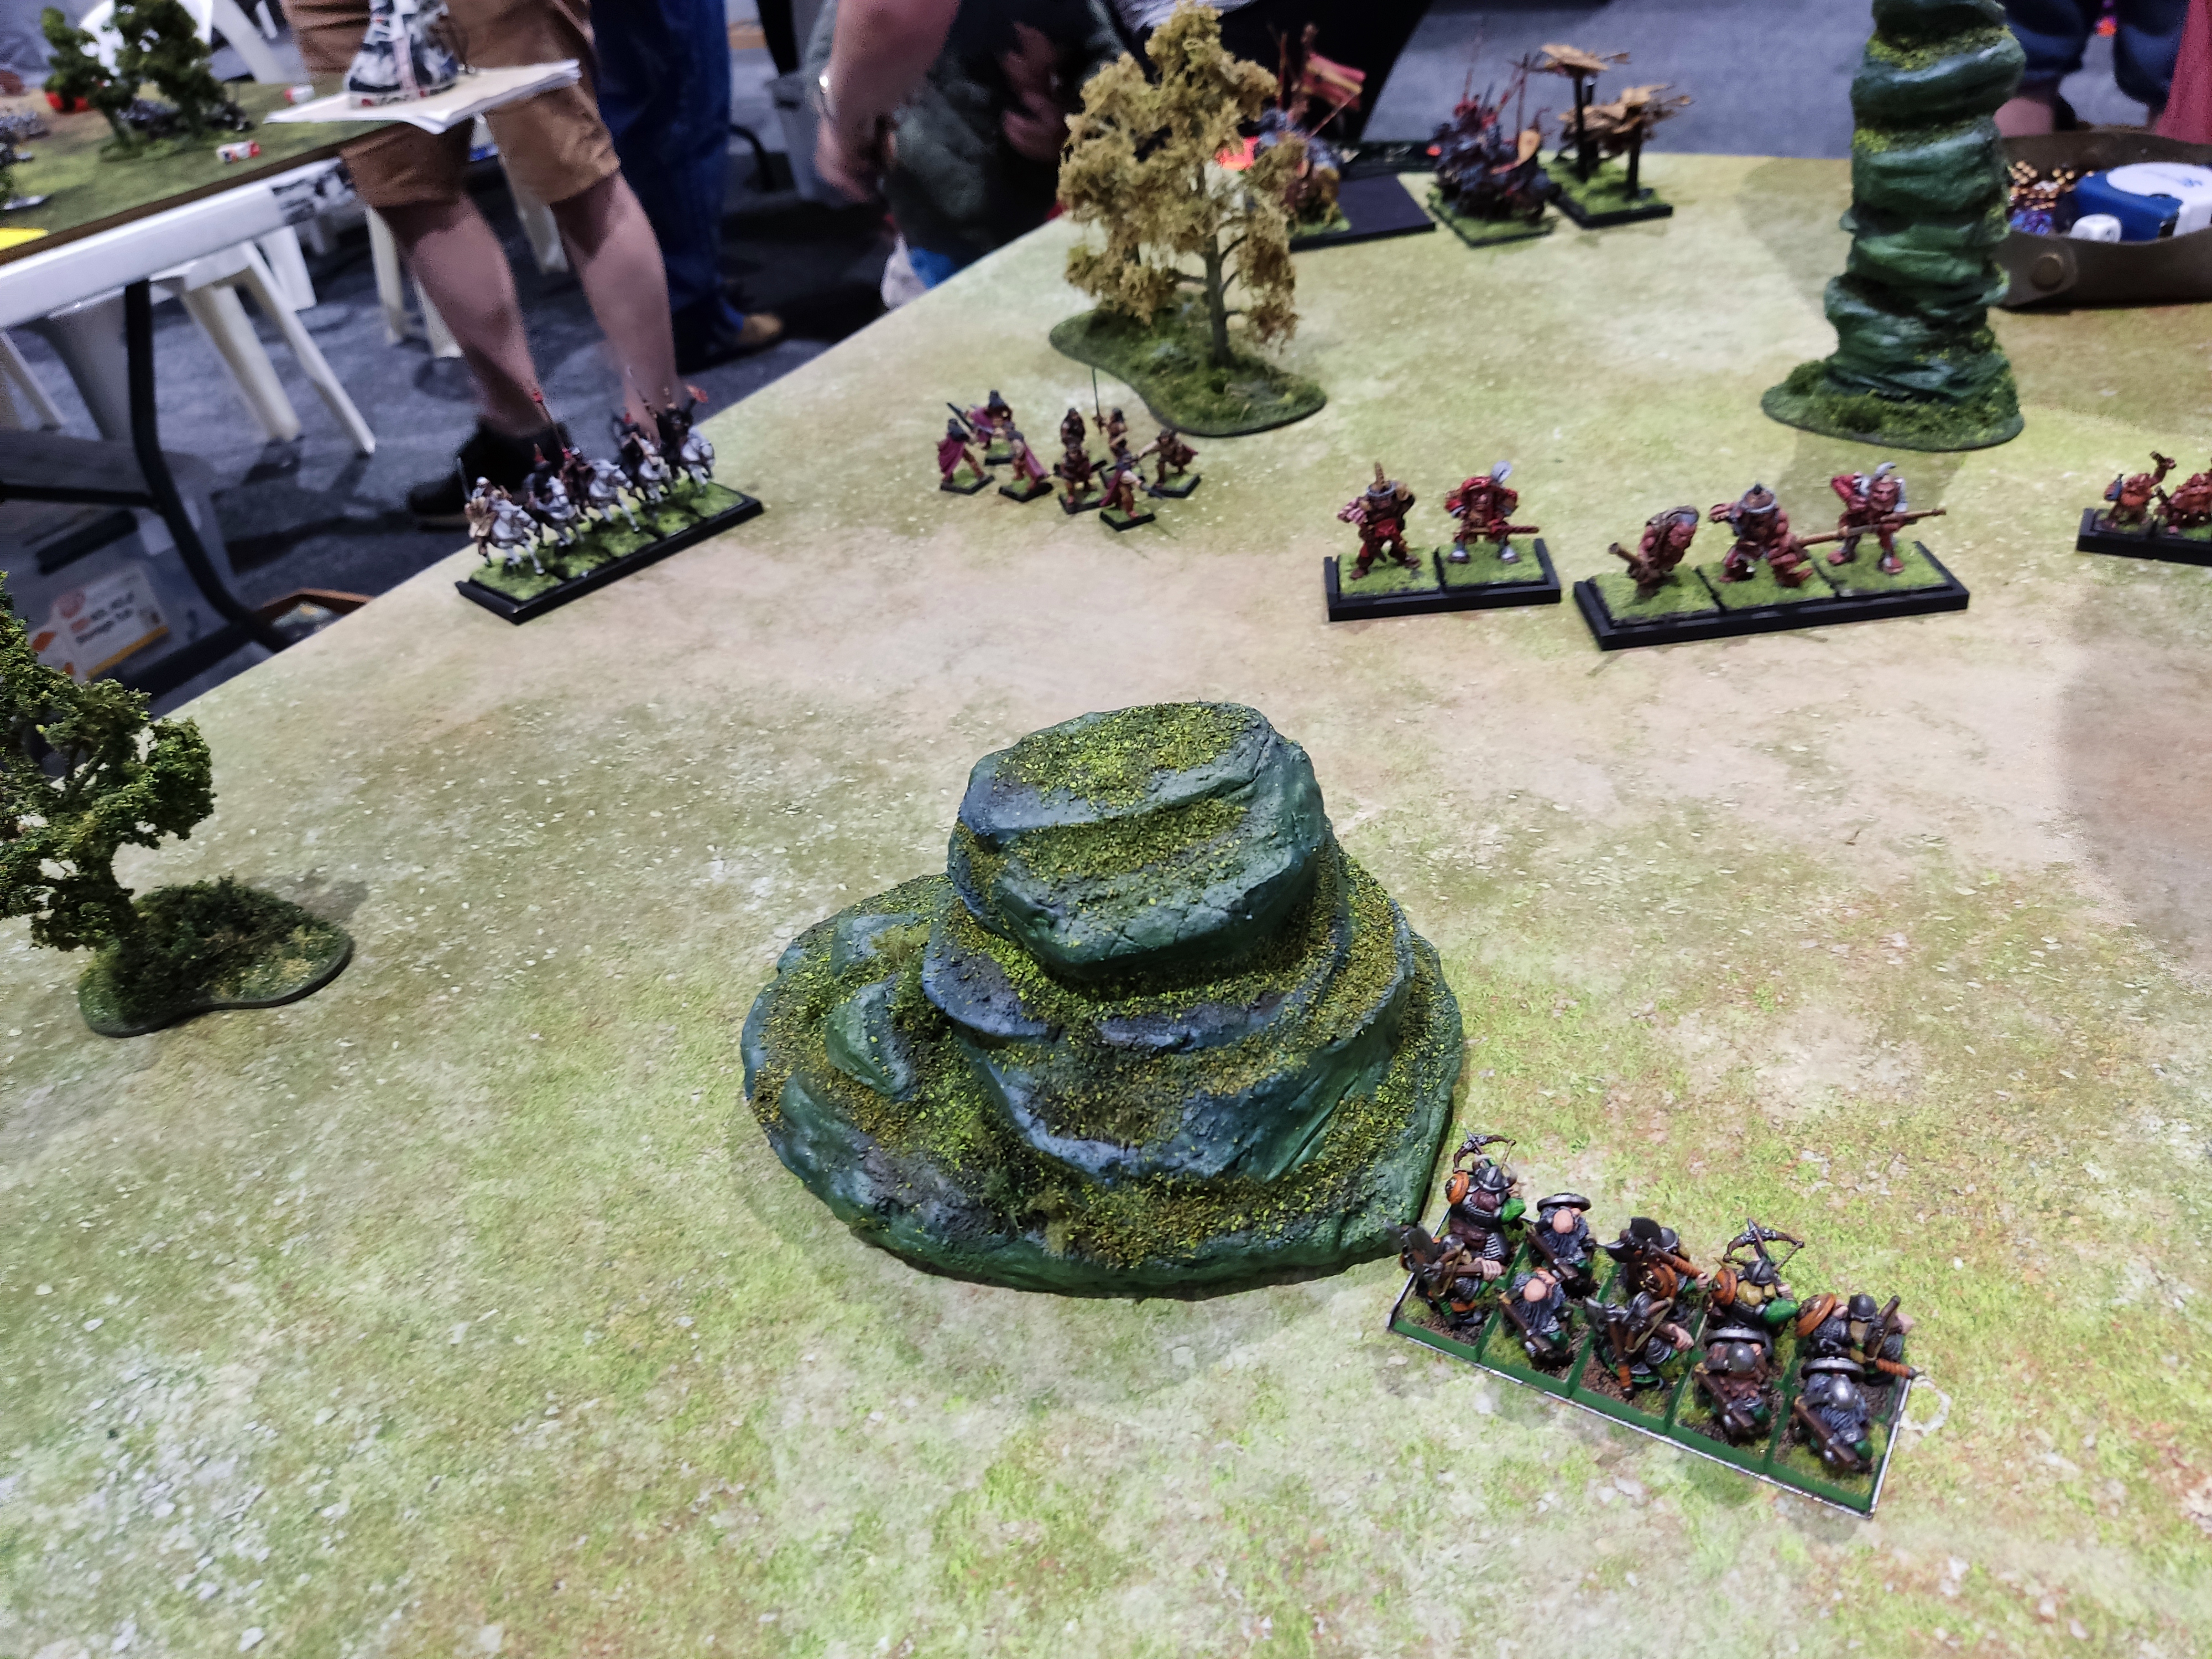
Still deploying, but you can see there were lots of rocks all over the place. I figured I could shield my flanks with them a bit. Pity about the stupidity with the Quarrellers. They could all have been wider there.
The Dragon Slayer commences the tournament by trying to pick a fight with a very large rock. Maybe it was a golem or something. You can never be too careful.
Some time after I finished my deployment, Angus eventually finished putting stuff down as well. It was a long thin line, with more shooting than you might at first have assumed.
Light Cavalry lurked on either flank. The Wizard is hiding here in the trees (he would never move all game), and the Duellists are behind the forest.
The Slayer Pirates got the memo that my Quarrellers obviously missed, deploying in a long thin line so they could all fire their pistols at whatever came within range. The Crossbowmen are there next to them, in the other forest.
The miners were tunneling, and with the +1 for finishing deployment first, I managed to get the first turn. I commenced the game with admirable good fortune. I fired the Stone Thrower at Voland's Venators, landed it smack in the middle, and wiped out half the unit. The unit then panicked and fled the field, taking the enemy Paymaster with them! Near as we could tell, this didn't mean the whole army had to take panic tests, as the Paymaster was not actually slain. That could have resulted in the whole game being a bit of a non-event, so was probably for the best. It was still a great start for me. I also picked off the Light Cavalry on that flank, mainly thanks to the Anvil hitting them pretty hard. The Pegasus Captain didn't seem to care (he passed his panic test), but that flank was really up to him now.
I moved forward with my combat units, as the enemy centre looked pretty manageable. The Quarrellers in the centre commenced trading shots with the Crossbowmen in the forest (a fight they'd have been unlikely to really win, even if they were all firing), whilst the other unit's shots bounced off the Leadbelchers.
The Dogs of War advanced toward the Dwarf lines, particularly on my left flank. Both the Leadbelchers and Slayer Pirates could shoot, but they were not yet in range and wanted to address that problem. Something told me I was going to have difficulty keeping some of the units on the extreme flank out of my deployment zone. I just didn't have enough units to go around. Or maybe I had deployed badly. Maybe both!
My left flank looks a lot less under control than my right...
The Pikemen (including the enemy General) advance toward the Ironbreakers, whilst the Slayer Pirates scurry forward with their pistols at the ready. Pistols don't shoot far, but they still shoot further than a Dwarf can charge. How unsporting!
The Pegasus moved up on my right flank, making use of the rocks as cover.
In my second turn the Miners arrived, walked onto the field, and then used assistance from the Anvil to charge unto the Halfling Hot Pot.
Sneaky underground Anvil attack!
Wait, what? How are we still here? What was meant to be an easy overrun toward the Crossbowmen was undermined when one Halfling survived and then rolled double 1s to pass his break test. Serves me right for being too lazy to rearrange the unit 4 wide when I deployed them. So now here we are, lapping around to ensure a single Halfling doesn't defy us again...
I got lucky again with my shooting this turn, picking off one of the Leadbelchers and sending the rest fleeing. They never rallied. I think they failed 3 times before eventually making it off the field. Honestly, that roll with the Halfling Hot Pot was probably Angus' only decent leadership roll all game.
Before the demise of the Leadbelchers, I had spent a fair bit of time trying to work out what to do with the Hammerers. They were advancing into the teeth of the enemy shooting, with Ogres menacing their flank. The Slayer Pirates were a problem - no prospect of them breaking from combat, every chance they'd actually out-fight me in combat, and support waiting in the wings. But sitting in front of them would get me shot. What to do... No idea. I backed off a bit. The Hammerers needed support they were unlikely to get.
The Pegasus considered charging my Dragon Slayer, but in the end decided it would get him stranded (and if he was a bit unlucky, chopped up). Instead he kept working his way around the flank toward my Stone Thrower.
The Dragon Slayer had moved out to support the Ironbreakers, and their combined efforts were enough to concern the Pikemen, who slowed their advance.
The Slayer Pirates kept advancing toward the Hammerers, opening fire on them once they got into range. They were careful to stay at least 6" away however, in case the Hammerers snapped and decided to take their chances in close combat.
The forces on my left flank continued to work their way around the rock, just further cementing my feelings that this flank was out of control, and the Outflank scenario was likely to be an issue with so many unchallenged units.
Clearly the Pikemen were not going to come to me, so my units forced the issue. Even the Quarrellers decided to close in, partly because they were achieving nothing where they had been, partly to add extra threats in combat, and partly because I was going to need units in the enemy deployment zone to compensate for what was happening on my left...
The Miners did indeed kill the Hotpot in the second round of combat, but what should have been an overrun now became a charge from too far away because of the forest. They decided to try anyway, but there were too many trees. They would have to wait another turn.
The Anvil misfired at some point, hence it facing backward to remind me it would miss another turn. This was less than ideal with enemy units sweeping toward it. At this point the Hammerers gave up any pretense of wanting to face the Slayer Pirates, and turned back toward my own lines to they could move away faster. This may have been the wrong call, but their prospects fighting the Slayers looked really bleak. I felt like they straight up trumped my unit, even without any more shooting.
The Pikemen were not interested in charging the Ironbreakers, preferring to wait and receive the charge for extra ranks of attacks.
The Pegasus finally interrupted what had been an underwhelming exchange as the artillery tried to kill each other. You can see here that mine had taken a wound. I don't think I'd done anything to the enemy Cannon. But the underwhelmingness was to continue as the Captain and his mount completely whiffed their attacks, then my artillery crew failed to wound the Pegasus as well. The combat was a draw. Lame!
At this point the Slayer Pirates split their fire, and those that elected to shoot the Quarrellers managed to panic them. Much dishonour, very bad Dwarfs. Oh well. They rallied at the first opportunity.
The moment of truth arrived for the Pikemen, as the Ironbreakers and Dragon Slayer both charged into combat. The Slayer bellowed a challenge. The Pikeman champion bravely accepted, and got an axe buried in his forehead for his troubles. Not much damage actually occurred in the fight. For all the attacks the Pikemen were bringing, they were fighting enemy with better stats and too much armour. On the other hand, I was rolling for the Dwarfs. So yeah, not much death. I think it was a draw.
The Miners got to grips with the Crossbowmen on their second attempt, and made short work of them. The survivors fled, and were run down by surprisingly quick Dwarfs.
This would actually count against me, as they had pursued so far that they would have difficulty getting entirely back into the enemy deployment zone.
Look at my Hammerers gloriously marching away from the nasty Slayer Pirates. Such heroism! I'm sure someone will be writing grudges about this.
The Captain eventually realised that his great weapon would do a lot more damage if he actually hit someone with it, and started to work his way through the crew of my war machine. The dream of out-fighting him was probably over now. We had our chance.
The second round of combat went worse for the Pikemen. I rolled a bit more damage, they lost by 2, and of course Angus failed his break test. They then fled an underwhelming distance, and were run down by the Dragon Slayer. What a guy! At about this point the Wizard finally managed to force a spell past my wall of dispel dice, casting Comet of Cassandora with irresistible force. It came down at the first opportunity, doing modest damage to one unit of Quarrellers and nothing at all to the other.
Hey look, we actually will get something into their deployment zone.
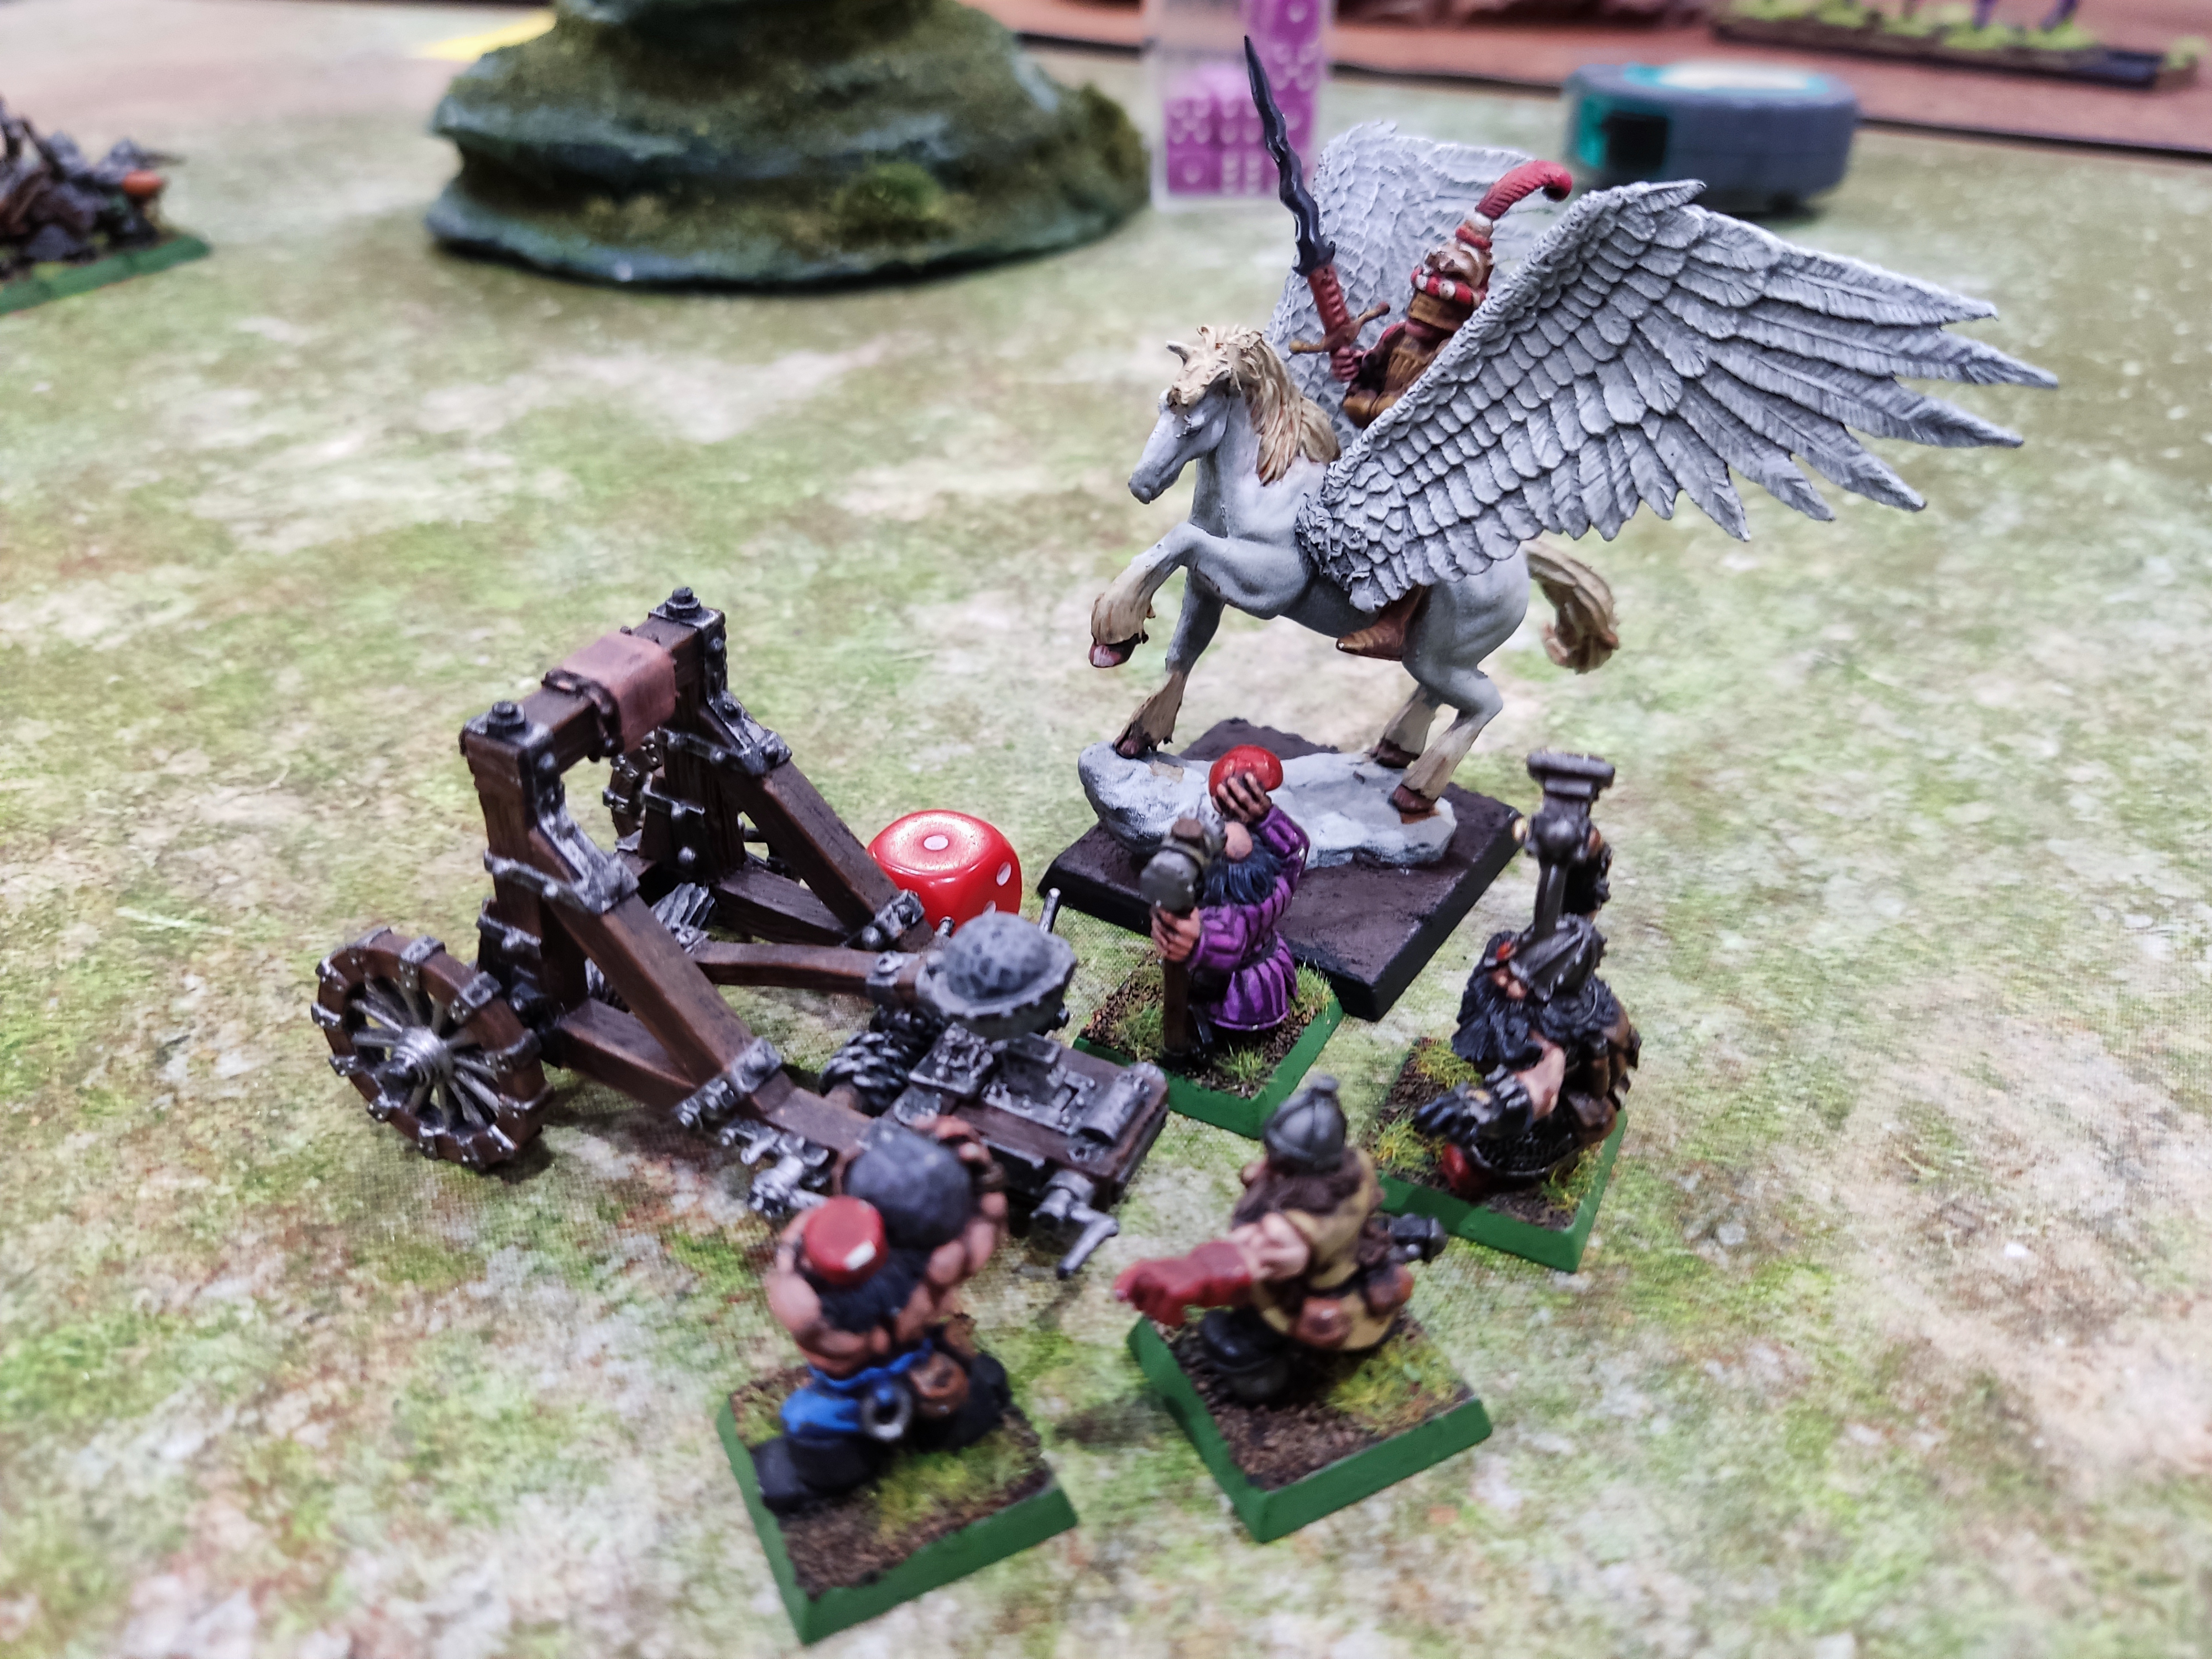
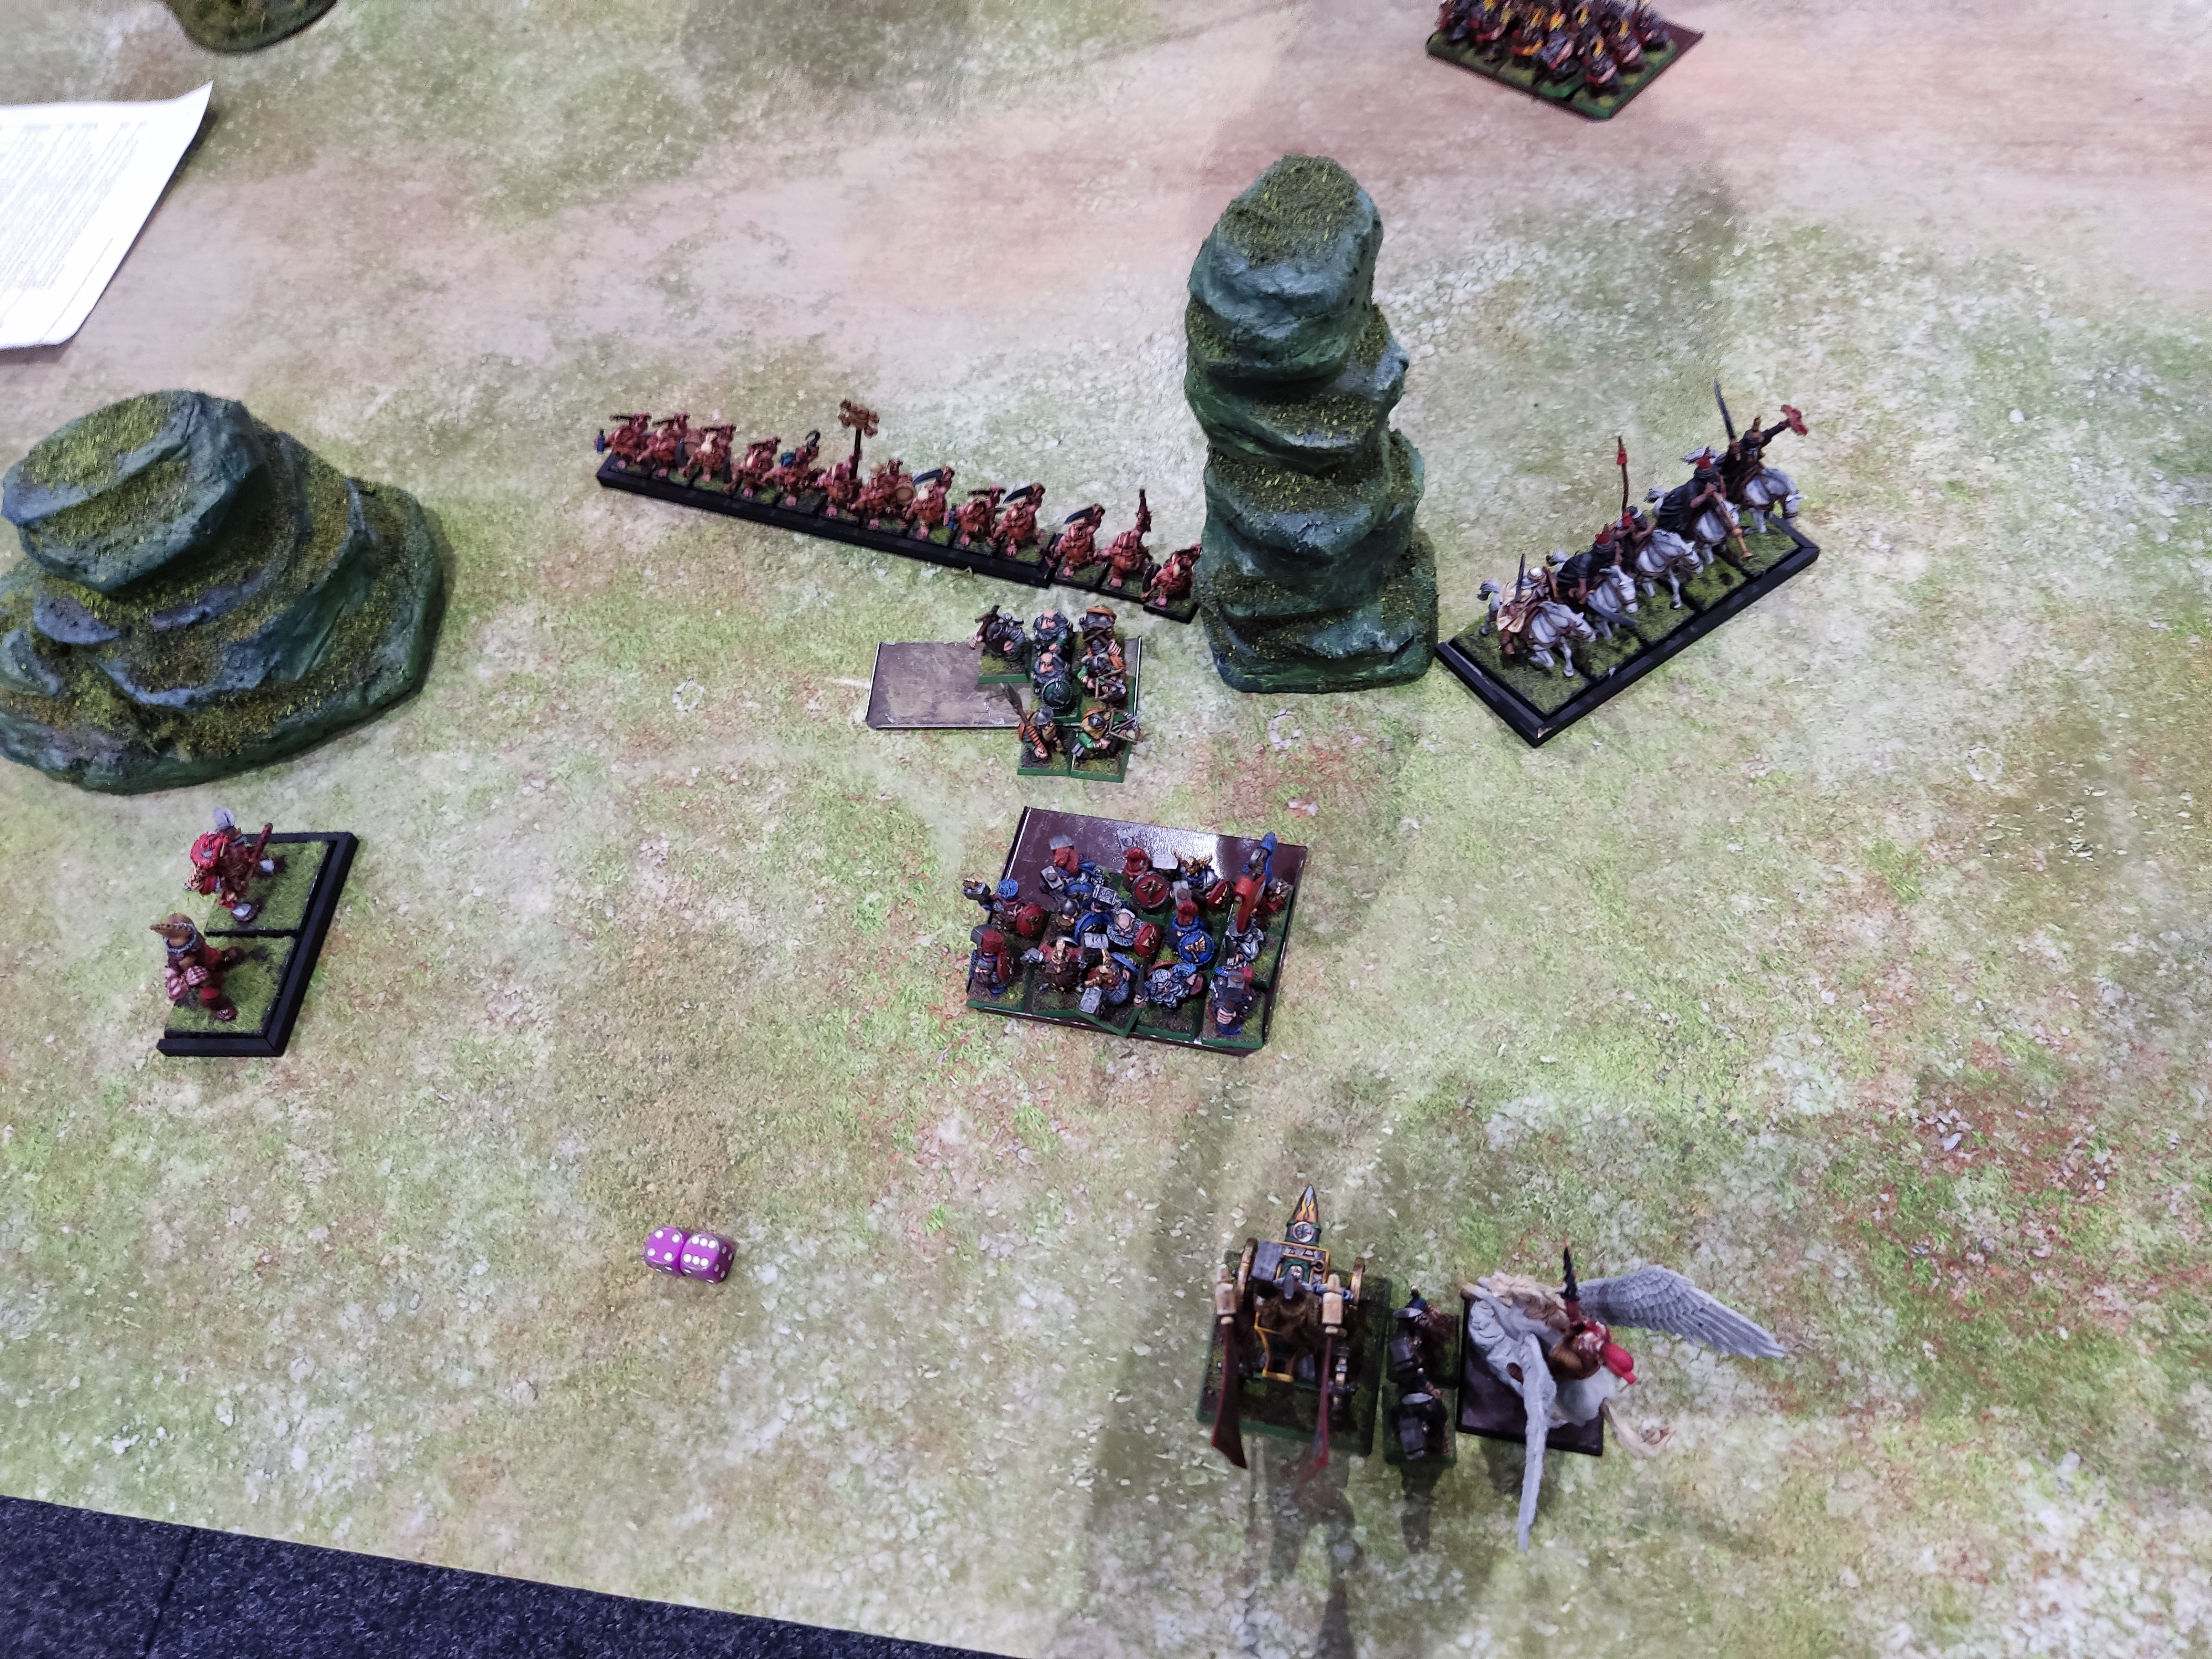
The Pegasus Captain finally finished off the Stone Thrower just in time to charge the Anvil. This had been anticipated, however: the Hammerers were now wandering along 3 models wide, looking at where all of this was about to occur.
The Maneaters had worked their way around the rock on the flank and started harassing the Quarrellers. They decided retreat was a sensible recourse, and fled over in front of the Slayer Pirates. This area was really not under control. And with the Anvil engaged, any real prospect of clearing off a unit like the Light Cavalry was gone.
The Quarrellers rallied, but they were not really safe. The Maneaters ended up charging them again, and because I'm a potato and forgot how 6th edition worked, I decided to flee from the charge rather than taking my chances. I wouldn't have a chance to rally, so I was just giving away their points. Idiot.
The Hammerers did indeed rescue the Runelord, although he probably didn't need it. He was facing the Captain in a challenge (the Anvil guards just sitting back and watching, because it seems like that's how it works - what great guards), and I was in no real danger of dying. But the Hammerers gave me unit strength and a banner, and the Pegasus fled - but too quickly for me to catch him, and he rallied at the end.
Come back here, you coward!

My final acts of the game were to send the Dragon Slayer into the Cannon. He crushed the crew in a single round, whilst everything else marched as quickly as possible to get into the end zone.
In the end I only got the Ironbreakers and maybe one of the Quarreller units completely into the enemy deployment zone. The stumpy legs of the Miners and other Quarrellers were just too slow. Angus had the Slayer Pirates (who had advanced all game unchallenged), Maneaters, Duellists and Light Cavalry in there. I got a point for killing the enemy general, but that still left me behind.
I had lost the scenario, having managed it pretty poorly. Maybe I should have forced the Hammerers into the Slayer Pirates before they made it into my zone. Even if I didn't win the fight, it might have made the difference. The Anvil probably failed at the wrong moment too, when it would have been turning its attention to the backfield. Oh well.
Despite my failure to manage the scenario well, I had done significantly more damage to the enemy army. I had lost only the Stone Thrower and one unit of Quarrellers, and had cleaned off the Venators, Pikemen, Crossbowmen, Leadbelchers, one unit of Light Cavalry, both pieces of artillery and the General and Paymaster. So even with Angus getting the 450 point bonus, I came out on top.
Result: 14-6 Win
You can find the next part of the report here.


No comments:
Post a Comment