
This
post is a continuation of my account of Convic 2014. You can find the
previous part here.
Game
4 - Watchtower
Johannes
Scherpenhuizen, Wood Elves
Comp
Score: 1.4
- Spellweaver (General, Level 4, Lore of Shadow) on Steed with Dispel Scroll, Talisman of Preservation
- Sisters of Twilight on Ceithin-Har (Dragon)
- Glade Captain BSB
- 16 Glade Guard with Musician, Standard, Trueflight Arrows
- 10 Glade Guard with Musician, Standard, Trueflight Arrows
- 10 Glade Guard with Musician, Standard, Trueflight Arrows
- 5 Wardancers
- 5 Wardancers
- 5 Sisters of the Thorn with Musician
- 10 Wild Riders with Shields, Champion, Standard, Gleaming Pennant
- 5 Way Watchers
- 5 Way Watchers
- Eagle
- Eagle
 |
| Hannes' Wood Elves, complete with scratch-built Forest Dragon. |
After
the overnight break, it was back to fighting more Wood Elves for me.
This game would be a bit different, given there was a Dragon kicking
around and we were fighting for possession of a Watchtower (worth 750
victory points in this tournament). For possibly the first time in my
8th edition tournament career, I was quite happy at the
thought of winning possession of the tower at the start of the game,
and I duly did so. I placed my Thunderers in there, giving them the
best vantage point they would get all tournament. This game had the
distinction of being the only time I actually managed to roll a 5 or
6 for Ancestral Grudge rule, giving my entire army hatred for the
battle. How novel.
This
game saw another dance of deployment between our scouting and
vanguarding units, and it didn't go particularly well for me. My
Quarrellers were effectively intercepted by Hannes' first Waywatcher
unit, and were only able to wheel in a bit toward the centre of the
table (they had plans to make good use of their full 12” allowance;
presumably this was apparent to my opponent). The Irondrakes were
likewise held up by the same unit. My Rangers went well out on my
right flank, having given up on protecting my early advance and
looking instead for a location from which they could contribute to
the battle. The Wild Riders over to my left shot forward with their
vanguard, whilst my Gyrocopter couldn't do anything of the sort given
it was also blocked by Waywatchers.
 |
| Deployment, after vanguards. |
 |
| My left flank. The Waywatchers blocked any possible advance by my Gyrocopter, then the Wild Riders exploited the gap. |
 |
| The right flank, with the Quarrellers cursing the Waywatchers and wheeling in as far as they were permitted, whilst the Rangers appeared hard on the flank. |
 |
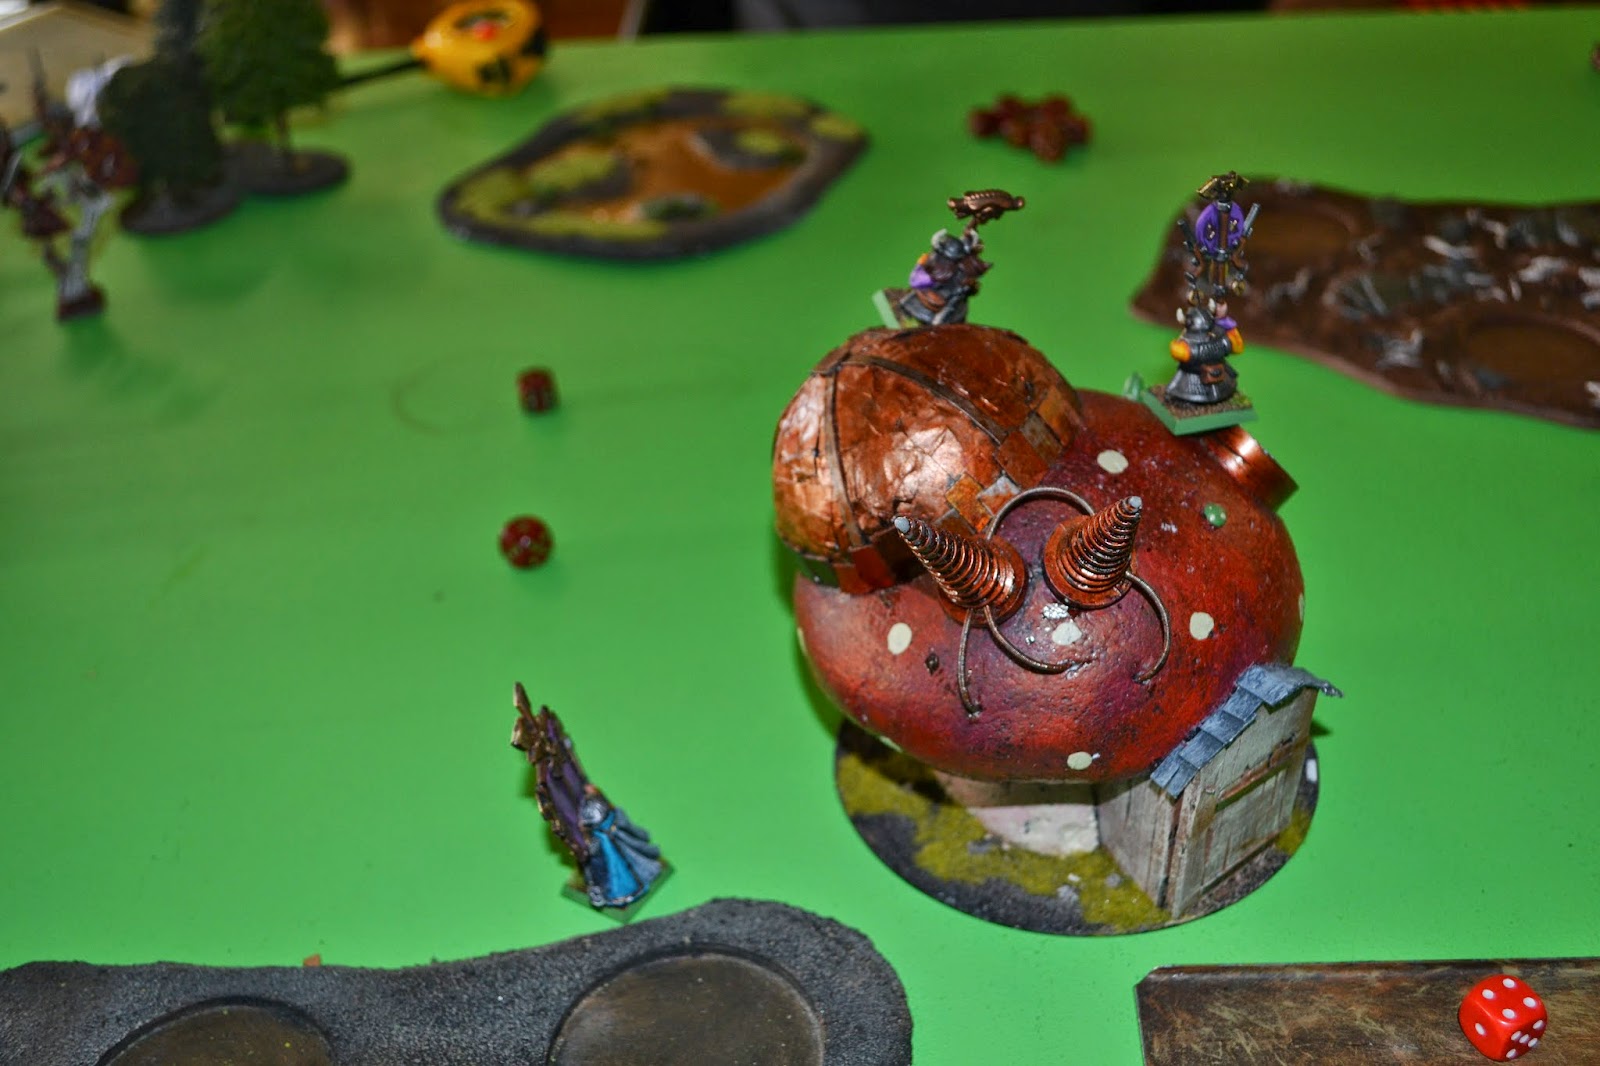
| The Dragon, which I believe is meant to be a tree bewitched to fly about and terrify innocent Dwarfs (and other things, I suppose) |
 |
| The centre of the field, with the all-important (well, 750-points-important) mushroom Watchtower. |
With my
having won control of the Watchtower, Hannes automatically had the
first turn. His first act was to declare a charge on the Thunderers
in the tower with the Sisters of Twilight on their Dragon. I would
love to have stood and shot, but failed my Ld 10 Terror test instead.
This would have been disastrous, however when you're in a building,
this doesn't cause you to flee – instead your guys all just run off
and hide in the closet or something, automatically Hold as a
reaction, and count as failing their Fear test for the first round of
combat. So I had missed a chance to shoot, but at least I still held
the building. My champion stepped forth and issued a challenge (or
rather, he shouted something lamely from his hiding position behind
the door), and was soundly thrashed for his efforts. It saved the
rest of the unit though, and this time they passed their break test
and retained control of the Watchtower.
 |
| My Thunderers huddle inside the building whilst the Dragon makes very short work of the unit champion. |
The
Eagle to my right flew over the heads of my Rangers and landed
between them and the Quarrellers, where it could not be seen. The
Eagle off to my left similarly advanced in the wake of the Wild
Riders, who continued their rush toward my back lines by sweeping up
between my Gyrocopters and reforming to be 10 models wide.
 |
| The Wild Riders are in my deployment zone before I even get a turn. |
 |
| The unit reformed 10 models wide - I'm not entirely sure why. Maybe they had grand visions of sweeping overruns off the Cannon. |
With the
Thunderers otherwise engaged, the Wood Elves had to find another
target for their shooting. The Gyrocopters caught their attention and
this resulted in the one on my left losing 2 wounds and the other
losing 1, but they both remained operational. Hooray for Toughness 5!
In my
turn I charged with both Gyrocopters. The mostly-dead one on my left
lined up an Eagle, which elected to turn and flee rather than
receiving the charge. This went poorly for it when it didn't flee far
enough and was run down. The other charge was against the Waywatchers
in the centre of the field, who likewise turned and ran. They were
more successful and easily out-paced the Gyrocopter chasing them.
 |
| The Irondrakes leave the glorious Wild Rider formation looking a little depleted. |
My
Irondrakes spun on the spot and moved toward the Wild Riders with a
swift reform. They showed off their Quick to Fire weapons by blasting
8 of the 10 Elves from their saddle, although being Frenzied, the
survivors didn't seem to care. Over on my right, the Rangers found a
sudden opportunity to use their throwing axes by reforming
immediately behind the cheeky Eagle and bringing it down with
contemptuous ease.
 |
| What birdie? |
My
Cannon had a very narrow window to try to bring down the Dragon, but
couldn't manage to land a shot on it so close behind the building. I
think my Quarrellers and Thunderers settled for shooting a few Glade
Guard in light of this – there was no point wasting their shots on
a fresh Dragon.
 |
| End of the first turn. |
 |
| The survivors of the Wild Riders reach the Cannon |
The
surviving Wild Riders hurried past the Irondrakes and charged the
Cannon, however with their entrenchments for protection, the crew
refused to be easily removed. One of them survived and fought on,
although there was little hope of him lasting much longer.
 |
| I got this... |
 |
| Waywatchers charging? The nerve of them. |
The
Waywatchers off to my left had watched the Gyrocopter run down the
fleeing Eagle and apparently took offence at this, deciding to charge
into its flank and hack at it with their paired hand weapons. I
thought this might go OK for me, but apparently I was mistaken. They
landed a wound immediately and knocked my splendid machine from the
sky before the pilot could fight back.
 |
| The apparently very scary Dragon finds a new target for its scariness. |
The
Sisters of Twilight apparently have a short attention span, because
rather than continuing what they had started the previous turn, they
decided instead to fly over the Watchtower and into the flank of my
Irondrakes. This time I passed my Terror test, however I did of
course fail my Fear test as my Lord stepped across and challenged the
beast. In a less than impressive display of defensive prowess, he
nearly died on the spot. With everything hitting him on 3s and 5
Thunderstomp hits, he took 4 wounds after saves, leaving him with
only 1 remaining. My unit was steadfast and held their ground before
reforming in a deep formation to face their attackers.
 |
| The Irondrakes reform to face the Dragon. |
With the
Dragon off doing something else, the remaining Wood Elves turned
their attention to the Thunderers in the tower. Withering was duly
cast upon them, and a billion arrows entered unerringly through every
window and imagined gap between the bricks of the building. I lost at
least half a dozen Dwarfs, but the survivors held their ground
despite their apparently exposed position (Trueflight Arrows are
silly).
In my
turn the Rangers decided to wander into the building on my right,
giving them a decent position from which to fire for the rest of the
game. My Miners arrived straight away, moving onto the field behind
the Glade Guard in a position to cause mischief.
 |
| The Miners arrive behind the Wood Elf lines. |
 |
| The Gyrocopter scoots in to the rescue. |
The
surviving Gyrocopter decided to do what it could to help my sorely
wounded Lord as he listed sideways upon his shield, and charged into
the flank of the Dragon. The challenge continued of course, so the
Gyrocopter was really arriving for moral support (read: combat
resolution bonuses). The challenge went better than the previous
round, as I passed my Fear test and the Sisters no longer had their
charging bonuses. I still had to take several saves (especially when
the Dragon rolled 5 for its Thunderstomps again), but somehow my Lord
remained upright and did a couple of wounds in return. Having taken
no wounds and with everything now in my favour, the Dragon found
itself taking a nasty break test and failed comfortably. It turned to
flee, but was run down by the heroic Gyrocopter, whose gloating was
cut short as he braked hastily to avoid smashing into the Watchtower.
 |
| No more Dragon. Things are looking up! |
I think
my Thunderers focused on finishing off one of the smaller Glade Guard
units this turn (they had made the mistake of walking out of the
cover of the forest). My Quarrellers probably shot at something, but
don't ask me what it was. The final Cannon crewman succumbed to the
Wild Riders, who reformed to face back onto the field. All in all, it
had been a good turn.
 |
| The Irondrakes find Wardancers in their flank, and Wild Riders in their rear. Should be OK... |
The
Wardancers were suddenly called into action in Hannes' third turn.
The unit that had advanced somewhat saw the flank of the Irondrakes
and decided to charge, whilst the 2 Wild Riders arrived in the unit's
rear. This would have been fine, were it not for the horror that is
Okkam's Mindrazor. The Wardancers were magically morphed from
moderately entertaining to mind-alteringly terrifiying, and laid
about them with Strength 8. My mostly-dead Lord was left with a
terrible decision about using Make Way, and in the end decided he had
to take his chances with the Wild Riders. This proved to be an
acceptable decision, and he lived through the round of combat, taking
down both the Wild Riders in the process. He was in the minority,
however. Some 14 Irondrakes were cut down by the 5 magically-enhanced
Wardancers. Thankfully I still had 5 models and the unit kept its
steadfast, holding in the face of the terrible losses.
The
other Wardancers had been lurking further back in the Wood Elf lines,
and moved to block the charge of the Miners into the rear of the
nearest Glade Guard, making a point of staying in the forest to
ensure they were stubborn. The Thunderers shrugged off most of the
enemy shooting this turn, thanks to their being back to Toughness 4.
 |
| The Thunderers in the Watchtower start to feel a little surrounded. |
In my
turn the Miners agonised slightly over whether they would take their
chances with being bogged by the Wardancers, or try a longer charge
into the rear of some more distant Glade Guard. In the end I decided
to play it safe and went into the Wardancers. They hunkered down with
3+ ward saves and only lost a couple of models, but only 1 Miner fell
in return, so it was a decent result. The tricksy Elves wouldn't have
fancy ward saves forever...
 |
| Somewhere in those trees there are Wardancers. No wonder you can't break them - you can't even find them. |
The
Wardancers were still Strength 8 at this point, but found themselves
foiled by a unit champion sitting on the end of the unit. The
champion died most hideously, but he was the only one that fell that
round. I then reformed to face the enemy and hoped like crazy that
the madness of Mindrazor would not return next turn.
 |
| Man, it was such a nice unit of Dwarfs before those Wardancers arrived. |
The
Thunderers discovered that the mage bunker of the Sisters of the
Thorn had emerged from cover (the Miners had flushed them out), and
tried their luck in culling the unit. They met with limited success
due to the unit's ward saves, but brought down a couple of them. My
Quarrellers were too busy to help shooting anything – they were
running as fast as their stumpy little legs would carry them, toward
the struggle between the Wardancers and the shattered remains of the
Irondrakes.
 |
| The Quarrellers hurry toward their comrades struggling in the middle. |
In turn
4 the Wood Elf shooting continued to pour into the Watchtower, and
the Thunderers were reduced to maybe 5 models by this point. The game
could potentially end in the following turn (a slight modification to
the scenario's normal random turn length), but even that might prove
too late.
It was
with a certain level of despair that I watched the Wood Elf
Spellweaver cast Mindrazor once more, this time with irresistible
force (and with no real ill effects). The Wardancers got that crazed
look once more, and set about removing the sad tatters of my
Irondrakes. The sole remaining Irondrake was felled with contemptuous
ease, as was Grim Burloksson. My only model to survive the onslaught
was my Lord, who continued to shrug off the worst of their efforts
with his battered armour and ward save. It was somewhat hilarious –
he'd nearly died in the opening exchange of combat after passing
practically no saves, then had fired up and ignored everything since
then. At this point he'd taken so many saves that he was maybe
actually rolling above average for the game (unthinkable for me, I
know)...
The
Miners continued to hack determinedly at their own Wardancing
opposition, and this time were rewarded when the Elves got sick of
their previous 3+ ward defensive dance and moved onto some sort of
modern interpretive nonsense that got them all killed. Progress!
In my
turn, my BSB charged alone out of the Quarreller unit in an attempt
to rescue my Lord from the horrid Wardancers. I could have sent the
whole unit in, but it felt like a waste of their crossbows. Instead
they continued to combine fire with my Rangers and Thunderers,
crippling Glade Guard units and removing the odd Sister of the Thorn
(I don't remember the exact targets at this point – suffice to say
the Sisters and Spellweaver could all have been dead by the end, were
it not for their ward saves).
Having
brushed off the Wardancers, my Miners decided to charge into the rear
of the Glade Guard nearby. They fled through the Watchtower to
safety, so I redirected onto the Waywatchers who also fled, through
my Quarrellers. No more combats for my brave Miners, alas.
 |
| Yeah, you better run! |
 |
| The Waywatchers flee from the Great Miner Menace (I believe I rolled a 2 for the charge. The Menace is largely over-hyped). |
The
Mindrazored Wardancers were down to 2 models at this point, and they
combined the full fury of their efforts in trying to finish off my
Lord. He very nearly shrugged it all off again (which would have been
slightly outrageous), but he finally perished even as the BSB cut
down one of the Wardancers and broke the other one, who eluded his
vengeful pursuit.
 |
| The Lord is dead. Long live the Thane (I hope). |
 |
| The Waywatchers decide to charge the Watchtower and flush the Dwarfs out with hand-to-hand combat. They will cheat with magic, of course. |
We were
into Turn 5 now, and would have to roll to see if the game continued
at the end of my turn. Hannes decided to gamble and charged the
Waywatchers near the Watchtower into it. This seemed optimistic until
he once more forced Mindrazor through, and suddenly had 10 very
high-Strength attacks against my 5 remaining Thunderers. In the end
the unti only having equal WS with my own and my fancy Dwarf Parry
saves were enough, and 2 Thunderers lived to repel the attackers. I
still held the building! If only the game would end immediately...
 |
| The attack is repelled. |
The Wood
Elf shooting was ineffectual, largely because most of the Glade Guard
were busy rallying. I was actually on top in the shooting war,
because in my turn I opened up on the BSB's unit and left it with the
unit standard bearer and the BSB by themselves, and the BSB on a
single wound (he had neglected to wear any armour into the battle).
At this point my 2 Thunderers took aim at short range and managed a
hit, but alas failed to wound the BSB who elected to take the bullet
heroically (to save the last model in the more valuable unit). I
think my own BSB charged at the Waywatchers, but failed to make the
distance.
At this
point we had to roll a dice. There was a 1 in 3 chance of the game
ending. I was hoping, but it was not to be – the game continued and
Hannes had another chance to steal my tower...
The Wood
Elf army was largely shattered by now, but I still hadn't gained many
points. Hannes decided that the Mindrazor gambit was not his best
plan at this point, and decided not to charge. Instead, he would
simply shoot me out of the building. No sooner had he decided this,
than there was a problem. The single fleeing Wardancer continued his
retreat, and passed straight through the only real unit of Glade
Guard remaining. With squawks of alarm, the cowardly Elves panicked
and ran, taking away the majority of Hannes' shooting and the sum
total of his remaining Trueflight Arrows. Ha!
 |
| Oops. It seems the fleeing is contagious. |
The
Waywatcher units were both able to shoot at this point, and did their
best to remove the last 2 Thunderers. Thankfully they failed, despite
their ability to ignore armour. If the game ended this time, I would
still have the Watchtower.
|
| The scraps fight on. |
 |
| The bedraggled Elf lines, lurking behind the tower. |
In my
turn, I did what I could to shoot things to death, but there were few
remaining targets (many of them had fled into cover behind the
tower). I killed a couple of the Waywatchers behind my Quarrellers
with the Rangers, but they held their ground. My BSB still couldn't
reach any combat targets and was suitably frustrated. My only success
was the 2 Thunderers, who once more targeted the retreating forms of
the BSB and unit standard. Once more they landed a hit, and this time
the shot buried itself between the shoulder-blades of the BSB and he
fell. Boo yeah!
We
rolled once more to see if the game continued, this time on a 4+.
Thankfully it ended, and I had held the tower throughout with my
resilient Thunderers.
 |
| The victorious Dwarf front lines, such as they are. |
Result:
20-10 (22.1-7.9 after comp)
Game
5 - Battleline
Jonathan
Vila, Ogre Kingdoms
Comp
score: 1.3
- Slaughtermaster (Level 4, Lore of Beasts) with Great Weapon, Charmed Shield, Talisman of Preservation, Earthing Rod, Other Trickster's Shard
- Bruiser (BSB), with Great Weapon, Rune Maw
- Firebelly (Level 1, Lore of Fire) with additional hand weapon, Dispel Scroll, Potion of Speed
- Butcher (Level 1, Lore of the Great Maw) with Sword of Striking, Dragonbane Gem, Scroll of Shielding, Ironcurse Icon
- 9 Ironguts with FCG, Standard of Discipline and lookout gnoblar
- 6 Ogres with FCG, ironfists
- 2 Mournfangs with heavy armour and ironfists
- 6 Maneaters (scouts and poisoned attacks) with Standard, Musician, Gleaming Pennant, 2 Additional Hand Weapons
- 4 Leadbelchers with Musician
- Sabretusk
- Sabretusk
- Ironblaster
In
the final game, I was going to have to try to deal with Ogres.
Unfortunately, as with most of these games, it would mean finding a
way to stop a “Gutstar” (a “Death Star” unit with all the
characters piled into the Ironguts). Hopefully my shooting would be
enough to strip it back, because my combat units were certainly not
up to the task.
 |
| Deployment after scouts and vanguards. |
I
got the side of the table with a building in it, which meant that the
“right” thing to do might have been to put the Irondrakes and co
in that building and hope to simply weather the storm and shoot out.
It would have been one way to reduce the combat effectiveness of the
Gutstar. Sounded pretty boring to me, and might have just seen me
lose everything except
that unit, so I didn't go for it. Instead I deployed much like I
would in any other game. The scouting Maneaters out-rolled me for
deployment and planted themselves on my right flank, which was
worrying for my Quarrellers. I ended up putting the Rangers in my
deployment zone, also on the right flank and in a good place to shoot
up the Maneaters. It would mean they'd struggle to get into the rest
of the game, but the Maneaters were worth a few points and were a
real threat.
 |
| The scouting Maneaters threatening my Quarrellers. |
I
got the first turn and moved a Gyrocopter to block the Maneaters,
before opening up on them with the Rangers and Quarrellers. I killed
half of them, but unfortunately the rest didn't panic like I had
hoped. On the bright side, the Cannon blew the Ironblaster off the
table with a single well-placed shot. My Thunderers tried and failed
to kill one of the Mournfangs, and the Irondrakes unleashed upon the
Gutstar, killing a couple of them (ie: not enough).
 |
| During the Ogres' first turn. |
 |
| The main Ogre line closes alarmingly quickly with my own. |
 |
| The Mournfangs are a little more cautious. |
The
Gutstar and Ogres next to them rushed straight at my Irondrakes,
which was a little disconcerting. The Slaughtermaster cast Curse of
Anraheir on my unit, which was bad for both my shooting and any
potential charge I might have concocted. The other units advanced,
but not so quickly. The Leadbelchers commenced what would be a brutal
series of volleys, averaging close to 20 shots for the 4 of them.
Thankfully they didn't roll too efficiently for damage, and I only
lost a few Thunderers.
 |
| The Maneaters charge the blocking Gyrocopter. |
The
Maneaters charged and disposed of the Gyrocopter blocking them,
electing to overrun a little way across the front of my lines.
 |
| It might be about to tear my army a new butt-hole, but it is a very pretty Gutstar, is it not? |
It
was my second turn and it looked like I was already out of time. My
remaining Gyrocopter moved in to redirect the Ogres next to the
Gutstar, ensuring I at least wouldn't have to deal with a combo
charge. The Irondrakes stayed where they were and unleashed another
volley on Jonathan's main unit. Grim Burloksson's re-rolls helped
compensate for the Curse upon my unit, and between them and the
Thunderers, I killed another 3 Ironguts. Unsurprisingly the unit
didn't panic. My Quarrellers and Rangers shot at the Maneaters again,
this time wiping them out. The Cannon shot at the Mournfangs and did
a single wound which was enough to kill the already wounded model.
They also did not flee.
 |
| The Gyrocopter moves up to block the Ogres, but the Irondrakes can only really stay where they are. |
 |
| Oh dear, this is gonna hurt. |
The
Gutstar was less than 6” from my lines at this point, however when
I pointed out to Jonathan that the Irondrakes could still stand and
shoot (Quick to Fire), he decided the Thunderers with my BSB were a
better target. This combat went predictably well, especially after he
cast boosted Pann's Impenetrable Pelt which meant his characters all
had almost infinite Toughness when they shouldered past the Ironguts
and absorbed my attacks. Even with fancy Dwarf Parry saves, I only
had to move 5 models when I broke and fled. It was apparently
traumatic for them, because they went straight off the table the
following turn, which was some distance away. The Gutstar didn't
bother to chase, and instead reformed to look meaningfully at my
Irondrakes.
 |
| The few survivors set a new Dwarf land speed record getting off the battlefield. |
The
unit of Ogres nearby also charged the Gyrocopter which had moved to
block them, and beat it down with minimal fuss before reforming into
line once more.
 |
| The Gyrocopter pays the price for its delaying mission. |
 |
| The Irondrakes are well and truly surrounded. |
It
was becoming apparent to me that I was not going to be able to handle
the Gutstar with my army unless I somehow shot it completely to
pieces. With the Thunderers gone and the characters all practically
invincible, it was all going to be a big ask. The Irondrakes reformed
to face the unit and fired, killing 2 more Ironguts. There were still
6 models in the unit however, including 4 characters. My Lord decided
he would have to strike out on his own and charged the Sabretusk
which had moved to ensure I couldn't escape by charging through the
regular Ogres. My Lord's situation was slightly different on his own,
and he managed to cut down the Sabretusk before overrunning into the
waiting Ogres. His mission was to try to buy some space for the
Irondrakes and (if possible) save his own skin. He didn't reveal the
last part of this to his underlings before setting forth. No point in
worrying them unnecessarily. No doubt they would be fine without
him...
 |
| I take what evasive action I can, with the Lord charging out to hold off one unit whilst the Irondrakes prepare to pepper the other one. |
My
Quarrellers decided they could not sit idly by and watch the undoing
of the rest of my army, and charged into the other Sabretusk, which
was behind the Gutstar. I cut the doggy down before overrunning into
the rear of the Gutstar. 20 Strength 6 attacks would have to be worth
something, wouldn't it? Unfortunately the Rangers and Cannon failed
to contribute, despite combined efforts to bring down the remaining
Mournfang.
 |
| My Quarrellers try to contribute. |
 |
| Well it's some sort of plan... |
The
folly of the Quarrellers became apparent when the Leadbelchers
flanked them and the Mournfang charged into the rear. For my part, I
did maybe a couple of wounds to the Firebelly. And I lost my entire
unit before I could even take a break test. It had gone rather
terribly, but they had achieved what was ultimately their goal –
they had bought the Irondrakes one last shot. Was it really worth it?
In hindsight, I'd have to say probably not.
 |
| Quarrellers? What Quarrellers? |
 |
| Oh, there they are. Guess I won't have to take a break test, then. That's something... |
The
Dwarf Lord and Ogres began a combat that would last most of the game.
I generally won combat, but never by very much and always in the face
of the Ogres' steadfast. I actually rolled pretty well in this
combat, but Jonathan passed an improbably number of Parry saves,
which really slowed down my progress. I broke the Ogres in the last
turn when they finally dropped to 2 models, however they outran me
and rallied on the table edge, taunting me. Nevertheless, the Lord
was at least alive to chase them. The same could not have been said
had he hung around in the main lines...
 |
| The Lord fights his own battle whilst the Irondrakes desperately continue to fire. |
The
Quarrellers had given their lives for the cause, and now my
Irondrakes took aim and tried to make it worthwhile. Their volley
landed a lot of hits, but with so many tough characters, they were
distributed all over the shop. The unit standard was slain and the
champion left on a single wound. The Firebelly, BSB and Butcher were
all wounded. Only the Slaughtermaster shrugged off the damage. I also
fired my Cannon down the flank, but the shot plugged in front of the
first character before I could potentially save the game with
something epic and bogus (4 characters with one shot? Yes please).
My
Miners finally arrived at this point, and moved on looking at the
Cannon. They were not the only ones, as the Mournfang was also
glaring at it malevolently. The Rangers also moved around, given they
had run out of targets.
 |
| The Mournfang apparently dislikes my Cannon. |
As
uninspiring as the late arrival of the Miners was, their early
departure was worse. The Mournfang made the charge into the Cannon,
killed it, and panicked the Miners straight back off the table.
Apparently they knew a bad battle when they saw one, and were not
hanging around for the final reckoning. Thanks, guys.
 |
| Thanks for coming, guys. |
 |
| The inevitable combat finally comes to pass. |
 |
| And my unit gets batted aside in a similarly predictable fashion. |
The
Gutstar (such as it now was) charged the Irondrakes with the sort of
devastating impact I had come to expect. I lost an entire rank of
guys, and in return all I could manage to do was pick off the
mortally wounded Firebelly (this may even have been with the stand
and shoot reaction – I don't recall). I lost badly, broke and was
run down.
 |
| Don't look at me like that! |
In
my turn I made what was potentially a mistake and tried to charge the
Mournfang with Bugman's Rangers. It was not that they couldn't win
that fight; they would have thrashed it. But it chose to flee, and I
was left with nothing to do with the unit when it got away. Maybe a
volley of shooting would have been better, but Strength 7 great
weapons sound a lot better than Strength 4 crossbows when your target
has that much armour.
 |
| What's left of the Gutstar splinters as the various elements go their separate ways. |
In
the end the Gutstar survived the game, more or less. The unit itself
still had a single wound remaining, out of the characters only the
Firebelly had died, and the handful of wounds on the others counted
for nothing. With the Ogre unit rallying after it escaped my Lord and
the Mournfang eluding capture, I had not really won a lot of points.
The Leadbelchers shot off half my Rangers, but the unit didn't flee
and they, together with my Lord, were all that survived of my once
shiny Dwarf army. I'd been rolled, basically by a single unit that my
army simply could not stop.
 |
| The Ogres mock my Lord by rallying out of his reach. |
 |
| What's left of the Rangers survey the wreckage helplessly. |
Result:
8-22 (10.2-19.8 after comp)
So
in the end, my army had acquitted itself OK. I had only won 2 games,
but a very narrow loss and some solid comp boosts had dragged my
score to somewhere just above breaking even. The list had not proven
to be impossible to use, but in the games where opponents had really
solid combat units, my regiments didn't have the spine to stop them.
In
all, I was fairly content. I had enjoyed myself a lot more than I
would have with a traditional Dwarf gun line, and all my opponents
had been fun to play against. The whole thing left me wanting to
attend another tournament, so now I'm eyeing off Rumble in the Bronx
at the end of August. I don't think I'll be running Dwarfs, though.
Time for another change.
Thanks for another awesome turney report!
ReplyDeleteLooking forward to seeing what you're going with next ;)
Thank you for posting these. I always enjoy your battle reports, and I especially enjoyed seeing this list on the table top.
ReplyDeleteCheers guys, thanks for reading.
ReplyDeleteHi Hoodlig,
ReplyDeleteI've been reading your blog for the past months and I find it absolutely well done.
Your battle reports and miniatures have been an inspiration for my own dwarfs since I first saw them.
I also really like Hippo's terrain (I frequent often his blog too but don't tell him :P)
Just wanted to point it out!
Keep up the excellent work!
Thanks Luigi, I'm glad you like the blog. Don't worry, I won't tell the Hippo about his secret admirers. Can't have him thinking too much of himself :P
DeleteForgot to mention,
ReplyDeleteStunning conversions on the ogres and can't wait to read a complete battle report! :)
Great battle reports yet again. Does the empire strike back, or is there something new and shiny in the offing?
ReplyDeleteRumble is only 2000 points, so I am trying to decide whether I can get an entire army of Empire-themed Ogres ready in time. 5 weeks. Could be done...
DeleteI am impressed, empire ogres,2000 points 5 weeks I am struggling to do five undead cavalry this month.
DeleteGreat report as always. Your dwarfs came up very nicely too.
ReplyDeleteAny chance the mighty chaos dwarfs will be your next army?
Alas, Chaos Dwarfs are not the list of armies I have available. Well, not without borrowing them from someone. And I don't think I will be buying into a new army when I already have 9 options kicking around here...
DeleteYour army list reminded me of the old proverb( and a video game with that name..)
ReplyDelete"Who dares Wins". No organ guns, no tank bus(1+ AS chars up front) and no hammerers.
You did well in an uphill battle.
The last battle against the Wood Elves had so many thrilling moments,
I really enjoyed the pictures and your story telling.
Cheers. Well I dared. Not sure I really won...
Delete