
This
post is a continuation of my account of the recent tournament,
Axemaster 2014. You can find the previous part of the report here.
I
spent the start of Day 2 sending SMSes to friends to see if anyone
could either assist me or play in my place for that day, as I had
basically no voice. Given how noisy the tournament venue was, I was
not at all convinced that my opponents would be able to hear me, and
I figured this would only get worse with the strain. Unfortunately
nobody was available, so I just had to try and tough it out.
Hopefully I wouldn't be reduced to expressing my intentions through
the power of interpretive dance before the day was out...
Game
4
Aaron
Graham, High Elves
- Prince on Star Dragon with Talisman of Preservation, Star Lance, Charmed Shield, Heavy Armour, Lion Cloak
- Noble BSB on Barded Steed with Enchanted Shield, Dawnstone, Sword of Might, Heavy Armour
- Noble on Great Eagle with Heavy Armour, Lion Cloak, Shield, Lance
- Noble on Great Eagle with Heavy Armour, Lion Cloak, Shield, Lance
- Noble on Great Eagle with Heavy Armour, Lion Cloak, Shield, Lance
- 9 Silver Helms with Full Command
- 6 Silver Helms with Musician
- 6 Silver Helms with Musician
- 6 Silver Helms with Musician
- Tiranoc Chariot
- Tiranoc Chariot
- Great Eagle
- Great Eagle
- Frostheart Phoenix
- Frostheart Phoenix
Comp
Score: 3 or 4
So
coming into this game, I think there were maybe 3 of us all on about
the same score at the head of the field. Given my list I figured that
wouldn't be me, but you never know. To say that Aaron's list was fast
is a bit of an understatement. 8 flying models and the rest of the
army had Movement 9. This was going to make it difficult for me to
control the terms of the game, but at least he had no magic
whatsoever. Maybe I could use that to my advantage.
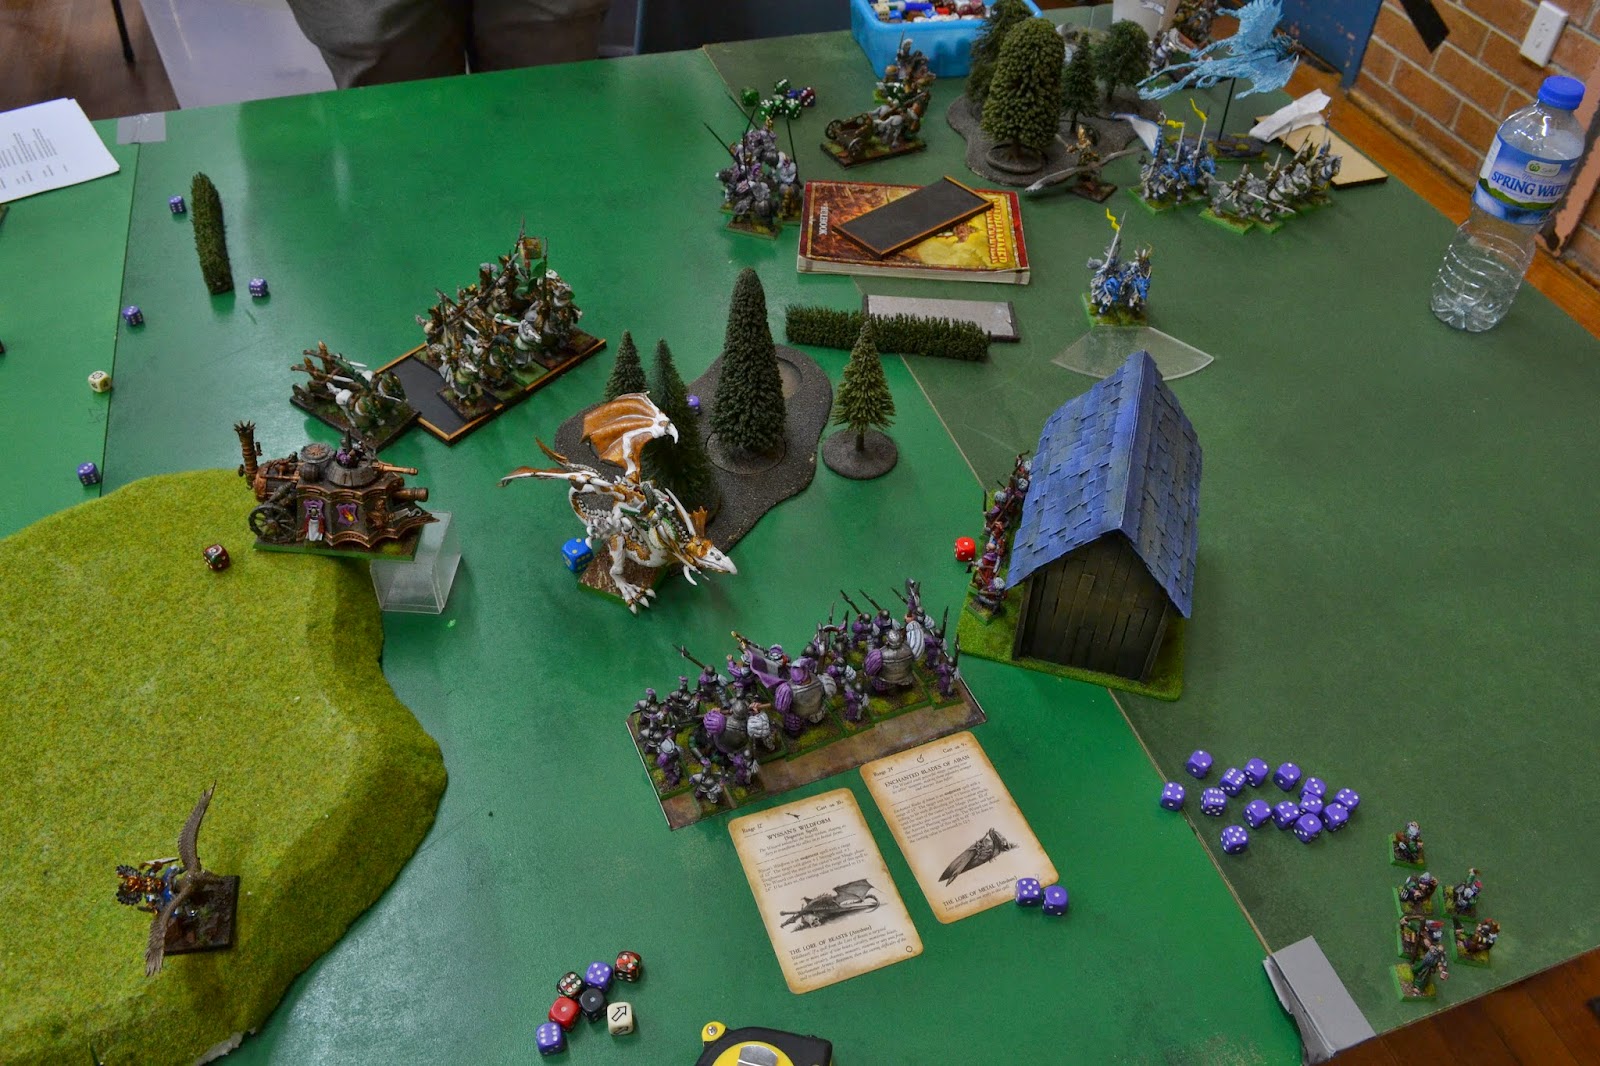
 |
| Deployment. |
 |
| Aaron's dynamically converted Eagle-riding Nobles were things of wonder |
 |
| Another seamless conversion... |
 |
| Pretty sure that one is losing the battle to stay on top |
My
basic plan for this game was to sit back and try to reduce the
enemy's numbers a bit before I had to engage. Unfortunately with just
a Steam Tank and my small Wizards to do this, the impact I could have
would probably be limited. Aaron wisely deployed the Dragon behind a
building, so it was not going to be shot by the Tank in the first
turn. That Dragon worried me. Strength 7 and the Star Lance would
pose a problem for my armour. And we won't talk about what would
happen if the thing caught up with my glorious Griffons.
In
my first turn I largely stuck with my plan. I moved the general's Griffon up a
bit on my right, in a slightly careless fashion as I didn't make
sure to keep the enemy out of my blind spots. I made the same mistake
on my left, which meant I was leaving safe spots for enemy flyers to
land if they flew as fast as they could. I wasn't really paying
enough attention.
 |
| Empire Turn 1 |
Good
things did happen in that first turn, however. I managed to kill one
of the Eagle-mounted Nobles with an un-boosted Searing Doom. This was
luckier than I had assumed, as I forgot the Lion Cloak's armour
modifier wouldn't count for the spell, so I was only wounding on 3s.
Part of the plan had been to try to panic the Chariot or Silver Helms
that were in front of him, but unfortunately they passed their tests.
 |
| One of the Nobles is blown away by Searing Doom, but sadly there was no panic. |
The
other success story of the turn was the Steam Tank, which lined up
one of the Phoenixes and blew it away with a single shot, easy as you
like. Given I am scarred from 5+ ward saves after years of playing
Daemon and Bretonnian players, I was suitably impressed by the
result. 2 flying units gone already. It was a good start.
 |
| Phoenix? What Phoenix? The Steam Tank does it work well. |
Aaron
took advantage of my lazy failure to guard my flanks by flying the
Dragon and an Eagle Noble up on my left, whilst another Noble flew up
on my right. Eagles landed in front of my Demigryphs and Knights,
whilst a small unit of Silver Helms was about the only other unit to
advance, placing itself so its flank would be exposed should I charge
the Eagle nearby and overrun.
 |
| Leaving a blind spot like that was careless, really. Could easily have been avoided if I was a little more focused. |
 |
| I guess I assumed I had it covered. Was probably only wrong by an inch or two. |
 |
| The unridden Eagles do their best to be annoying. |
 |
| The table as a whole after Aaron's first turn. |
In
my turn I decided to take the bait, and flew a Griffon over the
Demigryphs and into the Eagle. I was OK with the prospect of a
counter-charge from the Tiranoc Chariot nearby, after I broke through
and hit the flank of the Silver Helms. Or rather, I should say that I
would have been OK with it. Except that the Griffon and rider managed
1 miserable wound between them, and didn't even break the Eagle. It
was a lame performance. Aaron and I were both left scratching our
heads, as we were both already focused on what had being going to
happen next. Apparently we got ahead of ourselves.
 |
| This combat felt like a formality, right up to the point where I barely landed a wound. |
 |
| My Griffon moving up and trying to use an apparently useless hedge as a defensive position. Maybe we should have declared them to be like fences. |
My
Knights charged the other Eagle, and thankfully did a better job of
cutting it down than the Griffon had. I moved the Griffon on my right
up, needing it to be involved in the game if I wanted to try to take
control. I landed it right next to a hedge, convinced that this would
offer some sort of protection from the Chariot and Silver Helms in my
flank. This was laziness at its finest, as a quick glance at the
rules suggest that a hedge is not a specific sort of obstacle, and
therefore it would do little more than make the chargers take
dangerous terrain tests. Lame. I would pay for that later.
 |
| My Demigryphs reform and brace for impact |
The
Dragon posed a problem, but there was no point turning to face it.
Instead I moved my Pegasus away a bit, and reformed the Demigryphs so
that I would at least have 2 of them to fight before the Dragon got
to strike. Maybe I could unseat the rider, and Steadfast should hold
me in place.
In
the magic phase I threw a boosted Shem's Burning Gaze at the
remaining Phoenix, hoping to soften it up a bit before the Steam Tank
fired. This seemed like a sound plan, until the Tank fired and blew
the thing away outright, for the second time in a row! So the spell
had been wasted effort - it would have been far better spent smashing
a Chariot. Ah well, I couldn't complain - both Phoenixes gone before
the lines really engaged. It was a good result.
High
Elf Turn 2 shall forever be known as the Turn It All Went Wrong. I
had had a strong start (apart from the Griffon vs Eagle debacle), and
Aaron was now in a position to respond. The Dragon charged the
Demigryphs in the flank as expected, and the Chariot and Silver Helms
both had no trouble making it into the flank of my hedge-trimming
Griffon. Only a single Silver Helm failed his dangerous terrain test,
so that wasn't really going to help me. The unit of Silver Helms
which had been positioned to get flanked by my Griffon found itself
at a loose end, so charged the Steam Tank and managed to do a wound.
 |
| The Dragon engages the Demigryphs and the Silver Helms look to tie up the Steam Tank. Too late, the Phoenixes are gone, suckers!! (Might as well gloat whilst I can, right?) |
 |
| This could hurt. |
 |
| The Noble dismounts from his Eagle to assault my Wizard in the building, raising questions about what that really means in terms of Monstrous Cavalry stats. |
The
Eagle rider on my right flank charged into the house, which raised
sudden questions around what happens to Monstrous Cavalry in terms of
their Toughness and Wounds when assaulting a building (only the
modification to armour saves is explicitly covered for the rules of
Cavalry and buildings). We ended up calling over the TO for a ruling,
and he decided that the Noble would still be Toughness 4 and 3
Wounds, which was lucky for him because my feisty Archers would have
made him take 3 saves instead of 1 otherwise. The point of the Elf's
charge was to try to assassinate my Wizard, but he failed by only
doing 1 wound and being pushed back.
So
far it hasn't gone all wrong, has it? Well let's fix that. The
Chariot charging my Griffon somehow managed to inflict 5 wounds with
impact hits - 4 on the Griffon and 1 on the rider. The Silver Helms
failed their Fear test, which gave me sudden hope as with -1 to hit,
they would need 6s to hit the rider. Somehow they still landed 3
hits, and I failed my saves, dying outright. The Griffon was left on
a single wound and failed its Monster Reaction test, but instead of
rolling something great like Unbreakable, it turned Stupid. It did a
couple of wounds to the Chariot and then broke, getting run down in
the process. The one good thing was that 3 of the Silver Helms died
on the hedge as they pursued. Yay. The Chariot pursued straight
through a forest and into the front of my Halberdiers. Specifically
into contact with my Light Wizard, who was on a single wound after
miscasting the previous turn.
 |
| My Griffon is gone, and all I have to show for it are a few dead Silver Helms. Who I didn't even kill - their own lack of horsemanship did that. |
This
was not really the main disaster, however. The real problem was the
Dragon. My Demigryphs had been charged with holding it up, and they
failed spectacularly in that regard. After the Prince did 4 wounds
with his Star Lance, I managed to do a wound in return and knock off
his Charmed Shield. But then the Dragon attacked and decided to use
his breath weapon. Somehow I failed 2 2+ saves against the breath
weapon, and failed all 3 of my saves against the Dragon's attacks as
well. When all was said and done, I had lost 9 wounds, 3 whole
models, and my Steadfast. I then cheered myself up by rolling a pair
of 10s for the break test (so would have failed anyway), broke and
was run down. The true magnitude of their failure was revealed as
they broke, and the standard bearer died. Suddenly I only had 1
Demigryph left, only diagonally contacting the Dragon, and it swung
the direction of pursuit almost 90 degrees. Straight into the rear of
my remaining Griffon, all of about 4" away (it had just finally
finished off the Eagle it was fighting). So a combat I would have
desperately avoided had suddenly been forced on me in a way I
couldn't even flee from. Sigh.
 |
| What. The. Hell? How did that happen? |
 |
| My Dragon prepares to have its way with my Griffon in a most undignified fashion. Please, there are people watching! |
 |
| The end of the Turn It All Went Wrong (High Elf Turn 2) |
By
this point I was a slightly broken man, in keeping with my shattered
voice. One Griffon dead, another doomed to die, my Light Wizard
doomed to be assassinated as well... It was no longer going well.
Wallowing in my sorrows, I forgot to take photos for a while, so I'm
afraid there are some gaps. My Knights and Pegasus declared a charge
on the small unit of Silver Helms next to Aaron's main unit
containing his BSB. The Pegasus stuffed things up by failing, leaving
himself exposed to a charge from the Eagle Noble who had accompanied
the Dragon around my flank. His failure also denied me the chance to
overrun into the flank of the main Silver Helm bus, as it meant I
didn't have a wide enough frontage to control my direction properly.
I actually left a single Silver Helm alive, who fled until he was off
the table, and my Knights had to reform to receive a charge from the
BSB's unit and a Chariot.
That
situation would have been OK, however the Dragon chowed down on my
Griffon about as comprehensively as you might expect, and managed to
get itself 18" away from the flank of my Knight as well. All 3
High Elf units made the charge, dooming mine.
The
Chariot did indeed kill my Light Wizard before my Halberdiers hacked
it down, which panicked the 2 Silver Helms nearby. My Metal Wizard
and his Archer entourage sneaked out of the side of their building,
out of the arc of the Eagle Noble, before Searing Doom removed the
Elf and his bird from play. One threat gone - maybe my Wizard would
live a little longer, which was becoming increasingly important now
the Light Wizard was gone. The Steam Tank apparently didn't
appreciate being held up by Silver Helms, and wiped the unit out with
grinding hits and its steam turret (I don't remember which).
As
I have already said, in Aaron's turn my Knights were charged by the
Dragon, Chariot and main Silver Helm unit all at once. My BSB was
charged in the flank by the remaining Eagle Noble, and I decided to
flee. It was a pathetic flee roll (I rolled triple 2 when I can
re-roll 1s), but thanks to popping diagonally through the
Halberdiers, put just enough distance between us that Aaron failed
the charge roll.
Any
relief I may have felt was short-lived, however. The Knights were in
trouble, and this was compounded when Luthor Huss had to accept a
challenge from the Silver Helm champion because my own unit champion
had managed to die to Strength 3 attacks when I charged the little
unit the previous turn. Huss hulked out and smashed the champion
impressively, however the Dragon and its rider took a terrible toll
upon my unit once more and I lost 9 Knights in total. I broke and was
run down, and once more the fates conspired against me with the
direction of the Dragon's pursuit. I fled on an angle toward my
lines, and the Dragon caught me and landed smack-bang on the head of
the fleeing Pegasus. More sighs.
 |
| This combat could have gone very differently. Like if the Dragon wasn't there. That would have helped. |
 |
| So much for my BSB... |
In
my turn I had a big magic phase, as the Halberdiers backed away from
the Dragon and the Steam Tank swung about to face it. I managed to
cast Wyssan's Wildform and Enchanted Blades on the Halberdiers to try
to discourage the Dragon and Silver Helms from charging them, after
Aaron failed to dispel a boosted Searing Doom on the Dragon.
Unfortunately I only rolled 5 hits, which wounded the Dragon twice
and blew the Prince off the top. Maybe it would be enough, with the
Steam Tank facing it...
 |
| I reinforce the Halberdiers as well as I can. Note the Archer unit back in the building again, with the Steam Tank on the far side of the Dragon. What's wrong with that picture? |
At
this point I realised I had stuffed up. In order to get a look at the
Dragon and try to protect him from the newly rallied pair of Silver
Helms, I had moved the Metal Wizard and his Archers back into the
building. The Dragon was right between the Steam Tank and the house,
but I figured it would be fine - there was more than 10" between
them. I had somehow failed to take into account the fact that you
have to leave clear space for both the 10" roll on the cannon,
and then the bounce. If I had not entered the building and had walked
around it, I would have had a clear shot. Instead I couldn't fire for
fear of hitting my own troops. It was a stupid brain-fade, and I was
pretty cross with myself. It was most likely the only chance I'd get
to kill the Dragon, now that Searing Doom failed to do the job.
In
Aaron's turn the Dragon decided against going into the Halberdiers
alone, as the Silver Helms were not interested with all those augment
spells in play. The Eagle Noble tried a long-range charge into my
Beast Wizard and his Archers, but didn't get close. The Chariot
flanked the Steam Tank to hold it up, but did no damage. The rallied
Silver Helms charged into the building and despite having dropping to
Strength 3, they succeeded where the Noble had not and finished off
my Metal Wizard. I think my Archer unit broke and fled the table too.
 |
| The High Elves decide not to engage some of the most buff Halberdiers ever seen. |
 |
| Those 2 Silver Helms back to haunt me. This time the Wizard did not escape. |
 |
| The Chariot looks to tie up the Steam Tank. |
In
my turn the Steam Tank was pinned, Searing Doom was gone, and I no
longer had a way to deal with the Dragon. My Halberdiers decided the
best plan was to get out of the danger area, so charged around the
Steam Tank (which had misfired and wasted its steam) and into the
flank of the Chariot. They killed it easily and overran, needing
maybe 3 or 4 inches to get out of the arc of the Dragon and Silver
Helms. Naturally they rolled a 2. It wasn't the end of the world
though, as Aaron charged at them with both units. That gave me the
chance to flee from the Dragon, passing through the Silver Helms and
to safety. The Steam Tank became the target of their ire instead, and
was sandwiched between the 2 units. With 3 rounds of combat
remaining, this should have been OK. The Prince was gone and I still
had 9 wounds. The Tank died in the last round of combat in the game,
mainly because I refused to pass 1+ saves against Silver Helms and
Elven Steeds.
 |
| The Halberdiers charge the Chariot, kill it, then trip over their own puffy pantaloons. |
 |
| The Steam Tank is surrounded and battered into submission. |
 |
| We're outta here. |
My
failure was completed on the right flank. The Archers had done their
best to shepherd the Beast Wizard to safety, but the Silver Helms and
Eagle Noble hemmed them in for a last turn charge. The only way out
was aggression, so I decided I would charge the Silver Helms and cast
Wildform on myself. I failed the 8" charge, leaving me
completely at the Elves' mercy. In the end, all I had left was the
Halberdiers. Stuff was dead on both sides, but I had failed to get
points out of the now-riderless Dragon, which was the main
difference.
In
the end I had made things harder for myself by being careless with my
lines of sight in the first turn, being a bit careless with my
general's Griffon and messing up with the one cannon shot I could
have had on the Dragon. The dice didn't help in places, either.
Apparently I'm much better at firing cannon balls than I am at
passing armour saves.
Result:
5-15
So many flying beasties! And many commiserations on the stomping - I've rarely seen a dragon get up to such a rampage, they usually get artillerized then flop in combat O_O
ReplyDeleteSympathy for you there! I often have to face a Helf Dragon without cannons and it's not one of the most enjoyable parts of Warhammer Fantasy that's for sure!
ReplyDeleteIt's not like I didn't have the tools to kill the Dragon - I just didn't have time to kill it before it got into combat, and then couldn't catch a break to have a good crack at it.
ReplyDeleteI'm a bit confused: can you make pursuits and overrun moves with a particular angle? You've talked about "90° degrees pursuits". I thought those moves could only be done in straight lines. Nice battle report though, even if it was a bitter defeat !
ReplyDeleteThe centre of the fleeing unit goes on a line away from the centre of the enemy. Unfortunately with the bizarre way things worked out, by the time I broke the casualties had left the "middle to middle" pointing on a very acute angle. So the Dragon took a sharp turn and my Griffon suffered the consequences.
Delete