
This
post is a continuation of my account of the recent tournament,
Axemaster 2014. You can find the previous part of the report here.
Game
6
Ben
Wadsworth, Warriors of Chaos
- Chaos Lord of Tzeentch on Disc of Tzeentch with Talisman of Preservation, Crown of Command, Dragonhelm, Flaming Breath, Soul Feeder, Great Weapon, Shield
- Exalted Hero of Tzeentch BSB on Barded Daemonic Mount with Armour of Destiny, Scaled Skin, Great Weapon
- Chaos Sorcerer (Level 2, Lore of Tzeentch) with Chaos Familiar
- Chaos Sorcerer (Level 1, Lore of Metal) with Dispel Scroll
- 17 Chaos Warriors of Tzeentch with Full Command, Shields, Gleaming Pennant
- Chaos Chariot of Nurgle
- Chaos Chariot of Nurgle
- 5 Chaos Warhounds with Vanguard
- 5 Chaos Warhounds with Vanguard
- Chimera with Flaming Breath, Regenerating Flesh
- Chimera with Flaming Breath, Regenerating Flesh
- Hellcannon
- Giant
Comp
Score: 2
After
2 big losses I felt like reality had reasserted itself and my place
in the field had been corrected, so I hoped to do a little better in
my last game. I've been wanting to play Mr Wadsworth (the man behind
Shirts off Warhammer) for a while, and now I had my chance.
Unfortunately when I looked at his list, I realised I might have some
difficulty getting rid of some of his characters. Ah well, what was
the worst that could happen?
 |
| Game 6 deployment |
 |
| The Hellcannon lurks in the far corner |
 |
| So many dangerous models |
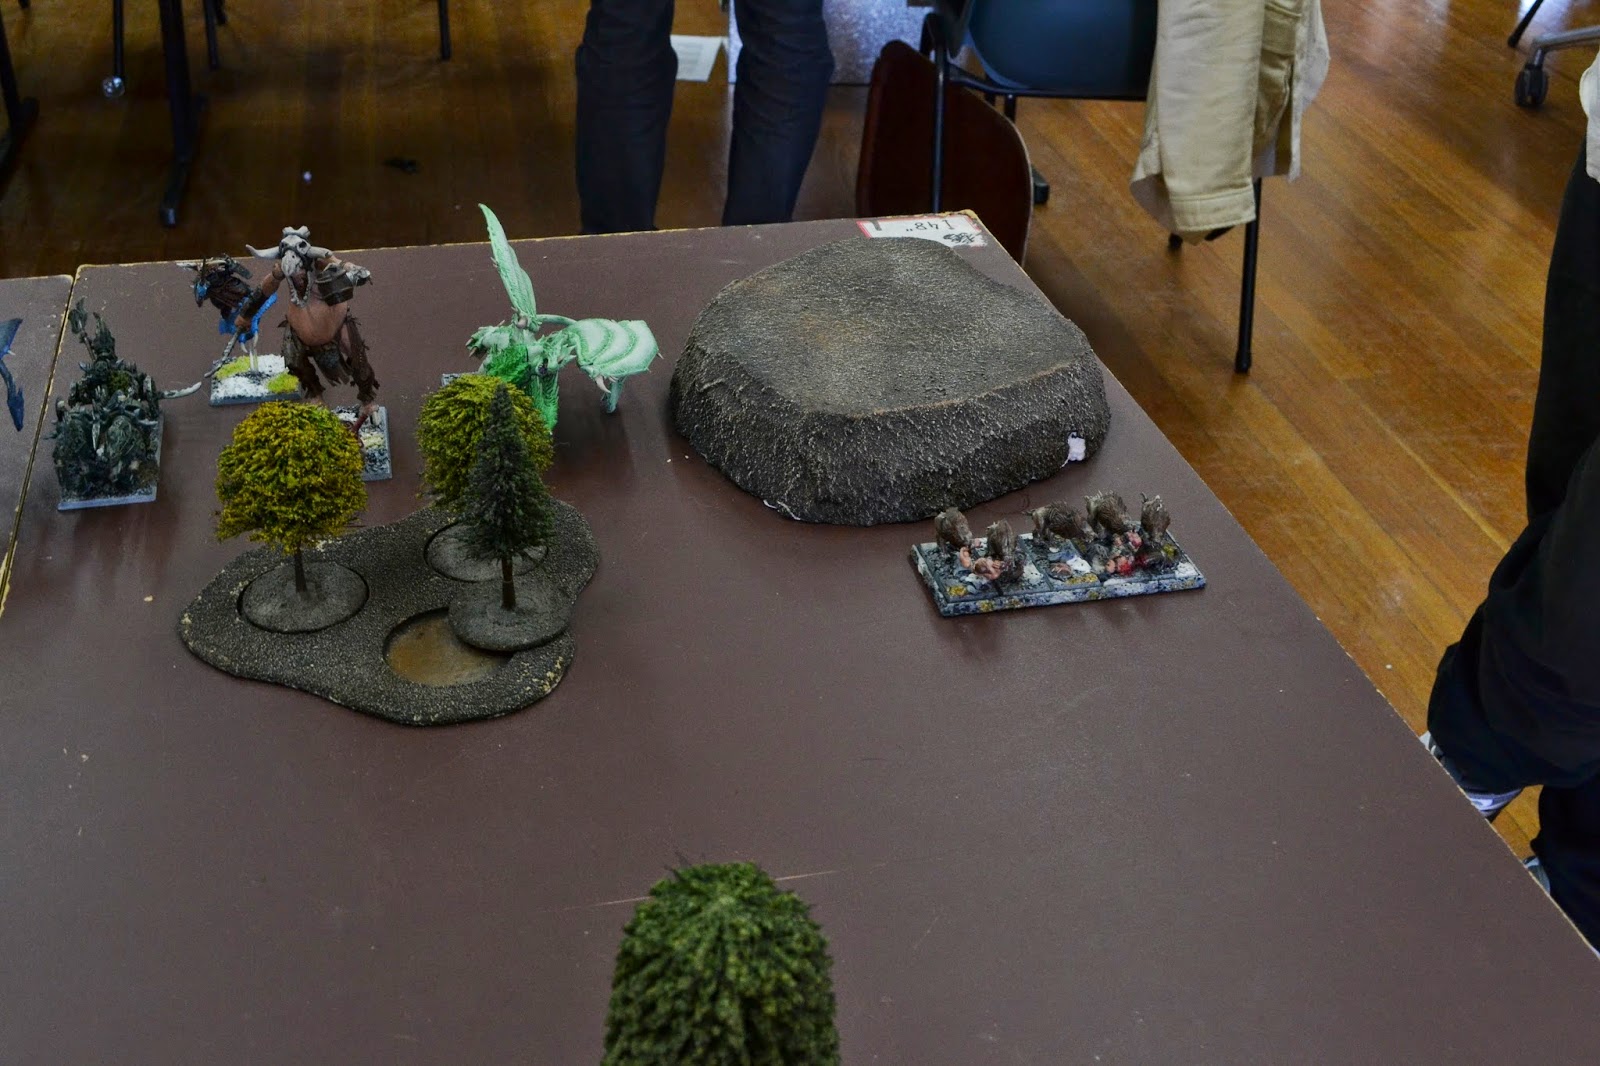 |
| The doggies bravely advance toward my lines with their Vanguard move |
Apart
from the Hellcannon in the back corner with a lone Chariot keeping it
company, Ben fielded a largely empty table facing my left flank. My
forces were centered more to the right, and the heavy hitters in the
Chaos army deployed opposite them. I put one of my Griffons well over
on the right flank, and one of the units of Chaos Hounds deployed
opposite and used Vanguard to move into charge range. I commenced the
game by going for the bait and charging, which of course they fled
(though I don't recall if it was voluntary or from Terror). They also
kept fleeing for 2 more turns before they finally made it off the
table.
 |
| The left side of my line sweeps forward a bit, whilst the centre more or less holds its ground |
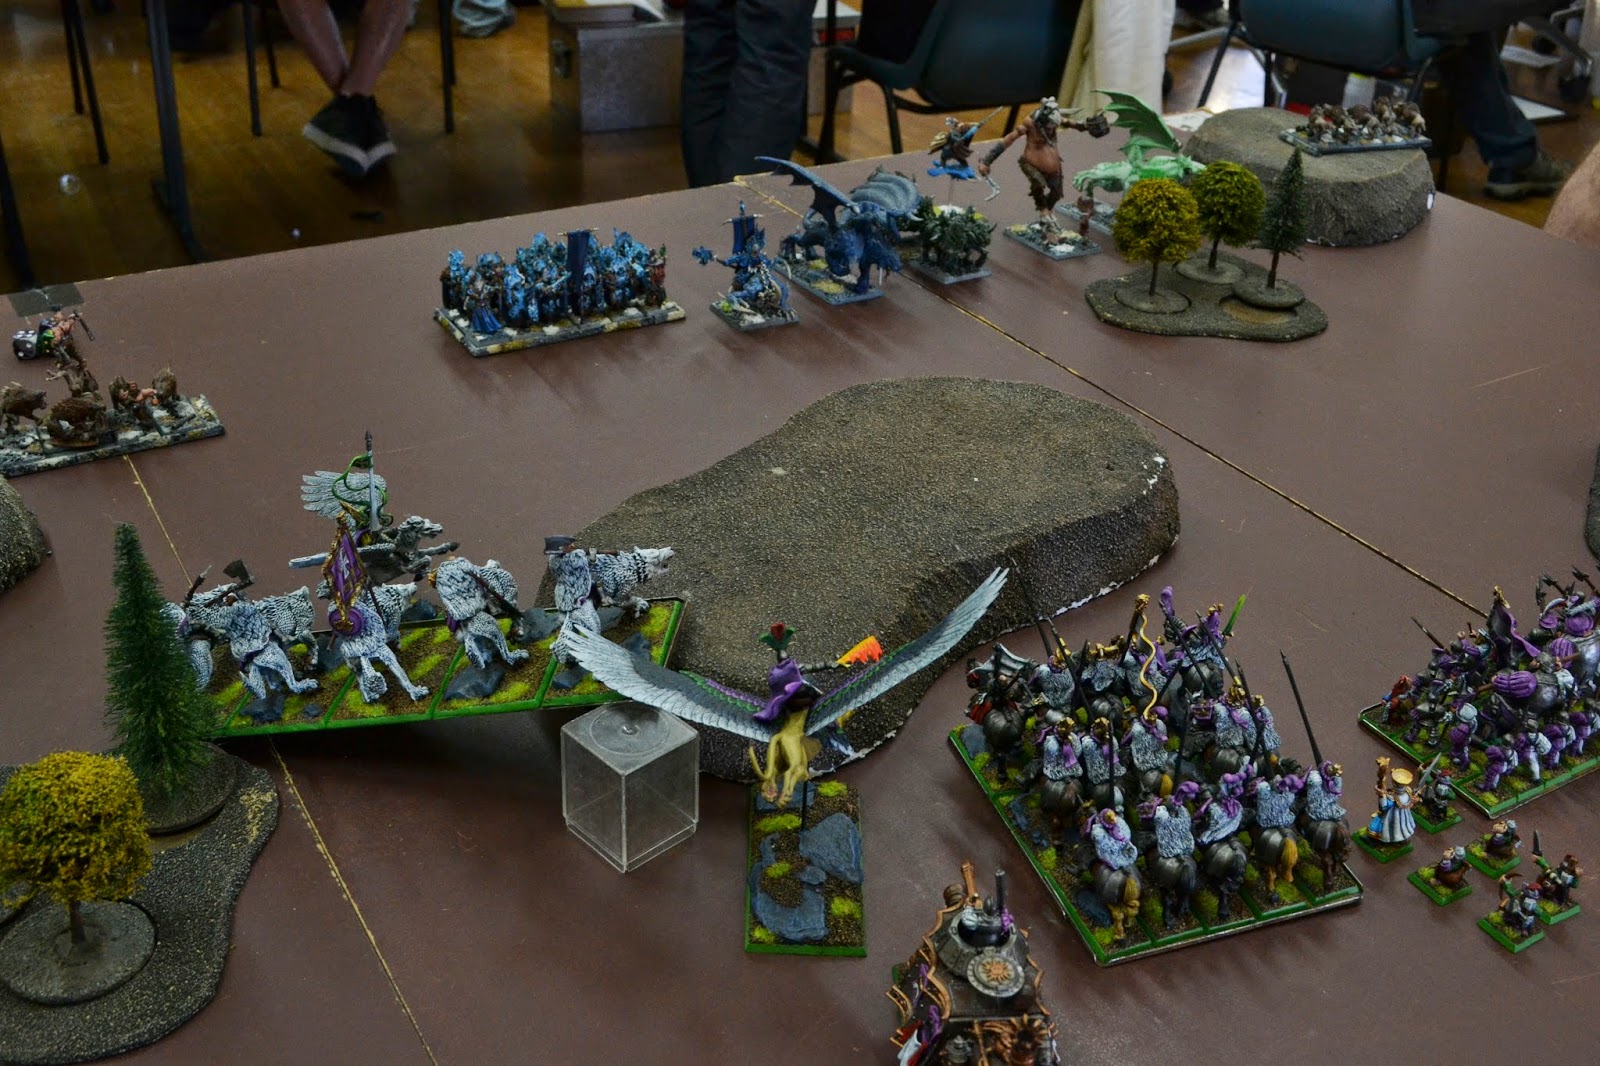 |
| Still not sure how I can handle all those heavy hitters arriving at once |
 |
| Yeah, you better run |
The
Demigryphs and BSB swept around on my left flank. There was a unit of
Chaos Hounds nearby that would likely get in the way, but without the
missile fire to cull them, I'd just have to deal with them on their
terms. The rest of my forces were pretty cagey, with multiple flying
enemies that I was in no particular hurry to engage. My Steam Tank
commenced a thoroughly disappointing game by misfiring, taking a
couple of wounds from the cannon (I think). My Wizards did a little
better, wounding both of the Chimeras with Searing Doom and Shem's
Burning Gaze (I would have preferred to concentrate fire on one, but
ranges or something prevented it). I might have left one of them on a
single wound.
 |
| Well that was not entirely unforeseen. The remaining Chaos Hounds make a nuisance of themselves |
The
Chaos Hounds to the left did indeed plonk themselves right in the way
of the Demigryphs, whilst the Chariot started to move up behind them.
The Hellcannon got all angry and rampaged, but didn't get far because
the Chariot had not yet moved out of the way. At least it wouldn't be
shooting that turn.
 |
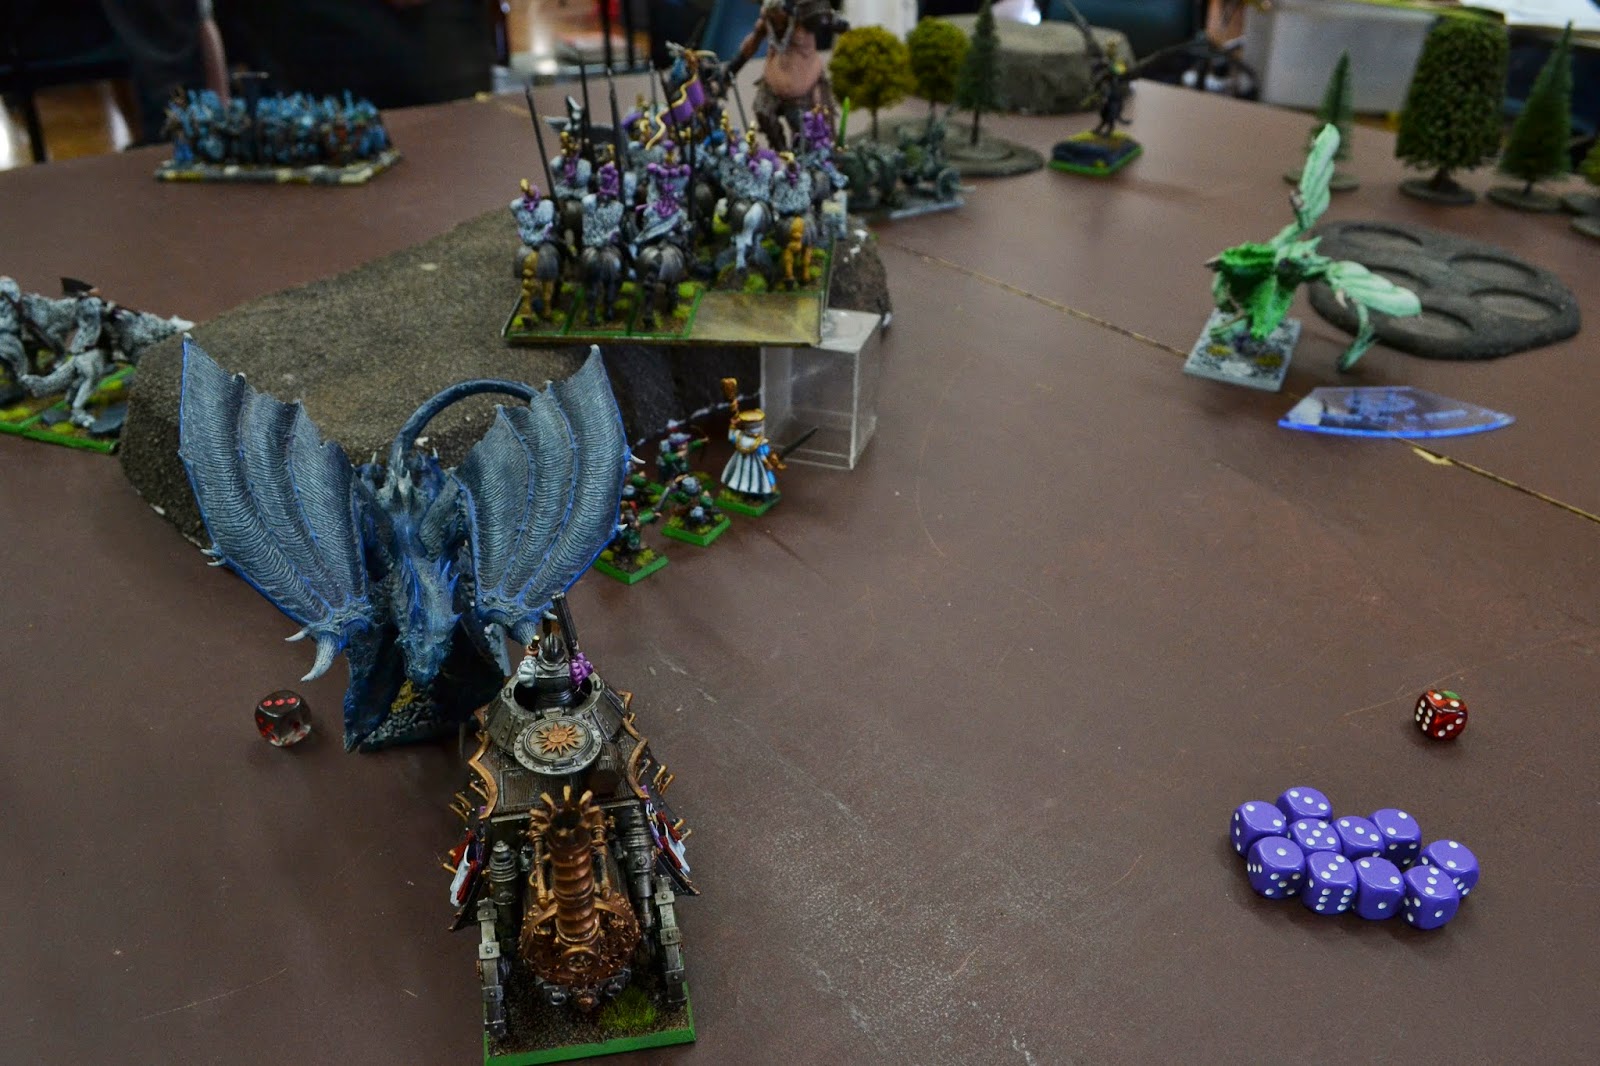
| The Chaos centre goes for an odd formation to keep me from the more vulnerable targets |
The
movement in the Chaos centre was very interesting. Ben decided to
plant his unkillable, Stubborn Lord on the hill right in the middle
of the field, and then used him as an effective screen for one of the
Chimeras that flew up behind him. Basically I wouldn't be able to
charge it with any of my units, except maybe my BSB and Halberdiers.
The Chaos BSB moved up behind the Chimera, effectively making a
strange conga line diagonally across the centre of the field. The
Chariot and Giant on that flank moved up, but they were far out-paced
by the green Chimera. It flew aggressively up in front of my
Halberdiers, and used its breath weapon on them (I think it was
basically a "use it or lose it" situation, because the
Chimera was down to a single wound). I lost plenty of models,
panicked and fled.
 |
| The Chimera's dreadfully bad breath is too much for the Halberdiers |
In
my turn the Demigryphs charged and killed the Chaos Hounds, before
deciding to reform facing the Chaos Sorcerers with their entourage of
Warriors near the back of the board. In the centre, I went
aggressively in. I figured I couldn't get to the blue Chimera unless
I went through the Lord, and the only way I was ever going to get rid
of him was by getting rid of the BSB and hoping he failed a Stubborn
test without the re-roll. I sent the Knights into the Lord, figuring
they were the only thing in my army other than the Steam Tank that
might break him (the Tank itself was busy hissing steam and doing
nothing again that turn).
 |
| My options were limited, so I decided to try to weaken the leadership in the centre. Getting rid of either the general or BSB would probably open up the entire game |
| The Demigryphs deal with the Chaos Hounds easily and reform to face the Chaos Warriors despite the Chariot in their rear |
To
try to get rid of the enemy BSB, I sent my BSB into his flank and my
general into his front. This guy had a 3+ ward save like the Chaos
Lord, but he wasn't stubborn and I might just get him through combat
resolution with the odd wound. If this seems optimistic, it was.
Naturally he challenged, and I decided to go aggressively and accept
with my general. He wasn't contributing anything in terms of bonuses,
so he might as well have a swing. Unfortunately this policy didn't
really work for me, as I did nothing at all in the first round and he
pulled out his great weapon and murdered my general off the back of
the Griffon, who was once more grief-stricken and went Unbreakable
again. My general might be useless, but at least it seems like the
Griffon is attached to him.
My
efforts to break the Chaos Lord were similarly futile. He challenged,
I accepted with Luthor Huss, we clubbed each other a bit, might have
taken a wound each, and I failed to break him. The following round
Luthor bit the dust. I did actually win the combat at least twice,
and even got the Lord down to 1 wound, but then Soul Feeder kicked in
and he started to revive himself.
In
Ben's turn he tried to scare off my BSB by charging my grumpy Griffon
in the flank with one of his Chariots, but the bonuses for the flank
charge were not enough to break me. The green Chimera charged at the
Halberdiers who had rallied after their earlier panic. Unfortunately
I failed my Terror test and fled again, this time off the table and
taking the Metal Wizard with them. Cowards. The Chimera redirected
onto the Steam Tank, but failed the charge. The blue one had no such
issues and swooped over the Knight combat and into the front of the
tank, however it didn't do too much damage (I confess I was hoping they would both make it in. The Tank was the best thing in my army to deal with them). The Giant spotted the
Archers trying to keep my Beast Wizard safe behind the forest and
charged at them. Once more I failed I Terror test and fled off the
table. Suddenly I only had my Light Wizard left. The Giant redirected into the Knights alongside the Chaos Lord, and started swinging with his club.
 |
| The Blue Chimera attacks the Steam Tank, but the Green one misses out. |
 |
| The Giant decides the Chaos Lord looks like he could use some help |
The
Chariot that had been following my Demigryphs now charged them in the
rear, however they shrugged off its efforts and turned to face it.
The Hellcannon fired across the field and landed a shot directly on
the head of my unengaged Griffon, however only the rider took a wound
(he rolled a 1 on the beast).
 |
| The Chariot tries for an opportunistic charge on the Demigryphs |
 |
| Oh you want some, do you? |
 |
| Protracted combats are popping up all over the table. Nothing breaks on the charge in this game, it seems. |
In
my turn the Steam Tank finally woke up and crushed the blue Chimera
beneath its armoured bulk. Hooray, actual progress! My unengaged
Griffon tried to rescue its friend by charging the Chariot fighting
it in the rear. Once more I had hopes that I might be able to break
the Chaos BSB, however I did little damage to the Chariot (stupid
Nurgle mark), took multiple wounds from the Chariot crew, and the
Griffon in the challenge copped some wounds from the BSB's great
weapon. If I won combat, it was not convincingly enough to break
anyone.
 |
| It's like a rescue mission, but when all you've got to use is Griffons, you can't really tell |
My
Demigryphs wounded and broke the Chariot, but rather than chasing it
they let it flee into the forest and reformed to face the Chaos
Warriors once more. That Chariot successfully negotiated the trees
and rallied, but didn't try to get involved in the rest of the game.
 |
| We are not so easily distracted. The Demigryphs let the Chariot escape and turn back to the Warriors - I'm starting to think they are the only worthwhile target from which I might actually be able to claim points |
The
combat in the centre was still not going very well. I cast Speed of
Light in the hope of making the Chaos Lord miss, but with the Chaos
BSB still around, it was all rather futile.
 |
| My sole remaining Wizard attracts the ire of the Chimera and runs for his life (my choice this time). Doesn't run far, though... |
 |
| Bummer. No more Wizards for me |
In
Ben's turn the green Chimera charged my remaining Wizard and his
bodyguard of Archers, and they fled a rather uninspiring distance and
were caught. The Giant kept swinging with his club (he did break it up with a bit of a yell and bawl once), helping cull my unit in spite of
their high WS. I was now losing but holding because of Steadfast.
What I should have done (but kept forgetting) was reform across to
get more attacks on the Giant and try to farm him for combat
resolution. Eventually I did this, but it was too little, too late.
The
level 1 Chaos Sorcerer was "volunteered" to hurry out from
his unit and into the path of the Demigryphs, buying the Warriors
some more time. Infernal Gateway hit home and did a wound or two, but
not enough to kill a Demigryph (which would have opened a path past
his blocking model). The Hellcannon landed a shot on the Steam Tank
and did a couple of wounds.
 |
| A sorcerous speed bump |
I
think it was at this point that the tangle between our BSBs was
resolved. My Griffon fired up and killed the Chariot, the Chaos BSB
responded by killing the Unbreakable Griffon, and my BSB wound up
losing combat and breaking, so he was destroyed. We were left with my
second Griffon and the Chaos BSB, both alive but no longer in combat.
I
decided not to charge yet another Griffon into the Chaos BSB, and
instead flew over behind the Chaos Warriors as my Demigryphs charged
and killed the Sorcerer in their path. They overran, but not quite
far enough to reach the Warriors (they were a fraction of an inch
short, I think). The Steam Tank misfired again, wasting another turn.
 |
| Argh, so close! |
At
this point there was not much left. Eventually the Chaos Lord and
Giant finished off my Knights, but the Giant emerged with two wounds
left. The Steam Tank failed yet again to do anything to it, but the
driver was not to be deterred by his temperamental machine, and pulled
out his pistol. He shot a wound off, failed to hurt it again as it
charged, but then clubbed it to death in close combat. The Giant
toppled over sideways without hurting the Tank, and so it survived
the game.
 |
| The Chaos Lord arrives to rescue the Warriors. Curse his eyes (he probably has more than 2, Tzeentch-worshipper that he is) |
 |
| Alas, poor Griffon! I finally use one of the infantry models I brought along in case a Griffon died and the rider survived |
My
Griffon's efforts to rear-charge the Chaos Warriors came to nothing
because the enemy BSB managed to catch up with him and kill first the
monster and then the rider. The Demigryphs did make it into the Chaos
Warriors and won handsomely, but the BSB helped them hold their
ground. The Chaos Lord then arrived in my rear and the combat ground
to a bloody stalemate at the end of the game.
 |
| How things ended. No points to be had here either. At least the Demigryphs held their own |
In
the end the Demigryphs and Steam Tank were all I had left, and I had
little to show for my efforts - I had cleaned up the Giant, a
Chimera, a Chariot, the Chaos Hounds, and a Sorcerer. There were too
many important Chaos models still alive. I had lost badly.
Result:
3-17
So
after a slightly strange tournament, my army had led at the halfway
point with 50 battle points, only to barely break even on 62 by the
end. My final 3 games had gone 5, 4, and 3 battle points. It's
probably for the best that things stopped there, then.
My
adventure with the Griffons had been amusing, but it was certainly
not a good idea if I wanted to win games. Where I had been winning on
Day 1, it really had nothing to do with the Griffons. On the flip
side, when I started losing on Day 2, it had a lot to do with them.
Granted I was occasionally careless in my play, but besides giving me
speed, too often the Griffons could not contribute meaningfully. It
was never more apparent than in the last game, where they struggled
to find a single thing they wanted to charge. By the end I felt like
I had come to a gun fight armed only with a wet fish. Or maybe a
Griffon feather.
Thanks for the report.
ReplyDeleteWas there much difference to the lists in the armies that were at the top tables at the end or were they all using the usual suspects?
Cheers
Aaron Graham (my opponent in round 4) won the event with the all-flying, all-singing, all-dancing High Elves. The other 2 podium places were also taken by High Elves, but with horrible Teclis-based filth (the lists were pretty much identical, I believe).
DeleteNext were Lizardmen, double Steam Tank Empire, and Simon Kwok's light council Empire (who I played in round 5).
So apart from an over-representation of High Elves at the pointy end, there was a bit of a mix. And arguably apart from Aaron's list, all the top positions were going to some pretty nasty lists as you would expect where the comp scores don't directly affect standings.
Great reports as always. Shame that your experiences between winning and losing were split between the days so precisely!
ReplyDeleteI love that you try out unusual options in your lists and, more often than not, make them work for you. Keep it up! It's very entertaining!
This was a great tournament report, I´m almost sad it´s over.
ReplyDeleteVery good pictures and I like the style/look of your army.
Why did you fail so many panic/terror tests in the last game, no bsb/general in range?
Cheers.
DeleteThe general was in range for some of it (before getting quickly cut from his saddle), but my BSB was busy acting as an extra unit in order to try to swing a combat my way (much good that did me). So it was partly self-inflicted.