
So we were onto Day 2 of the tournament, and after the savaging I had taken in Game 3, I was hoping I would be back into a realm of relative safety on the tables. But then I arrived at my table, and this is what I found...

What the hell? We didn't sign up for this!
Turns out the tanks belonged to the 40K player at the other table. Probably for the best, really...
Game 4 - Plunder
Daniel Harwood - Ogres
- Horde of Ogre Warriors with Mead of Madness, Crocodog
- Horde of Ogre Warriors with Brew of Haste, Crocodog
- Horde of Ogre Warriors with Crocodog
- Horde of Ogre Warriors with Crocodog
- Horde of Ogre Warriors with Crocodog
- Red Goblin Blaster
- Red Goblin Blaster
- Berserker Bully
- Berserker Bully
- Grokagamok
- Ogre Warlock with Drain Life
- Ogre Warlord on Chariot with Blade of Slashing

So many Ogre Warriors. I mean, I get it. They're a solid unit. But I was glad none of them were Siegebreakers instead. One of those units had Mead of Madness and the Berserker Bully (character closest to the rock) came with Wild Charge. Otherwise that was a wall of Speed 6, so I had the upper hand in terms of dictating terms.

The Warlord on Chariot went hard on the flank, with the other Berserker Bully between the Blasters. So Daniel's fastest element was furthest away.

I need to make some blasters for my Ogres. Although they're not as scary as they used to be.

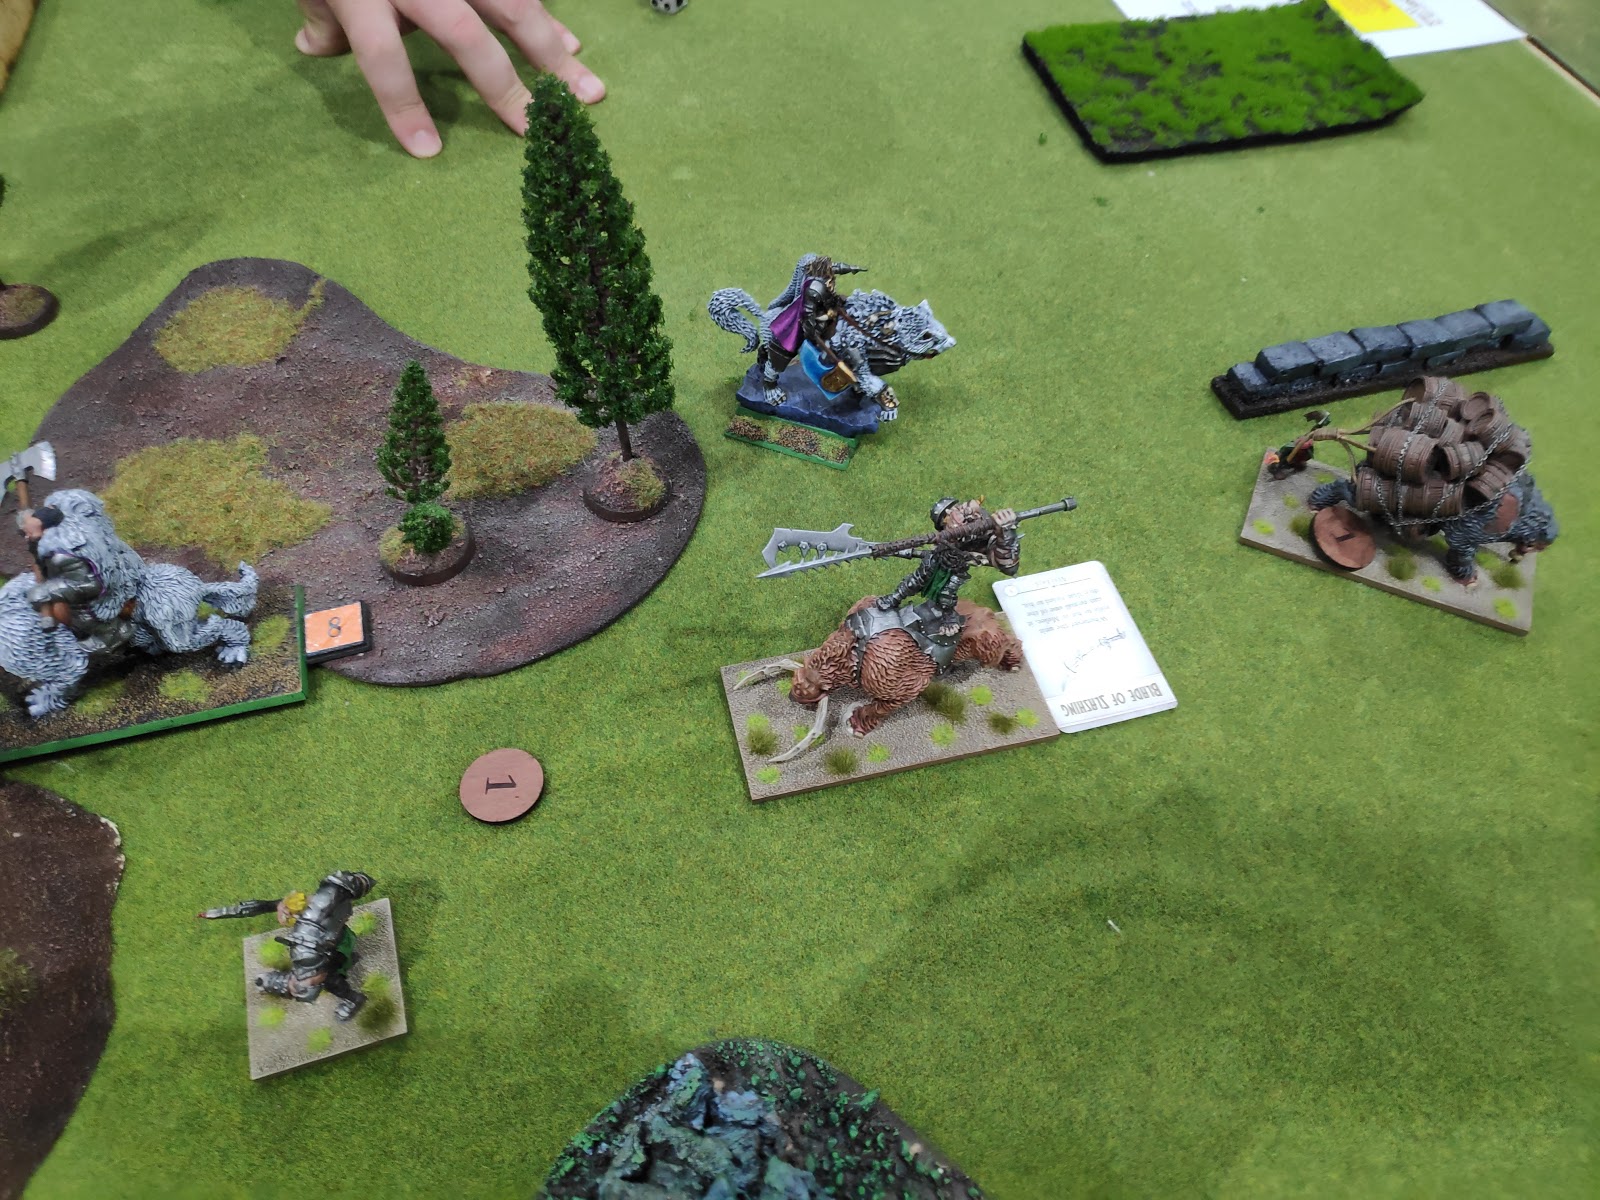
That's Grokagamok near the forest. I knew he was likely to hurt, wherever he got in.

I got the first turn and took the opportunity to apply pressure by advancing, using my superior speed to threaten whilst staying out of the enemy charge ranges.

The birb made use of the handy forest hiding him from the nearest enemies.

The Baron was left to watch the flank whilst everything else curled in toward the centre. Basically I was looking to ignore this flank for now, and hopefully deal with the main line before these units became relevant.

Deploying the Honour Guard in a place where they wouldn't get clear of the terrain in the first turn was careless of me. If they got a charge, it would be hindered.

In Daniel's turn, the flank closed in as much as it could without disrespecting the Baron too much by offering clear flank charges (at which point he would have become a real threat on his own). The Chariot is still hard on the flank. It's facing the right way, but it's a long way from my main forces...

Denied the chance to charge anywhere and faced with the prospect of being charged all over the place, he eventually decided to advance hard up into the face of my units.

I'm not convinced this was the right move. The Honour Guard were barely faster than his units. I would have been tempted to try to encourage me to commit without all my Speed 7 stuff (and the unit held up in the terrain).

The nearest Blaster had poked its nose into the forest, so it could now see what was going on over on the other side of the trees. The Warlock made a weak attempt at throwing lightning at my Knights, and then it was my turn.

The Baron charged in from the flank, hitting the Blaster in the side (although it was a hindered charge). The Mammoth went into the flank of the nearest Warriors, with the Knights going in the front. The Honour Guard are actually fighting the next unit along, but were being pushed this way by my other Knights...

...Who were also fighting that unit. The birb went over the enemy lines into the flank of the Warlock.

The other birb and the hindered Honour Guard engaged the unit on the hill, whilst the Knights hard on the flank decided to start working on the Warrior unit in front of them. This was probably the only combat that was not clearly favourable for me

So... Both Warrior units near the centre folded under the combined charges of my units. I didn't have great options in terms of avoiding flank charged. Grokagamok was going to get a go at the flank of the Knights. I just had to accept that, and turn things into position to avenge them. At least it would get him to commit, and being flanked by the Berserker Bully almost outside of the picture would have been almost as bad (and rendered the Knights mostly useless if they survived, anyway. The Baron did reasonable damage to the Blaster, but thanks to Grokagamok's very inspiring presence, the Goblins stuck around. The birb also failed to get through the Warlock, but definitely dented him.

The Warriors on the other hill also folded, leaving me free to reform and put the remaining unit in an unenviable position.

The left was more of a surprise, but maybe not that much given how things were going for Daniel (it never rains, but it pours). The Warriors found themselves unable to hold their ground against the lone charge of the Knight regiment. I suspect this could be mainly attributed to the lack of a re-roll for the nerve test. Still, it felt harsh. It meant I had removed 4 out of 5 Warrior units in a single turn of charges.

Having survived the assault of the Baron, the Blaster took the opportunity to flank charge my Mammoth. It was a hindered charge, but a few hits could really hurt... Both Grokagamok and the Berserker Bully hit the Knights (although Grok was a little slow getting moving in this picture).

The Chariot Warlord was closing in now, but he was too late to really be relevant. He had been too wide in his movement. The second Blaster was sneaking off to grab an objective.

Looking for whatever revenge they could find, the remaining Warriors and the damaged Warlock charged the Knights in front of them.

The other Berserker Bully ended up deciding to charge the Halflings. I'm not sure why. Maybe he thought he could get through them in a single turn and dash to safety with an objective. Or maybe he was admitting that he wasn't going to get through the Knights, and this was his best bet to contribute.

It was a reasonable wave of counter-punches, but it did feel like insurmountable damage had already been done.

I did like the mead wagon in the middle of the Warriors. That was pretty cute.

Grokagamok and his mate dealt with the Knights in pretty graphic fashion, but the Mammoth stood its ground thanks to the Blaster only landing a couple of hits. It was still hurting, though. 8 wounds was a decent outcome from 2D6 hits.

The Knights took 9 wounds, which was a fair whack, But they held their ground without wavering, which was a good effort considering.

The Halflings also held their ground, having the lone Bully well under control.

They then backed out of the way to make sure the path was clear for a flank charge by the Knights.

Neither of my birbs engaged this turn, having little or nothing within their line of sight. They focused on getting into a better position and healing units around them with Radiance of Life. Thanks to the Knights holding their ground, the Ogre Warriors were forced to endure a rear charge from the Honour Guard. The Knights decided this was now under control, and counter-charged the Warlock instead.

Grokagamok had decided that it was best to receive the charge of the Honour Guard in the front, which meant the Mammoth was in the rear. Maybe I should have trusted the Mammoth to do the job alone, but he was disordered and I did not want to chance a bad roll leaving Grok alive and swinging.
The Baron emerged from the forest, ready to chase another Blaster.

Everything I charged that turn died. This freed up the Knights and Mammoth to spin about, facing the remaining enemy units. Interesting question here. Can the Berserker Bully see those Knights? The hill is Height 3, making it the same as both the Knights and Ogre. The Knights are not half on the hill, so I would have thought that meant the unit counted as Height 3 and was thus hidden. Even if part of the unit counted as Height 6, the path to that bit would be blocked by the taller Honour Guard. I was actually a bit concerned about the rules for hill line of sight during this event. Read literally, it seems if a unit just pokes its leader point onto the hill, it can see over but other units won't be able to see it. Maybe this has been covered in an FAQ. Doesn't sound like how it should work...

By this point the far left flank had reached a level of irrelevance. The Knights and Halflings would not be moved again.

It seems I missed a picture or two. The Warlord Chariot charged the Mammoth, and despite it being a hindered charge (I think), finished him off. The Berserker Bully did charge over the hill, and also finished off my damaged Knights.

The Blaster panicked a bit about the oncoming Baron, and decided a hindered flank was better than just turning to face him. Given he lost Thunderous Charge, this might be true.

Sneaky Bully, running into the middle of my lines to pick on the poor Knights.

A combined charge from the birb and Honour Guard was enough to rout the Warlord.

The Baron decided he could handle another hindered flank charge, and this time, without Inspiring, the Blaster crumbled.

And the Bully was duly punished for his picking on the Knights.
Result: 20-1
No comments:
Post a Comment