This is the third part of my report of the recent tournament at Cancon 2023. You can find the previous part here.
Two games down, and I hadn't even lost yet! This seemed like a pattern that was unlikely to continue, and here came a pair of Treemen to put a stop to my run... Dave had the only Wood Elf army in the field, which left me wishing that I'd followed through with my plan for using them instead of the Dwarfs (of which there were 5). Oh well.
I was a bit surprised by the 2 Treemen, but the rest of the list wasn't as finely honed as it could have been, so I guess the TOs figured it was OK. I still remember getting 2 Treeman banned from Cancon in 6th edition. Ah, the good old days... Dave's list was also terrible for Blood and Glory. If I killed with the general (which was one of the Spellsingers, given the Highborn was Alter Kindred and not leadership material) or the BSB, the game would end that turn and I'd get 500 bonus victory points. I had plenty of banners, so didn't face the same dangers.
Anyway, on to glory! And blood. Always need some blood.
Game 3 - Blood and Glory
Dave Lewis - Wood Elves
- Alter Kindred Highborn with Great Weapon, Light Armour, Helm of the Hunt, Stone of Rebirth (maybe the Bow of Loren? Probably? He didn't use it, though)
- Spellsinger (Level 1) with Dispel Scroll
- Spellsinger (Level 1) with Dispel Scroll
- Noble with Battle Standard, Asyendi's Bane, Hail of Doom Arrow, Light Armour
- 10 Glade Guard
- 8 Dryads
- 8 Dryads
- 8 Dryads
- 5 Wild Riders
- 7 Wardancers
- 5 Wardancers
- Treeman
- Treeman
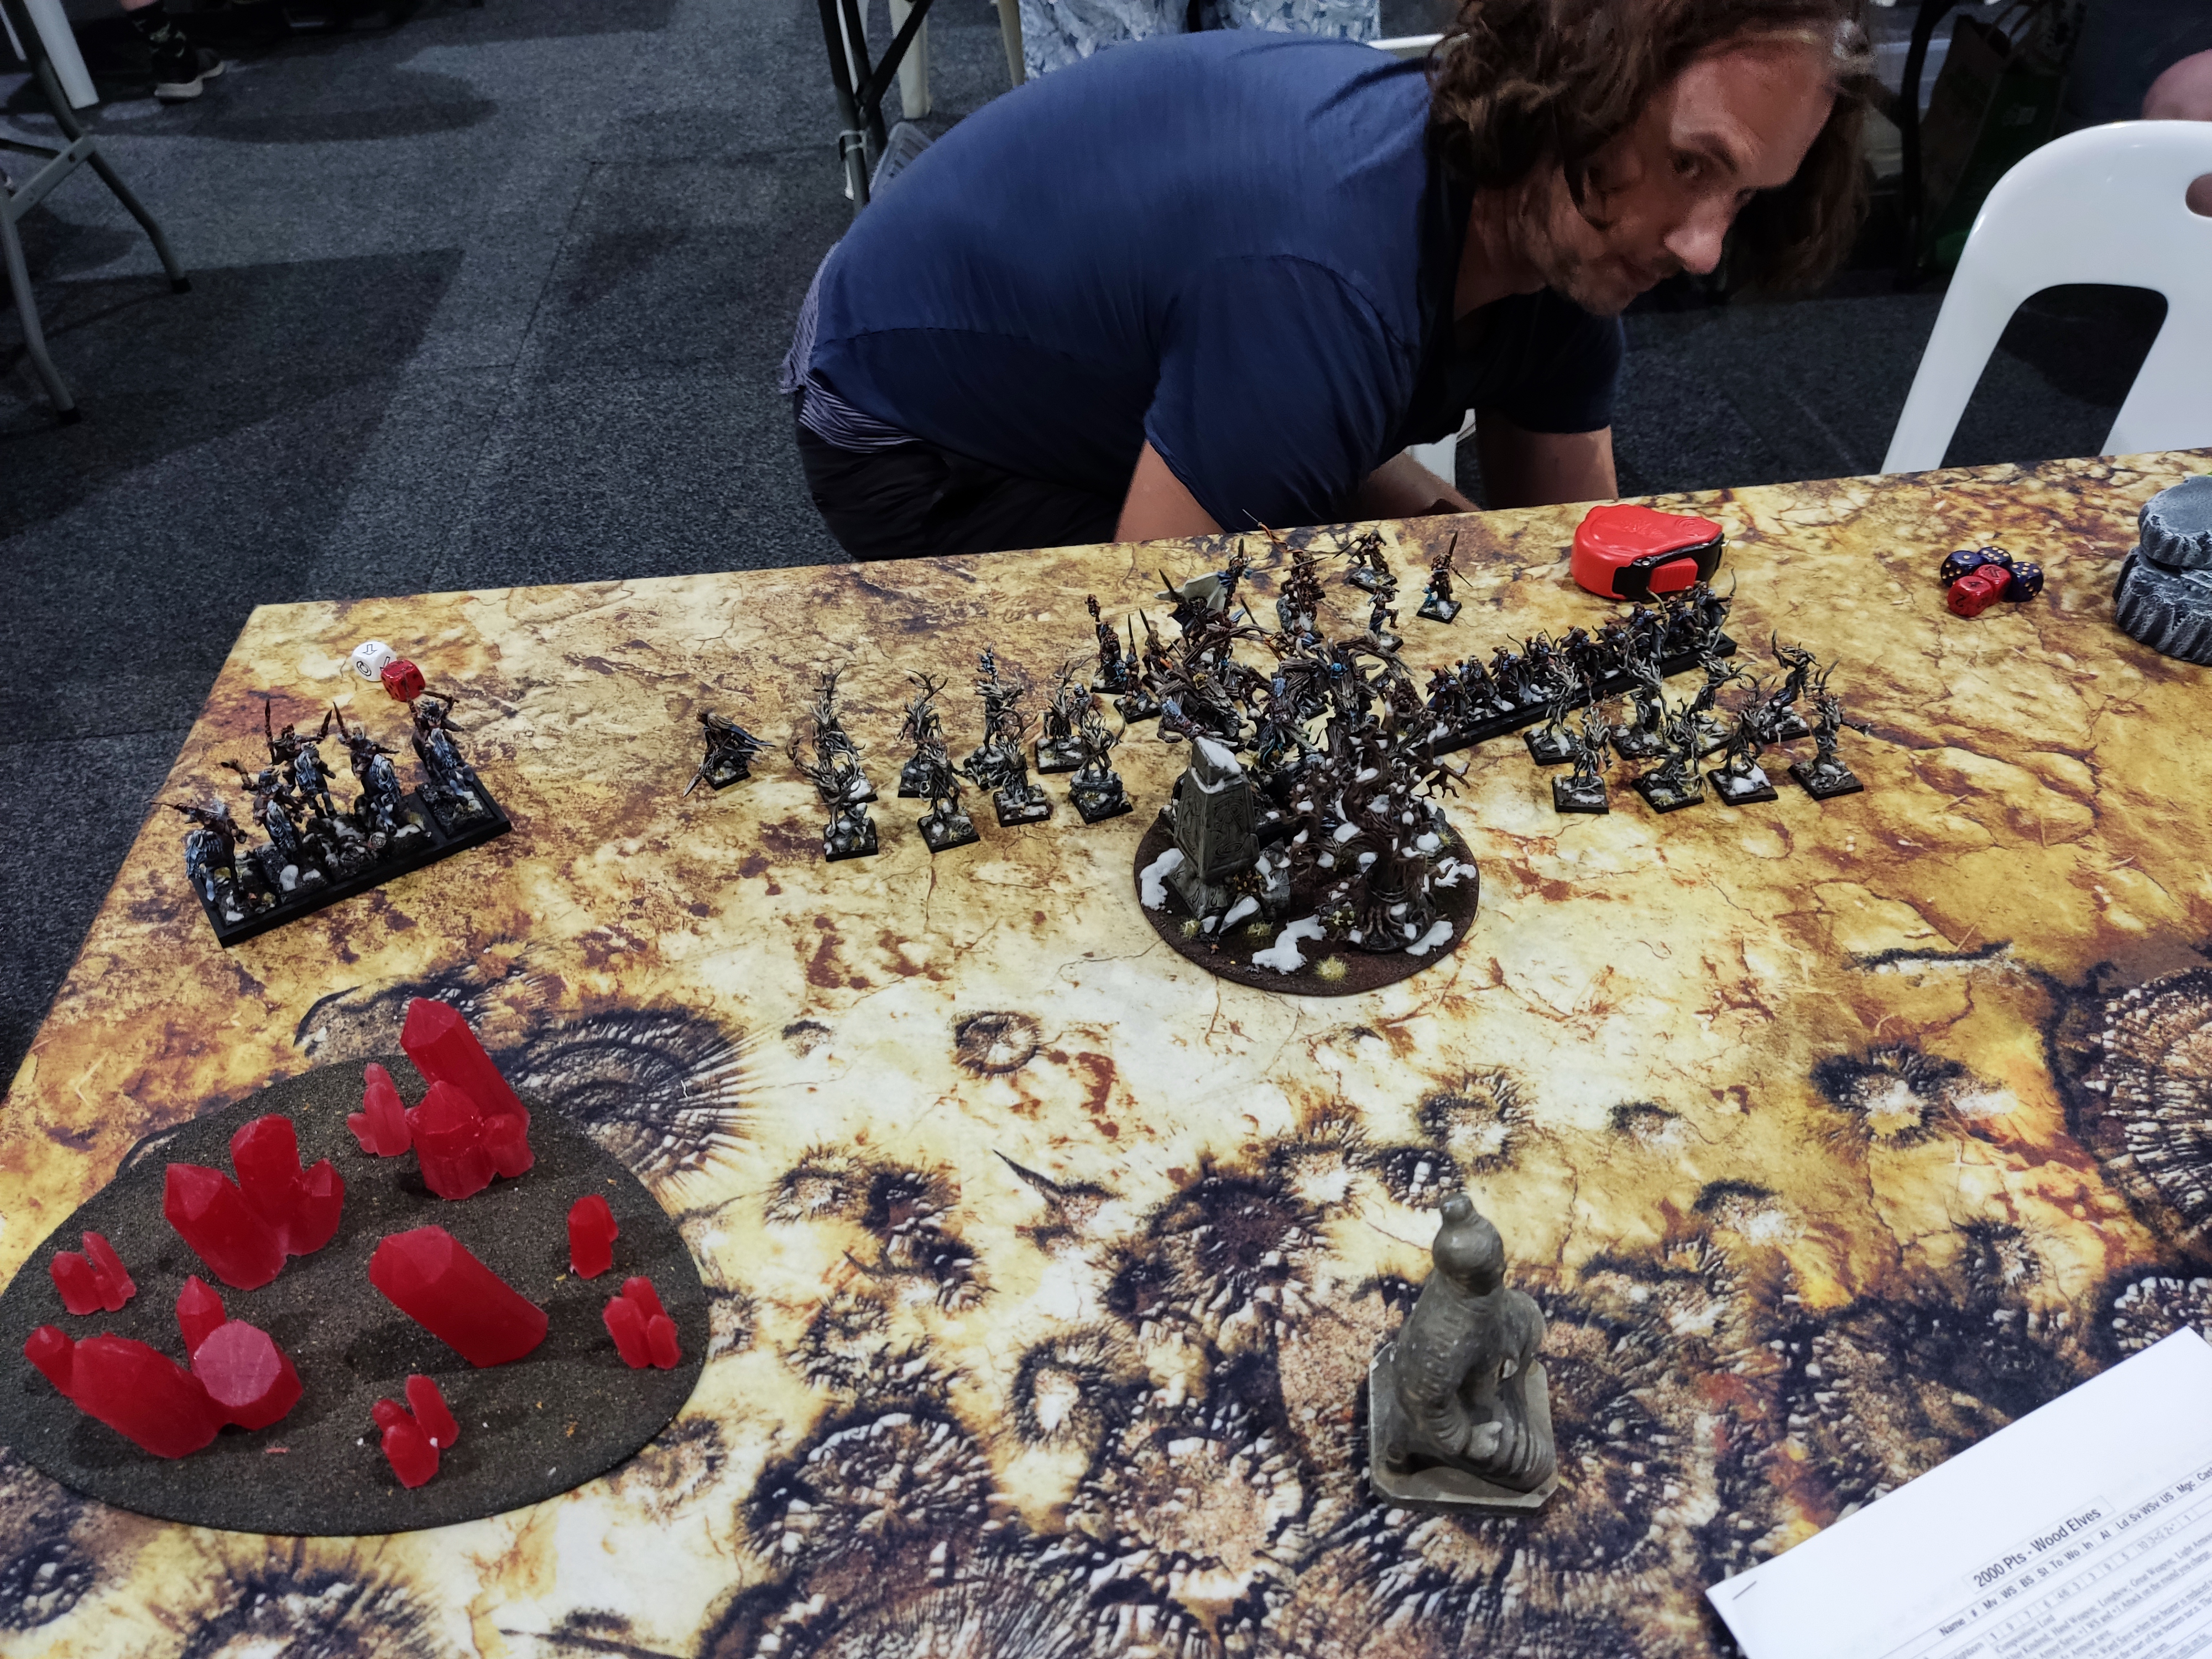
Another moonscape of a table. We used the crystals as another "forest", because otherwise the only one would have been the one Dave brought with him, which felt unsporting and a bit sad for Wood Elves.
The Wild Riders and Highborn went on the end, obviously intending to scream along the flank using the available cover.
Sorry, the nature of the table makes it hard to tell what's going on here. Both the Treemen are in the forest. The BSB and both Spellsingers are floating behind them, in amongst the Wardancers.
And then way over on my right flank sat the other designated flanking unit - a single unit of Dryads. The beauty of these guys (in fact nearly the entire list) is that they can't be panicked, so there was really not much I could do to prevent their advance with my shooting. They were inevitable.
And this is how I set up. The Dragon Slayer was my token defence to try to give those Dryads something to think about. The Quarrellers set up knowing that I actually would have more firepower than the Wood Elves, but that Dryads and Wardancers are hard to hit, and Treeman are tough as hell...
For the first time in the event, I failed to get the first turn. The Wild Riders and Highborn moved into the crystal forest and did their best to surf along using Treesinging. I think one attempt did get through, but it only moved a little bit and was then going to run out of room due to the other terrain over there.
The Treemen decided to emerge from the trees and walk toward me, flanked by Dryads. The other stuff hung back a fair bit - I don't think Dave really knew what to do with it all yet. The Spellsinger who was his general stood by herself in the middle of the forest.
The Dryads on my right flank began their long march of inevitability toward my missile troops.
This is what a whole turn of shooting looked like in my first turn. The Anvil hit the Wild Riders to slow them down (and kill one). The Quarrellers worked hard to kill 4 Dryads between them.
The Stone Thrower fired at one of the Treemen (pretty much the only way I was going to kill them), but scattered off him.
We... don't really like the look of this.
The Dryads continued their flanking advance, watched intently by the Dragon Slayer.
The Glade Guard stepped up into range of some of my Quarrellers as the rest of the line continued to advance. The Spellsinger still lurked out of sight in the forest, with some Wardancers nearby. Honestly at this point I was considering what I would do if the Miners turned up. I could potentially have been engaging the Wardancers and looking for a slingshot into the forest to end the game. Is that what I wanted?
At least the Treemen and their friends were being a bit cagey, whilst waiting for the Wild Riders and Highborn to get around into position. It was giving me more time to shoot. This time the Stone Thrower bounced off the head of one of the Treeman (rolled a 1 to wound). Oh, and the Miners failed to arrive. So that meant I didn't have to decide what to do with them. Ending the game early wasn't an option. That's a plus, right?
I was worried about a double charge from the Treemen into one of my units, so had used the Anvil to slow one of them. The downside to that was that the Wild Riders were free to crank up their speed again. Now they were behind my lines. Fortunately I had erected a wall of dice, and was probably safe.
By this point my Quarrellers had reduced the centre unit of Dryads to just a couple of models, and had started to work on the Glade Guard.
The Wardancers had all finally moved in front of the forest, meaning if the Miners arrived now, they would have to head straight for the Spellsinger and she'd be free to flee from the Anvil charge. So that plan was probably off the cards.
In my third turn I was being offered charges, so I decided to accept. The Hammerers engaged the Dryads right in front of them.
And the Quarrellers decided shooting the Dryads was too much like hard work, so went to work with their axes instead.
Having abandoned their proposed assassination run, the Miners appeared on my own board edge, then used the Anvil's help to charge into the rear of the Wild Riders.
The Stone Thrower finally figured out how to fire an actually dangerous rock on target, and nearly killed one of the Treemen. He was left on a single wound. Great success!
The Quarrellers who were not busy trying to hack Dryads to death continued to fire at the Glade Guard, and this time they panicked from the damage.
The Miners managed to kill 2 of the Wild Riders, but of course their pursuit speed was no match for the fleeing speed of their enemy.
The Hammerers managed to break the Dryads they were fighting, however they couldn't catch them. They did catch a Treeman, though. And had another one looking at their flank. Not great, but what can you do?
Over on the right flank, the Dryads were continuing their march of inevitability. They were keeping really hard on the edge of the table, maybe because they were scared of the Dragon Slayer? Either way, it was taking a while for them to get to their destination.
Come back and fight, you cowards!
Unsurprisingly, the wounded Treeman wasted no time in coming to the assistance of his brother. Being Stubborn was pretty much the sum total of my plan here...
The Wild Riders rallied, and the Wardancers started to work their way around the other side of the Hammerers.
The Highborn engaged the Stone Thrower, determined to stop it firing at any more Treemen it might see.
So inevitable. So slow. Way too much patience involved here. That's 4 turns of skirting the battlefield so far.
The Hammerers didn't manage to wound either of the Treeman, but they did get a bit squashed in return. Still, they were Stubborn with the BSB nearby. They held their ground.
Dwarf war machine crews are also Stubborn, so the sole survivor held his ground too.
Thanks to some assistance from the Anvil, the Miners arrived to try to rescue the beleaguered Stone Thrower engineer.
Meanwhile the Ironbreakers flanked the flanking Treeman in an effort to rescue the Hammerers.
The Miners wounded the Highborn twice and broke him, but highlighted a bit of an issue when fighting fast things - everything was fleeing 14+ inches, meaning I was zero chance to catch anything. That's him, having already run past the Anvil.
The Ironbreakers managed to take the final wound off the Treeman (I think the BSB did it), and overran through, stopping just short of hitting the already-fleeing Dryads. The Hammerers were left on their own again, but now there were half as many Treemen!
Unfortunately it was the Treeman's time to receive assistance. The larger unit of Wardancers including the Wood Elf BSB and Spellsinger charged into the flank, and the smaller unit went into the front, even though there was only room for one to actually fight.
The Highborn rallied, the Wild Riders turned about and moved away from the Miners and the Quarrellers (who had turned around), and with no unit to charge, the Dryads continued their long march of inevitability. The Quarrellers who had been on the hill the previous turn had opted to march off the front of it the previous turn, rather than trying to face them as their approached from behind.
The Hammerers were fighting bravely, but they simply couldn't hurt the Treeman to their front. the Wardancers also killed the Dwarfs who could reach them, so it was all they could do to simply hold their ground. The Wardancers lapped around behind them, presumably just because they could... They didn't really need the combat bonus.
It was my 5th turn and the enemy was approaching my Anvil from all directions, but they still hadn't engaged it. At this point I decided things were looking pretty dicey, so the Anvil fired up one last time and helped the Miners into the flank of the Wardancers. More specifically, into the flank of the BSB. Killing him would get me the bonus points and end the game. Nearby, the Ironbreakers charged and destroyed the Dryads who had rallied right in front of them.
Alas, the BSB took a wound, but lived. Now the Elves would likely kill my front rank before I would get a chance to finish him off. On the bright side, somehow the Hammerers were still there. Not many of them, but not yet none...
Having dealt with the Dryads, the Ironbreakers were now swaggering about in the enemy's backfield.
My Quarrellers continued to try to shift into a position to rescue the Anvil, but given it was busy helping the Miners do their thing, their stumpy little legs meant they were struggling to get where they needed to be. The Dragon Slayer emerged from behind the hill, though. I doubted the enemy wanted a piece of him given the importance of the Anvil, but it was worth trying to be a distraction (or being within range to render assistance).
In Dave's last turn, absolutely everything that could do so charged the Anvil, The Dryads of inevitability, the Wild Riders, and the Highborn. Somehow one of the Guards managed to weather the attacks from his assailants, and the Runelord and Highborn fought each other to a standstill in a challenge.
At this point however, the game was coming to a head in the other combat. I was resigned to the Miners' assassination attempt having failed, but then the Elves just couldn't land a telling blow on them. I only lost 1 attack, which meant I still had a few to try to finish off the BSB. This time he perished, and even though the Hammerers were finally wiped out, the whole combined combat thing went really badly for Dave. I won combat by 1 lousy point, the larger Wardancer unit (still containing the Spellsinger) broke, and so did the Treeman! Right at the point where the game was guaranteed to end! losing the BSB had been a real disaster for him.

And thus the game ended. I had lost the Hammerers and half points on the Stone Thrower, but the Wood Elves were really battered. Both Treemen gone, the BSB and one of the Spellsingers, 2 of the Dryad units, the larger Wardancer unit, and half points for the Highborn and Wild Riders. Plus I got the 500 bonus points for the scenario. It had been a really rough final turn for Dave.
Result: 16-4 Win
You can find the last part of my tournament report here.


No comments:
Post a Comment