Tuesday 29 September 2015

Axemaster 2015 Aftermath - Part 3

This is part 3 of my tournament report. You can find part 2 here.

Game 4
Mal Patel, Lizardmen

  • Slann Mage Priest (Level 4, Lore of Metal)
  • Saurus Old Blood
  • Saurus Old Blood
  • Saurus Scar Veteran with Battle Standard
  • Skink Priest (Level 1, Lore of Heavens)
  • 22 Saurus
  • 22 Saurus
  • 20 Skink Cohort
  • 20 Skink Cohort
  • 20 Skink Cohort
  • 3 Razordons
  • Bastiladon

Comp Score: 6
Mal's Lizardman army
My Mission: Capture the flag


First up on day 2 I would be playing Mal Patel. Given he's based in New Zealand we had only ever attended a couple of the same events, so it's not surprising that we had never played before. Mal's list was almost as underwhelming as my own. It was not that it had nothing, but there were a lot of nothing choices in the list.
Deployment, with things pretty well stacked over to the right.
That unit in front the building contains about 99.9% of the things that matter in Mal's army.
Easy meat for the Wyvern. They had a banner I wanted.
Stacking the right flank just a bit, in a slightly aggressive fashion.
I lost the roll-off for deployment, and Mal punished me by choosing diagonal deployment. I think this was probably not a bad thing for my army, but setting up the deployment zones is annoying. We both set up pretty aggressively, right up on the 12" line. I was backing myself to get the first turn with a +2 modifier to the roll. This time I was rewarded for the assumption, and I won the roll-off.

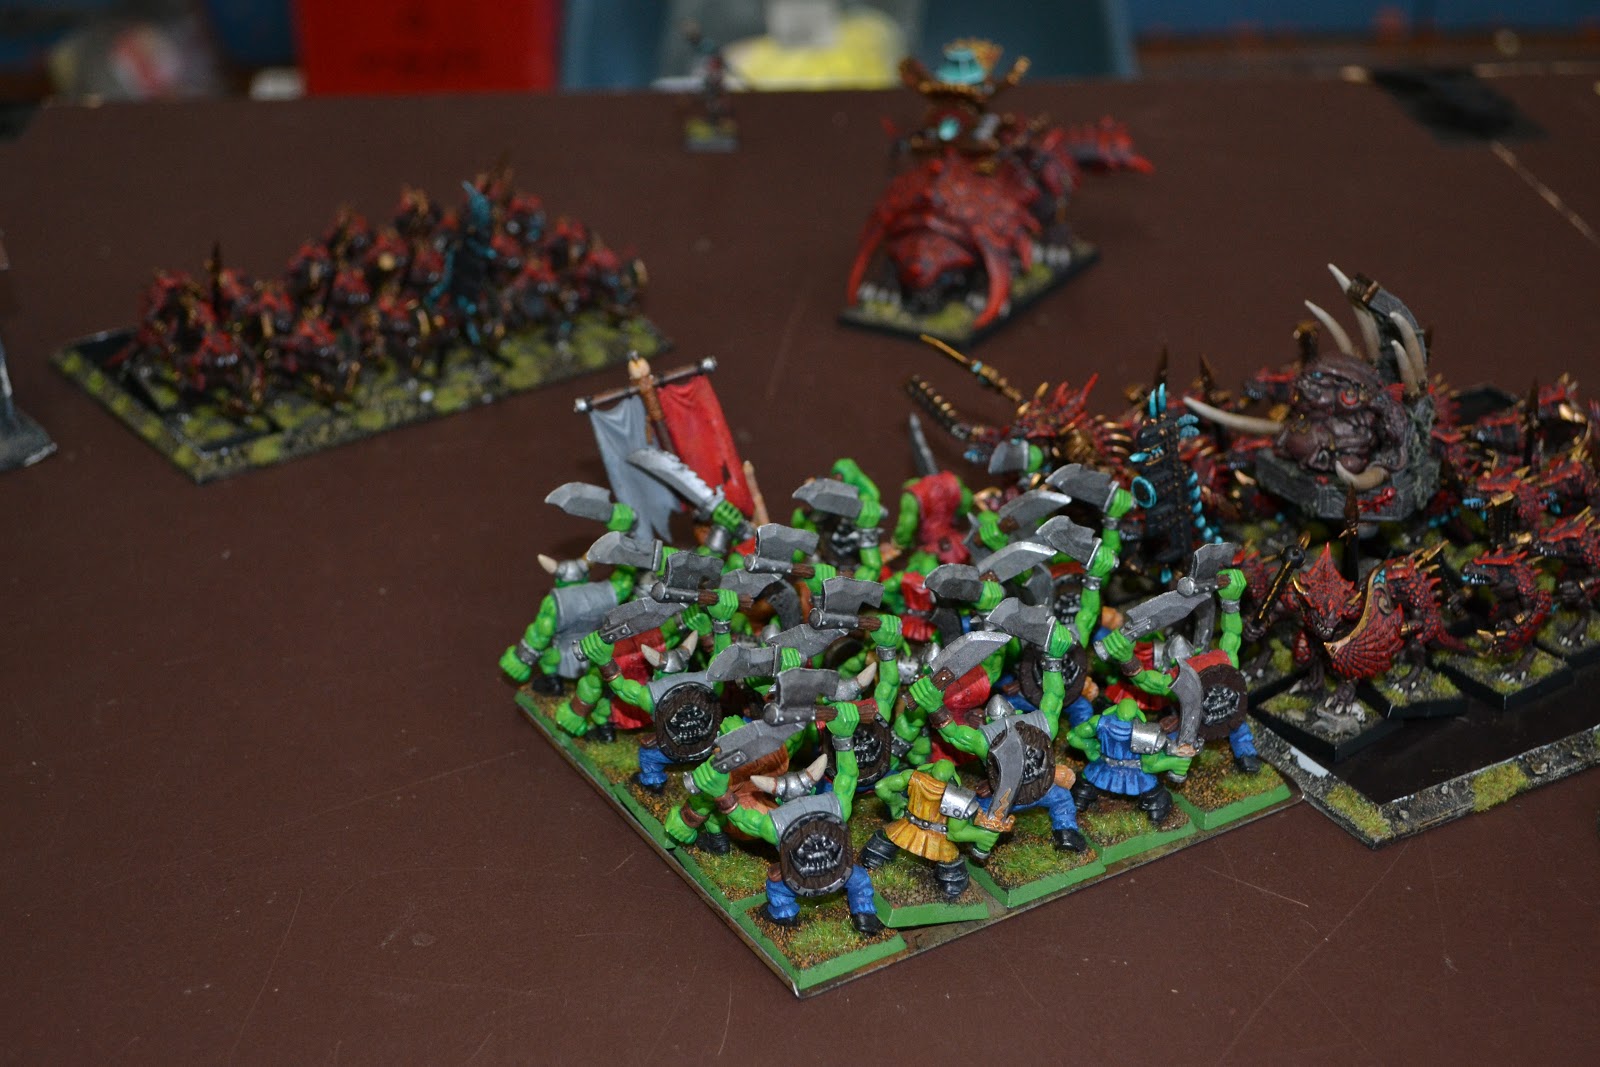
Mal had elected to stack everything of substance into a single unit of Saurus, effectively giving himself a death star. Whilst I admitted to myself that I didn't want much to do with that unit, it meant that everything else on the table was easy prey.
Turn 1. In we go!
A slightly closer view of gigantic spiders eating the whole world whilst Orcs cheer them on.
I charged one Arachnarok into the Razordons and the other into a regiment of Skinks, although with a block of Orcs including my BSB and Great Shaman to ensure Steadfast wouldn't be a problem. The combats were about as one-sided as you might expect. Both of Mal's units got smashed and fled. The Razordons went straight off the table which allowed that Arachnarok to reform. The Skinks were also doomed, but I decided to pursue because I had lined things up with the intention of hitting the next Skink regiment with the Arachnarok's pursuit. Unfortunately my units were a bit too congested and ended up in a traffic jam, and we came to the conclusion that it wasn't going to work, so I stopped things just out of contact.
Stupid traffic jams. Maybe if the Orcs hadn't been so sluggish in their pursuit roll.
On my left flank I had placed one of my Wyverns. It was intent on chasing a Skink Cohort that had deployed over there before it, given it was carrying a banner. My Wyvern charged and the Skinks failed their terror test and fled, escaping for a turn. The Skinks rallied immediately in a more defensive, deep formation. 
How it looked after my first turn.
The Skinks rally and go defensive.
The Lizardmen respond. Note how close the Orcs are to the flank of those Skinks.
The Slann's unit advanced a bit and the mighty Mage Priest demonstrated his potent magical powers by hitting the nearest Arachnarok with both Searing Doom Doom and Gehenna's Golden Hounds - for a grand total of 1 wound. Mal and I were both suitably impressed. The Skinks that had narrowly escaped being charged by the spider opened fire on it for a couple of wounds. They then stood and shot as it charged them and damn near killed it, leaving it on a single wound. A great many 6s were rolled in that volley. 

The Wyvern on my left charged the Skink Cohort again, and this time they held their ground and stood and shot ineffectually against it (it may have taken a single wound). They lost combat and failed their steadfast break test. I think I let them go and reformed, given how close they were to the table edge (they left the field).
The Wyvern wipes bits of devoured Skink off its face and reforms.
Whilst the Arachnarok had survived its near-death experience to charge into the Skinks, a regiment of Orcs had stuffed up a relatively easy charge into the unit's flank. This was slightly worrying, as I needed the unit's ranks to break the Skinks' steadfast (unless the Arachnarok went berserk and slaughtered most of the unit). My fears were confirmed when about half of the Skinks died, but the remainder held and reformed with the Slann's nearby presence to reassure them.
The Orcs in much the same place as before, but the Skinks have held off the Arachnarok and call for help...
Super Froggy to the rescue! Well OK, he might let the 2 Old Bloods and the Scar Vet help.
The Slann and his friends then charged to the rescue, into the flank of the Arachnarok. Given the spider had only a single wound remaining, I didn't have high hopes for its survival. I did at least intend to kill something before it went, given that the only thing faster than it was the Skinks, boosted by the nearby presence of the Bastiladon. I didn't realise that the Skinks were still in the mood to roll 6s, however - they killed the Arachnarok before it got to attack anything important.

That was a slight pity, but what followed was a lot worse. The Slann's unit overran, and travelled the 8 or 9 inches it needed to hit my Orc regiment in the flank - the one containing my Great Shaman, BSB, and most of my chances of holding onto my fortitude, my Capture the Flag scenario, and the game as a whole.
No no no! That was NOT part of the script!
Just out of the arc of the Arachnarok.
That overrun changed the entire complexion of the game. Mal's unit had travelled far enough to get it out of realistic range of a rear charge from my other block of Orcs, and maybe an inch or two out of the arc of the remaining Arachnarok (they would have been in so much trouble if they'd been a bit slower). As it was, I figured the combat was going to dictate the direction of the game, so I threw in everything I had. The horde of Orcs went into the flank, and my general's Wyvern went into the front alongside my flanked Orc unit. I wished for some magic to turn things my way, but I unfortunately I hadn't rolled up Ere We Go, so I was going to have to rely on the raw burliness of my Orcs to see me through.
Charge with everything!
I send everything available against the Slann's unit in an effort to preserve my all-important unit of Orcs.
Matters got worse when Mal revealed that someone in the combat was packing the Egg of Quongo. As far as eggs go, it's pretty much the worst. It can do apocalyptic damage if you roll well. Mal rolled modestly for the initial roll, then somehow still killed 5 Orcs with D6 Strength 4 hits. Given this counted for combat resolution, I was in trouble. Then I started rolling, and it became apparent just how much trouble I was in. Admittedly, Mal rolled badly too. My BSB took only a single wound from an Old Blood and did maybe a wound back. The other Old Blood was similar inept. My Wyvern and rider tried to kill the enemy BSB, however he turned out to have a 5+ ward save and passed both the tests I made him take. I had lots of Orc attacks into the flank of the Saurus, so I rolled lots of dice. I even had a thunderstomp (I don't know that it killed anyone). I think I came out of the combat having done 3 unsaved wounds in total. It was truly abysmal, in a combat that was going to decide the fate of the game. Mal wound up having done maybe a dozen wounds thanks largely to his egg. 

All of my units broke and ran. The flanked unit with my characters and my Wyvern went straight off the table. The horde went in a different direction, but was run down mercilessly by the pursuing Lizardman regiment.
<sob> My beautiful Orcses!
Arachnarok into the flank of the Bastiladon sounds good. It would appear the Saurus panicked somewhere along the line. I didn't remember that, but they rallied immediately anyway.
My remaining Arachnarok had to cheer itself up eating the damaged remains of the Skink unit that had killed its friend. It killed them when they broke and ran into the flank of the Bastiladon. I had thought this was a good idea, but after a few rounds of combat and only having done a couple of wounds to the beast, my poor spider eventually found itself flanked by the Slann and his mates, who had done a victory lap of the table and returned to finish the job. 
The Slann returns to gloat over his earlier successes.
Opportunity lost?
My remaining Wyvern went after the Skink Priest nearby, but I don't think he got there before he managed to channel through a boosted Searing Doom on behalf of the Slann (the fat lazy frogs can cast spells by proxy to save them getting off their magic sofas), and blew the Wyvern to pieces.

In the end my consolation was to be fighting with the Arachnarok before the Old Bloods worked out how to use their great weapons and ended it. I attacked the Scar Veteran with the army standard, and wounded him with a venom surge. Once again he passed his 5+ ward save and spoilt my fun before helping his friends dismember my glorious spider. Kill joy.
Oh yeah, they pulled one more bogus overrun to mop up my remaining (admittedly irrelevant) Orc unit at the end...
I came out of the game with nothing - no models and no points. It was a disheartening result after the game had looked so promising early on. Curse that overrun. Mal had grabbed his one chance with both hands. And then throttled it before kicking it for a while whilst it lay bleeding on the floor. My poor Orcs.

Result: 0-20

You can find the final part of my tournament report here.

3 comments:

  1. Nice pics :). Red lizards vs greenskins

    ReplyDelete
  2. From the picture it looks like his overrun should have just clipped the orcs rather than be full in the flank, or have i missed something?

    ReplyDelete
    Replies
    1. It didn't hit it by much, but it was enough. Once it's established that they will contact, it becomes a new charge and the unit wheels in on the way to maximise contact.

      Delete